How to Perform the Perfect Squat
First off I have to admit, I pulled a sneaky one on you. There is no perfect squat, everyone is built different and we all carry qualities unique in ourselves. What is perfect for someone else might not be perfect for you. This instructional is written to give you ideas and suggestions for how to feel more comfortable in your squat along with exercises that will help you develop the foundational biases needed to get the most out of your training.
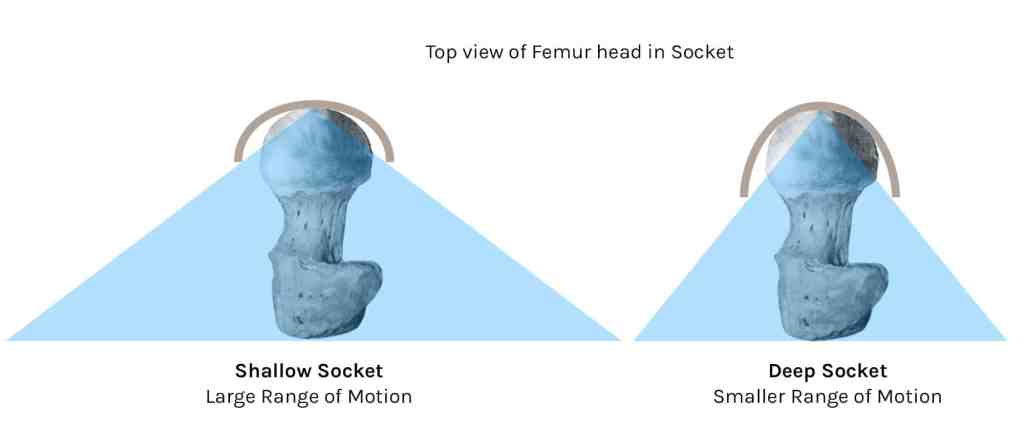
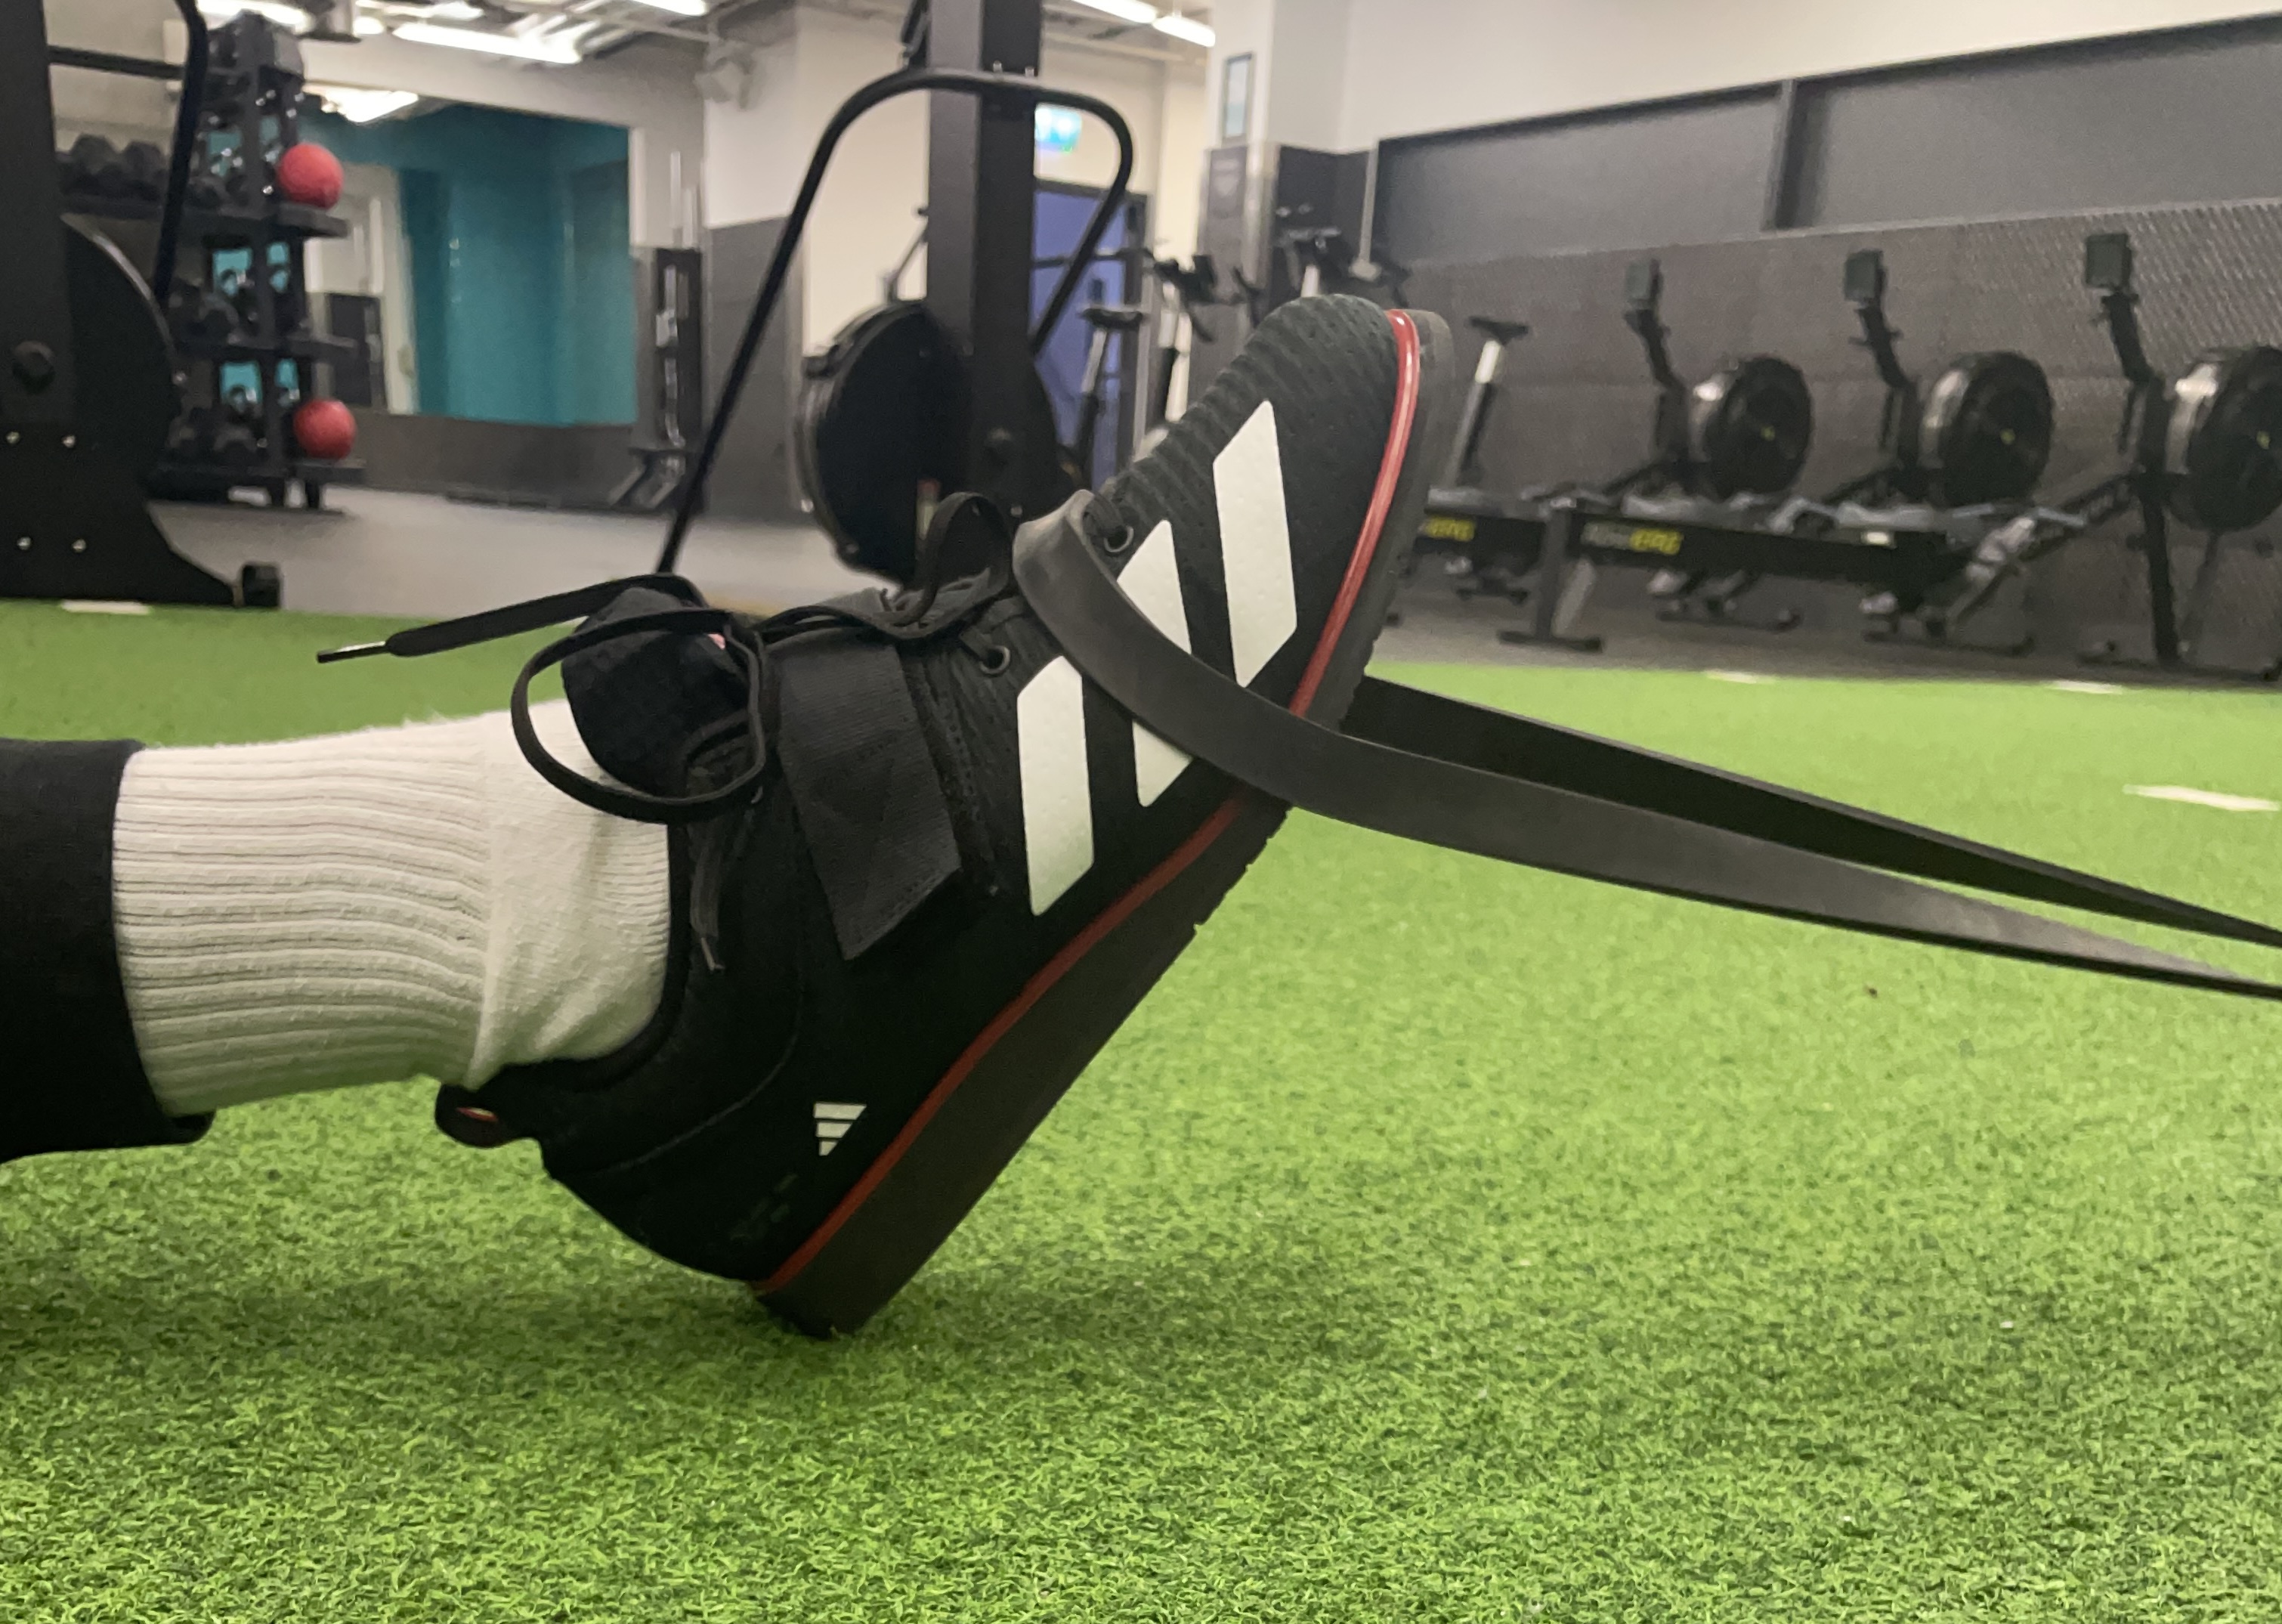
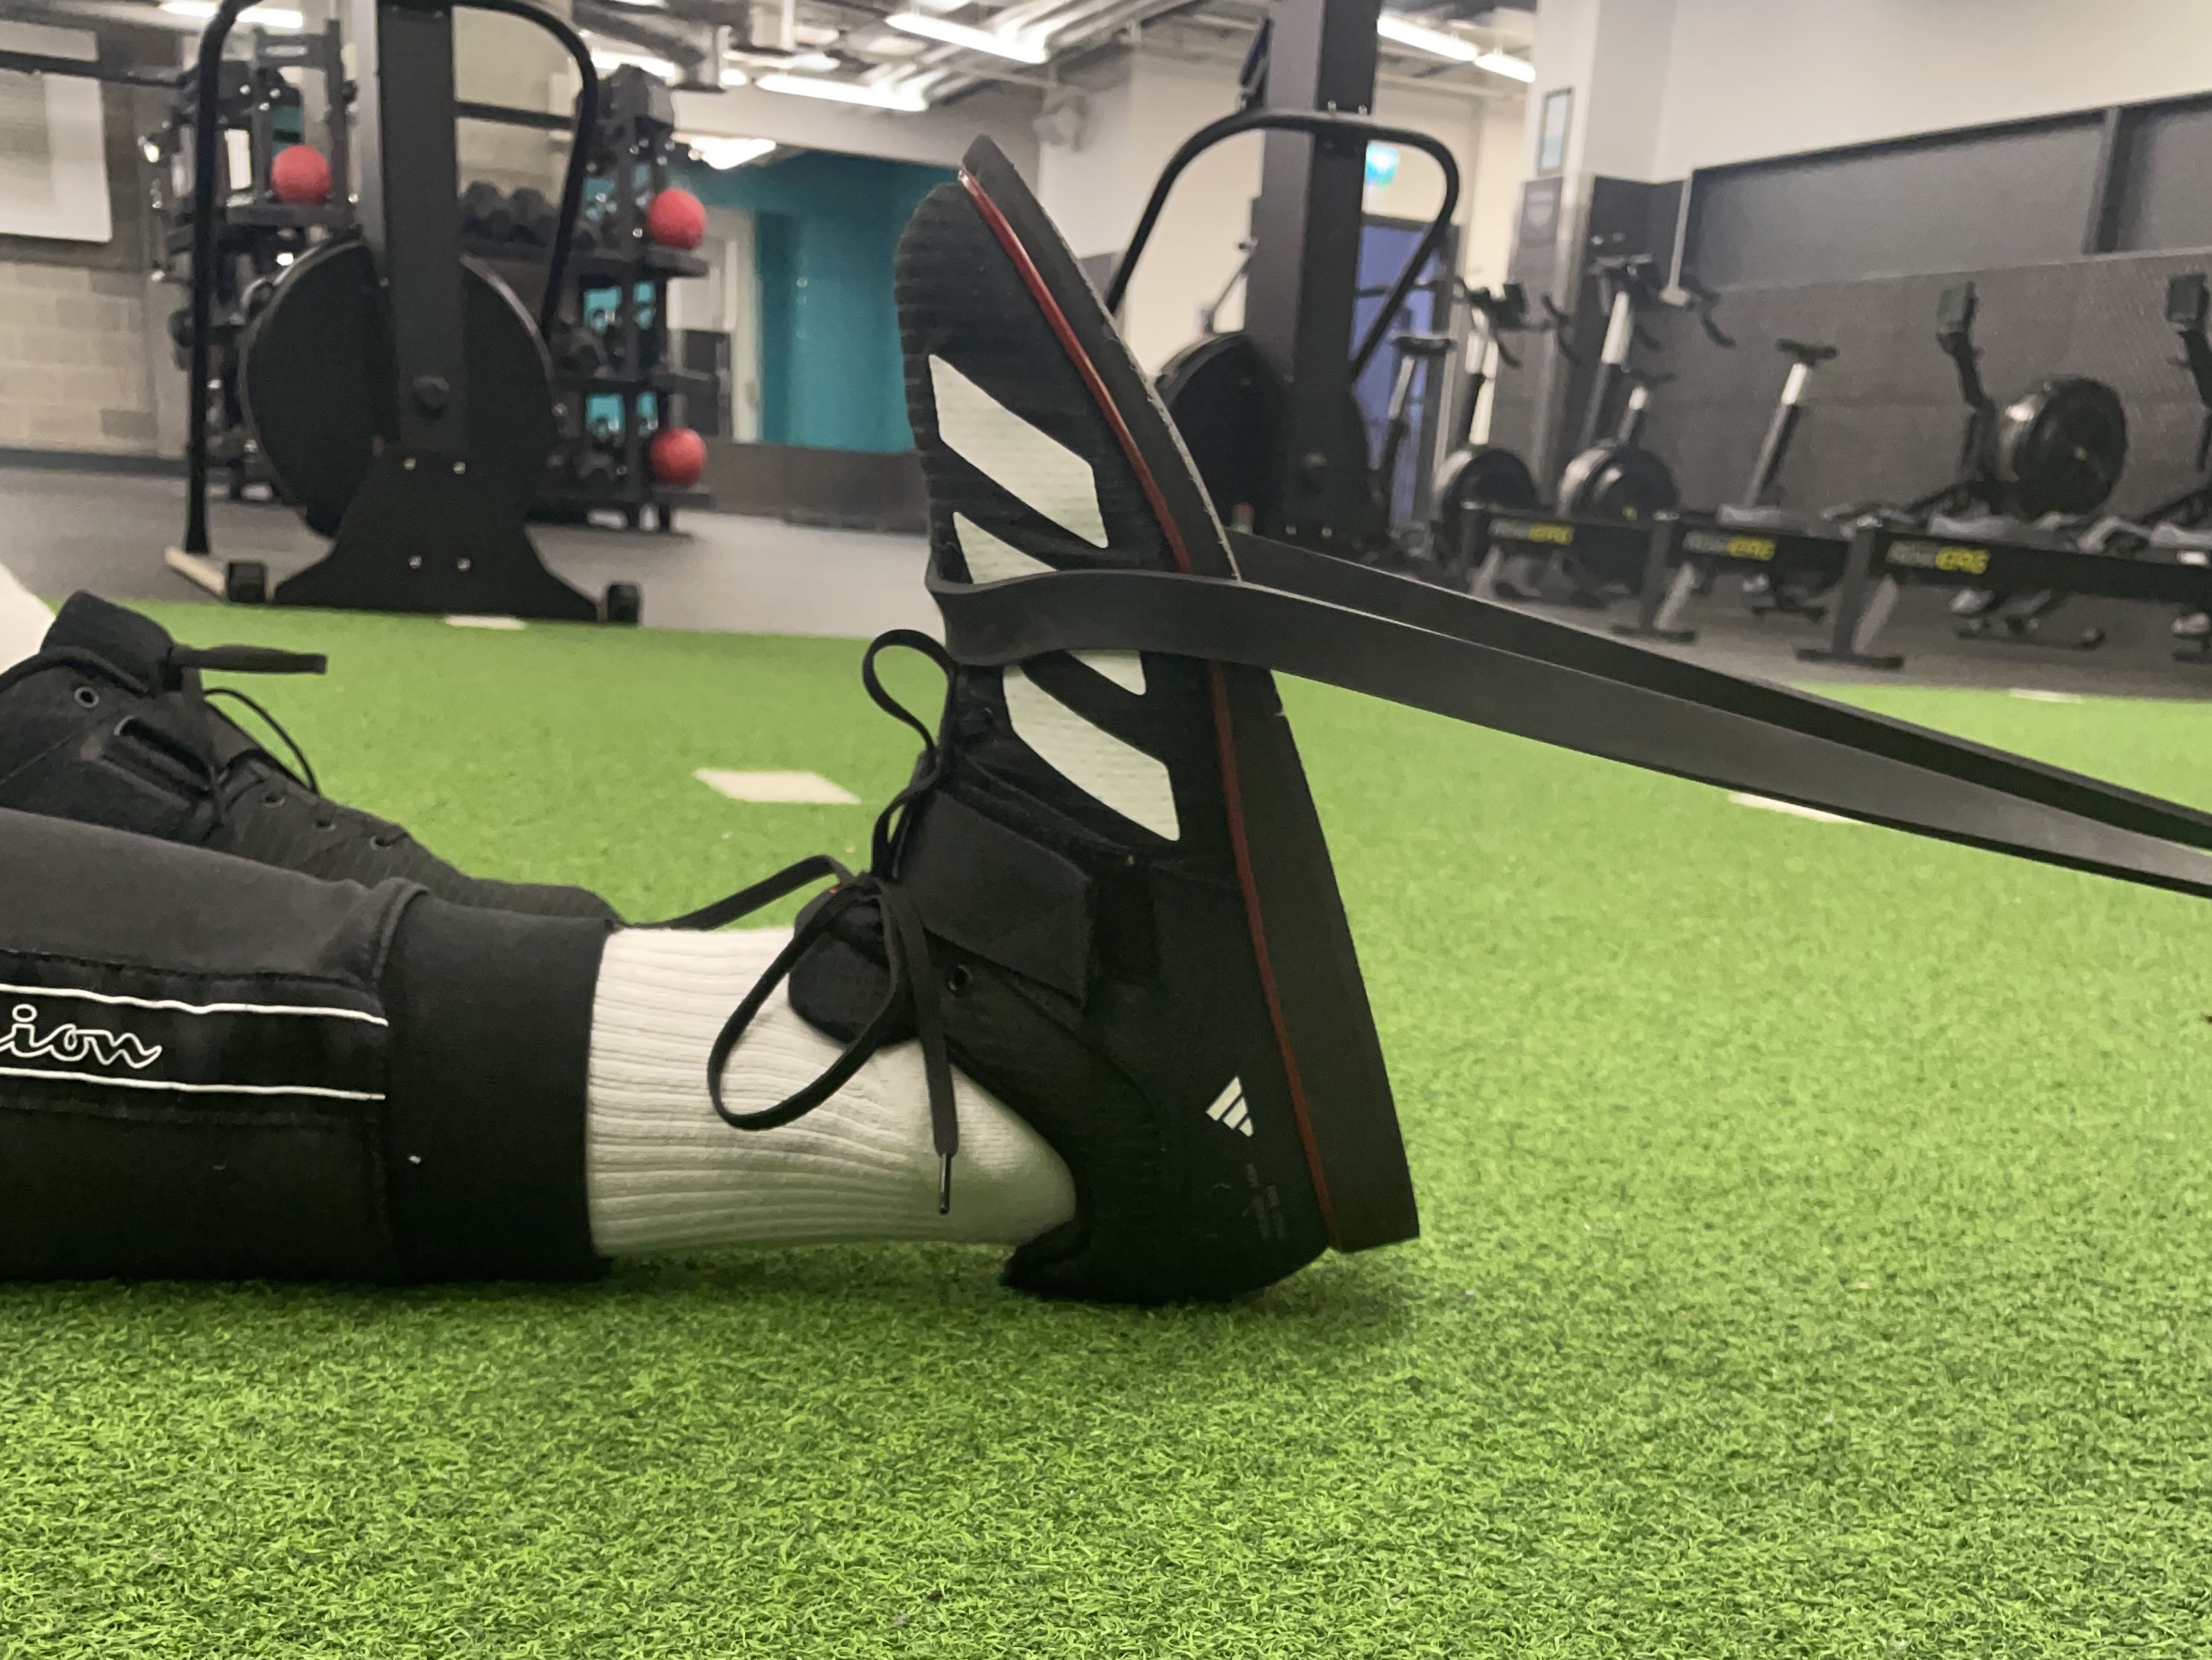
Before we go into details we must make an assessment of your anatomy. The structure of your bones dictate three key aspects of your squat: The Width of your feet, Depth of your squat and The positioning of the bar on your back.
Width of your feet:
The depth of your hip sockets will play a deciding factor in where you should place your feet, a shallow socket will allow for a deeper squat with a greater Range Of Motion (ROM). Whilst a deep hip socket will limit your depth and ROM.
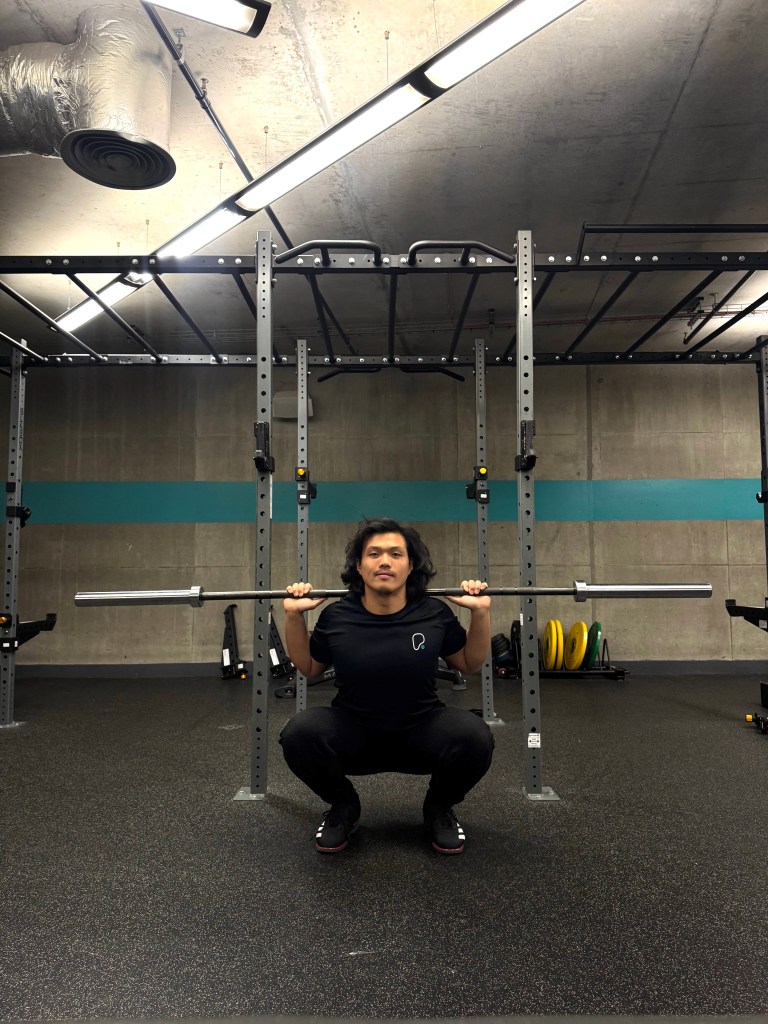
Start by squatting in a neutral stance (this can be done with or without the bar). Bring your feet together at the heels, forming a 90 degree angle. This will tell you how wide your feet should be and will be your standard for foot positioning.


Squat and ask yourself these questions:
Are you comfortable?
Can you keep your spine in a fixed position (no extension or flexion)?
Are you able to keep your head and chest up or does it fold forward towards the bottom?
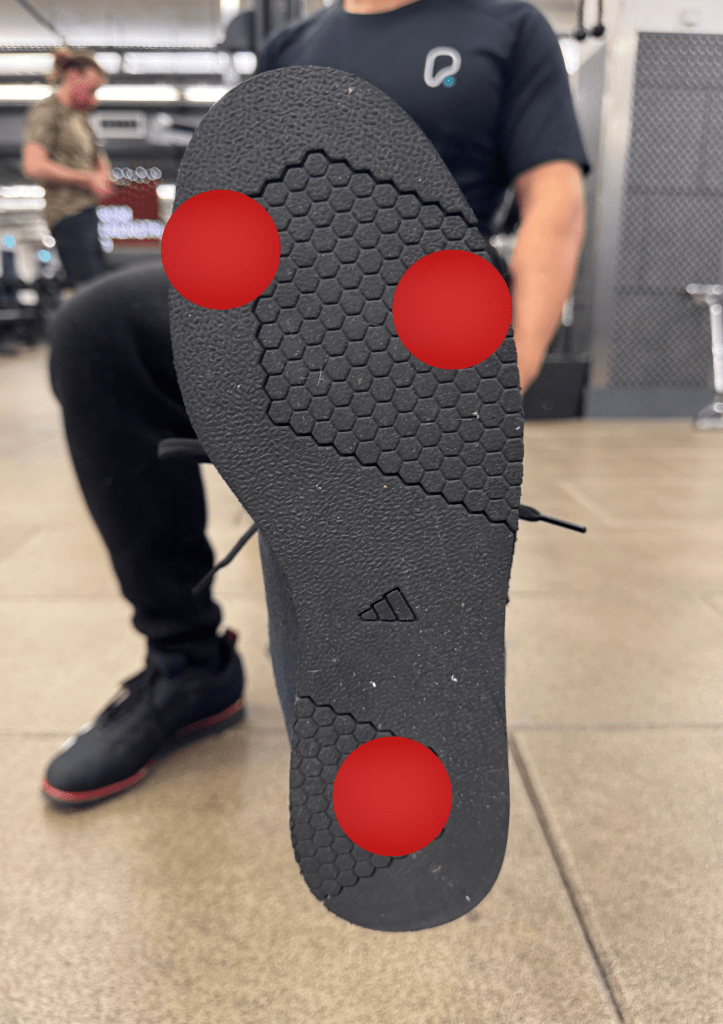
Are your feet forming three points of contact at all times (big toe knuckle, little toe knuckle, heel)?
Do your hips reach at least parallel or deeper?

If the answer is no to any of these questions then widen your stance by an inch or two and try again. If your feet are wider than the width of your shoulders and you’re still struggling it’s time to look at your bar positioning.
Bar Placement:
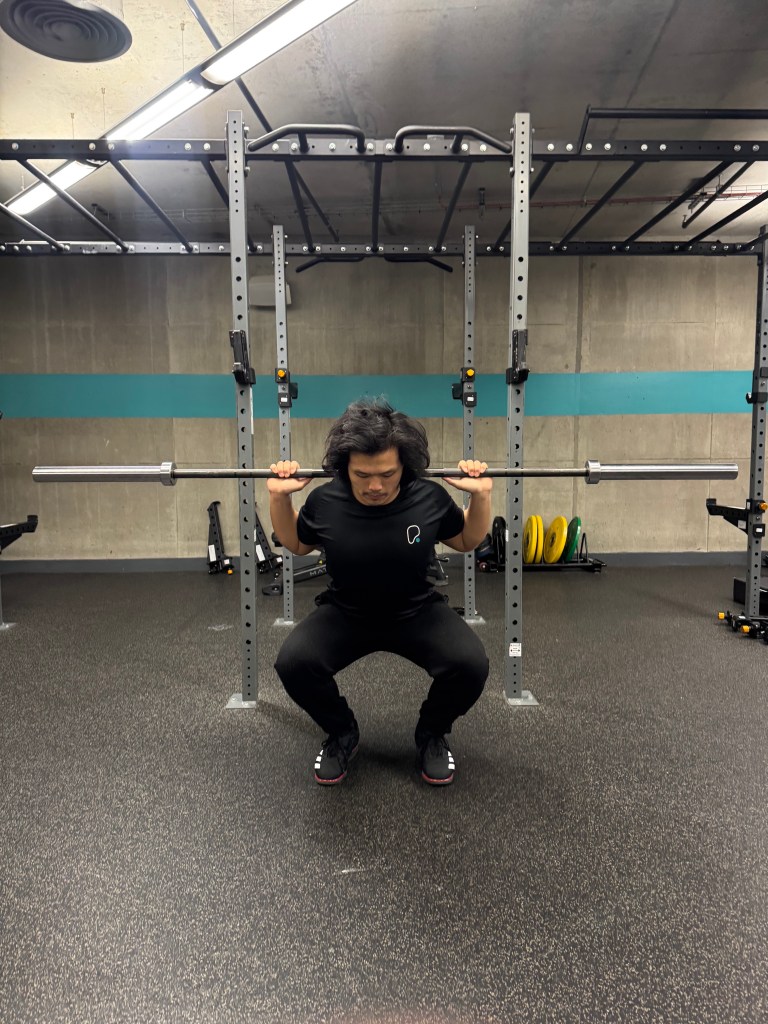
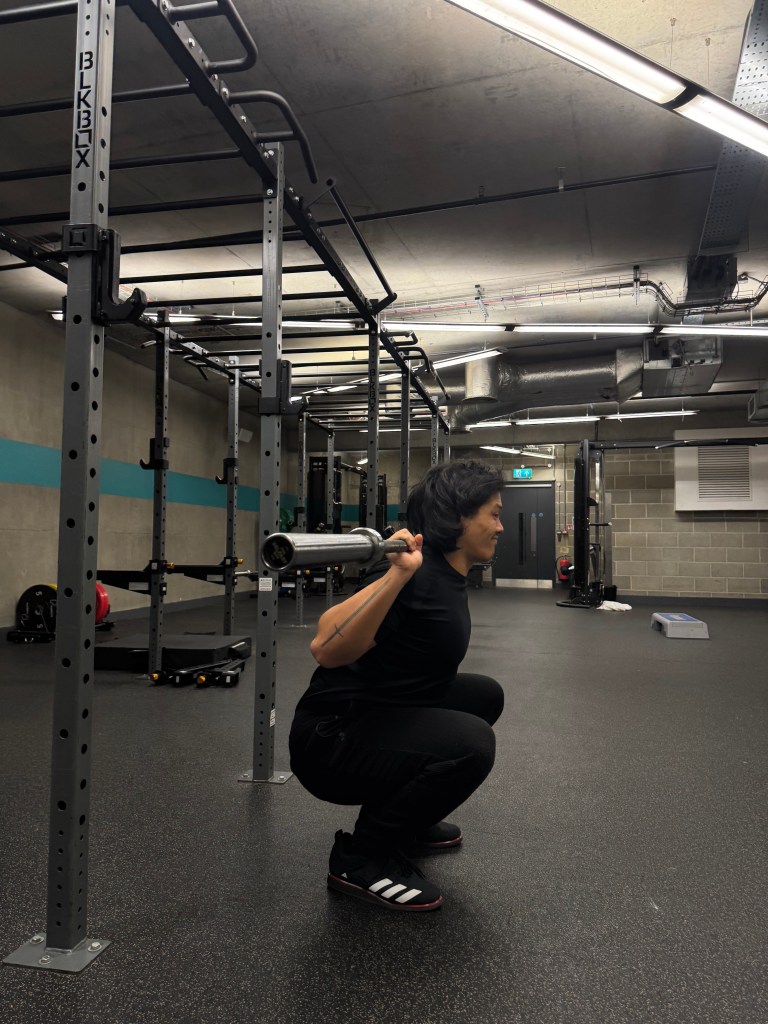
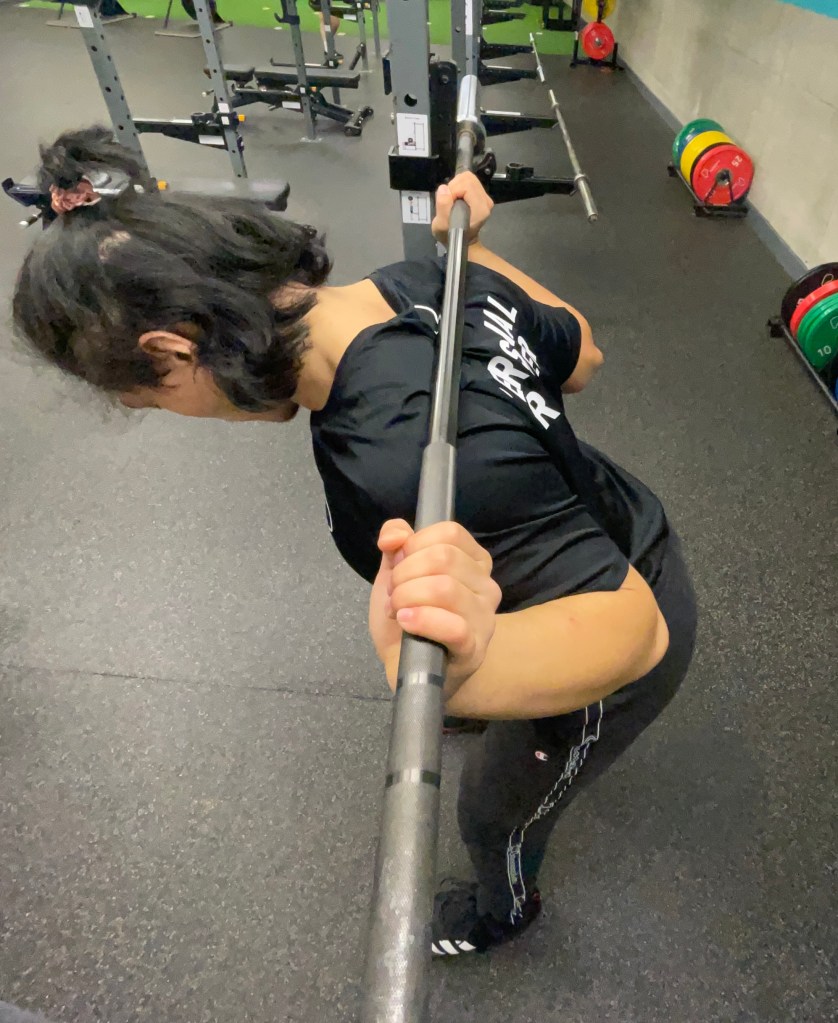
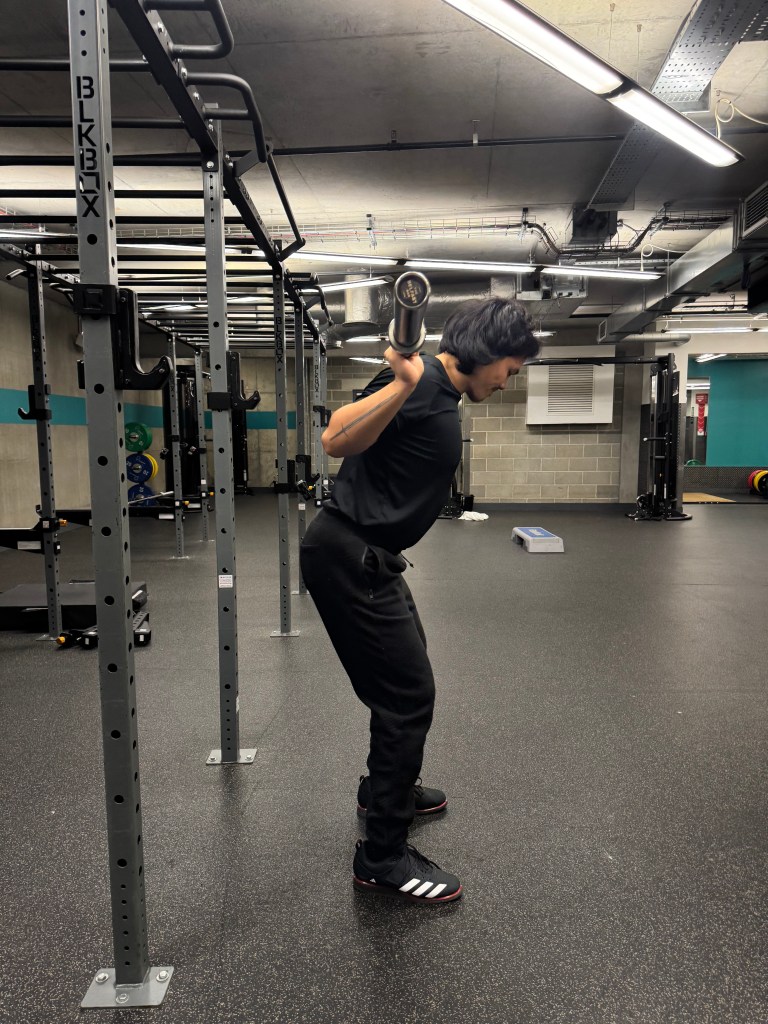
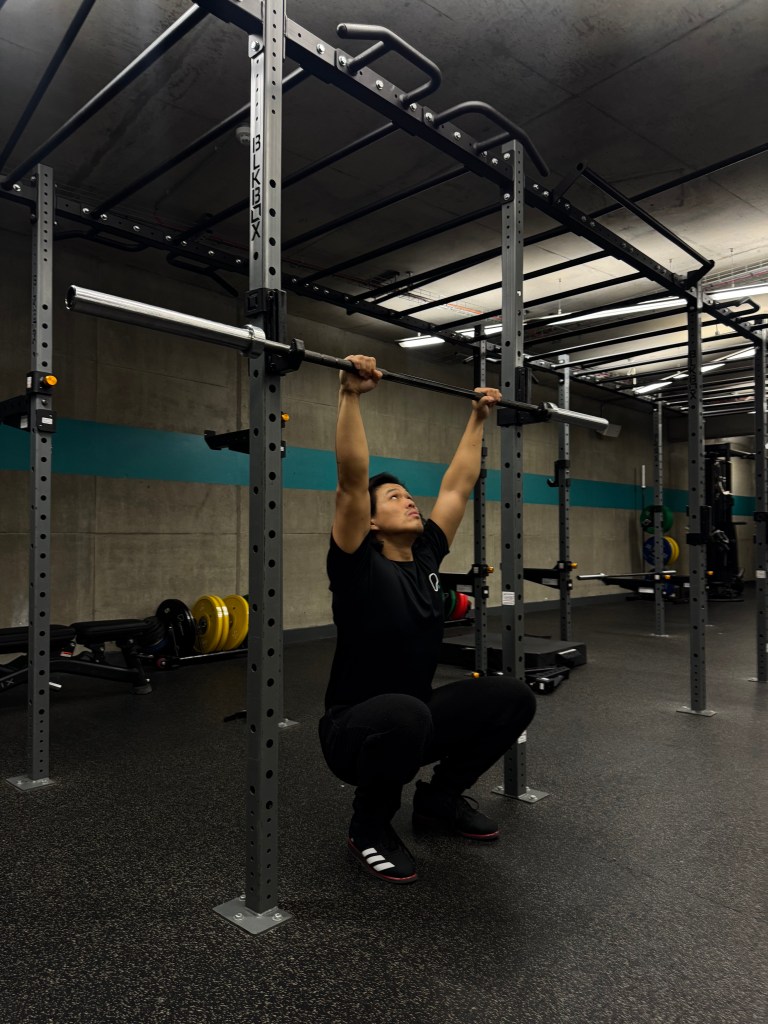
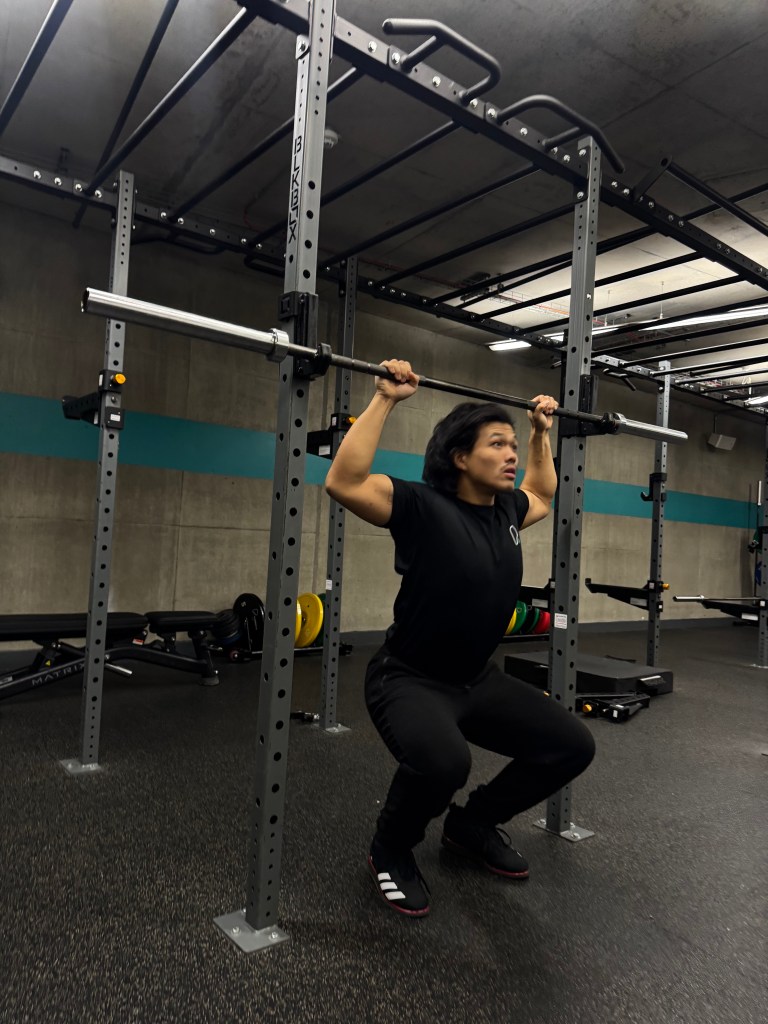
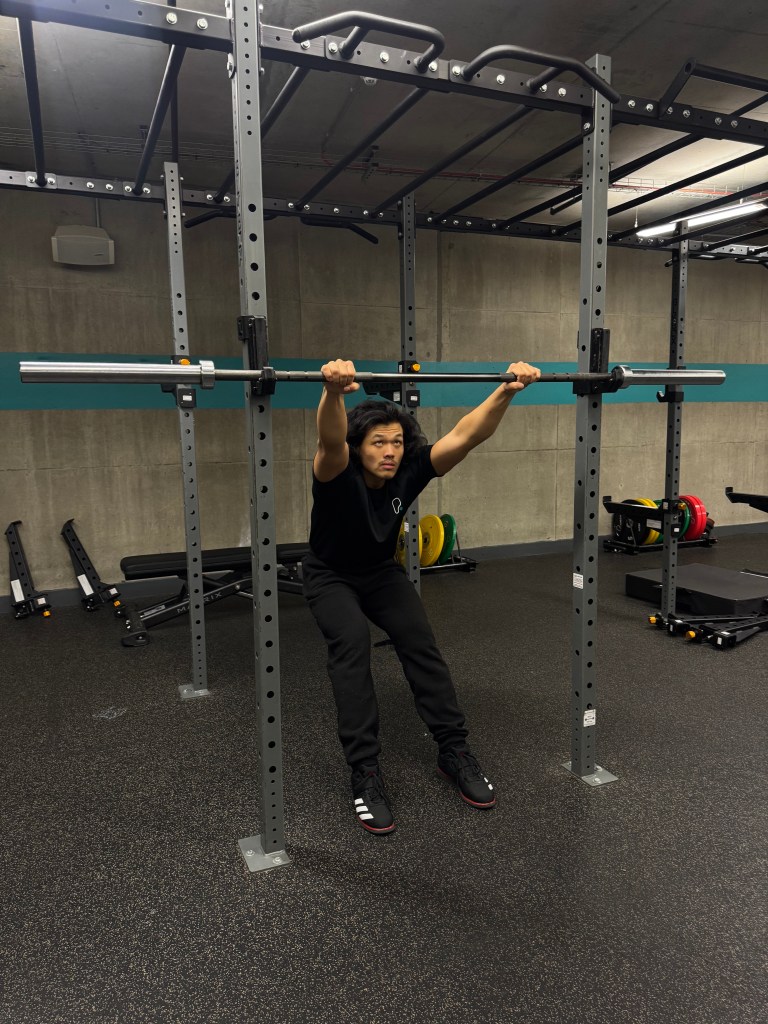
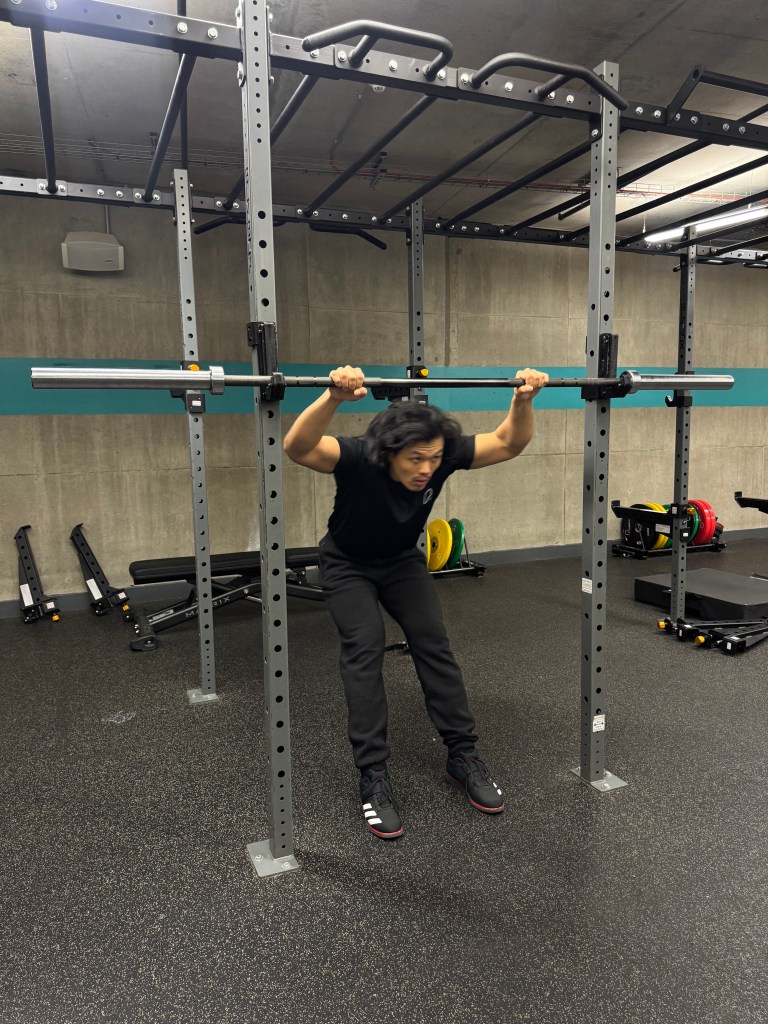
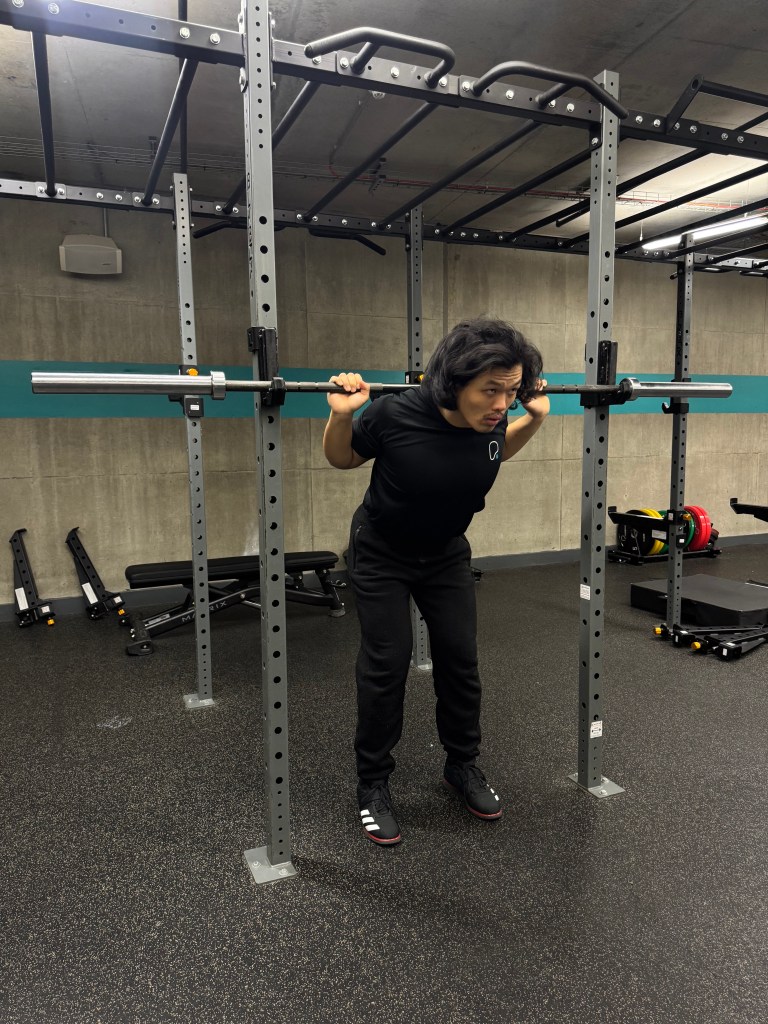
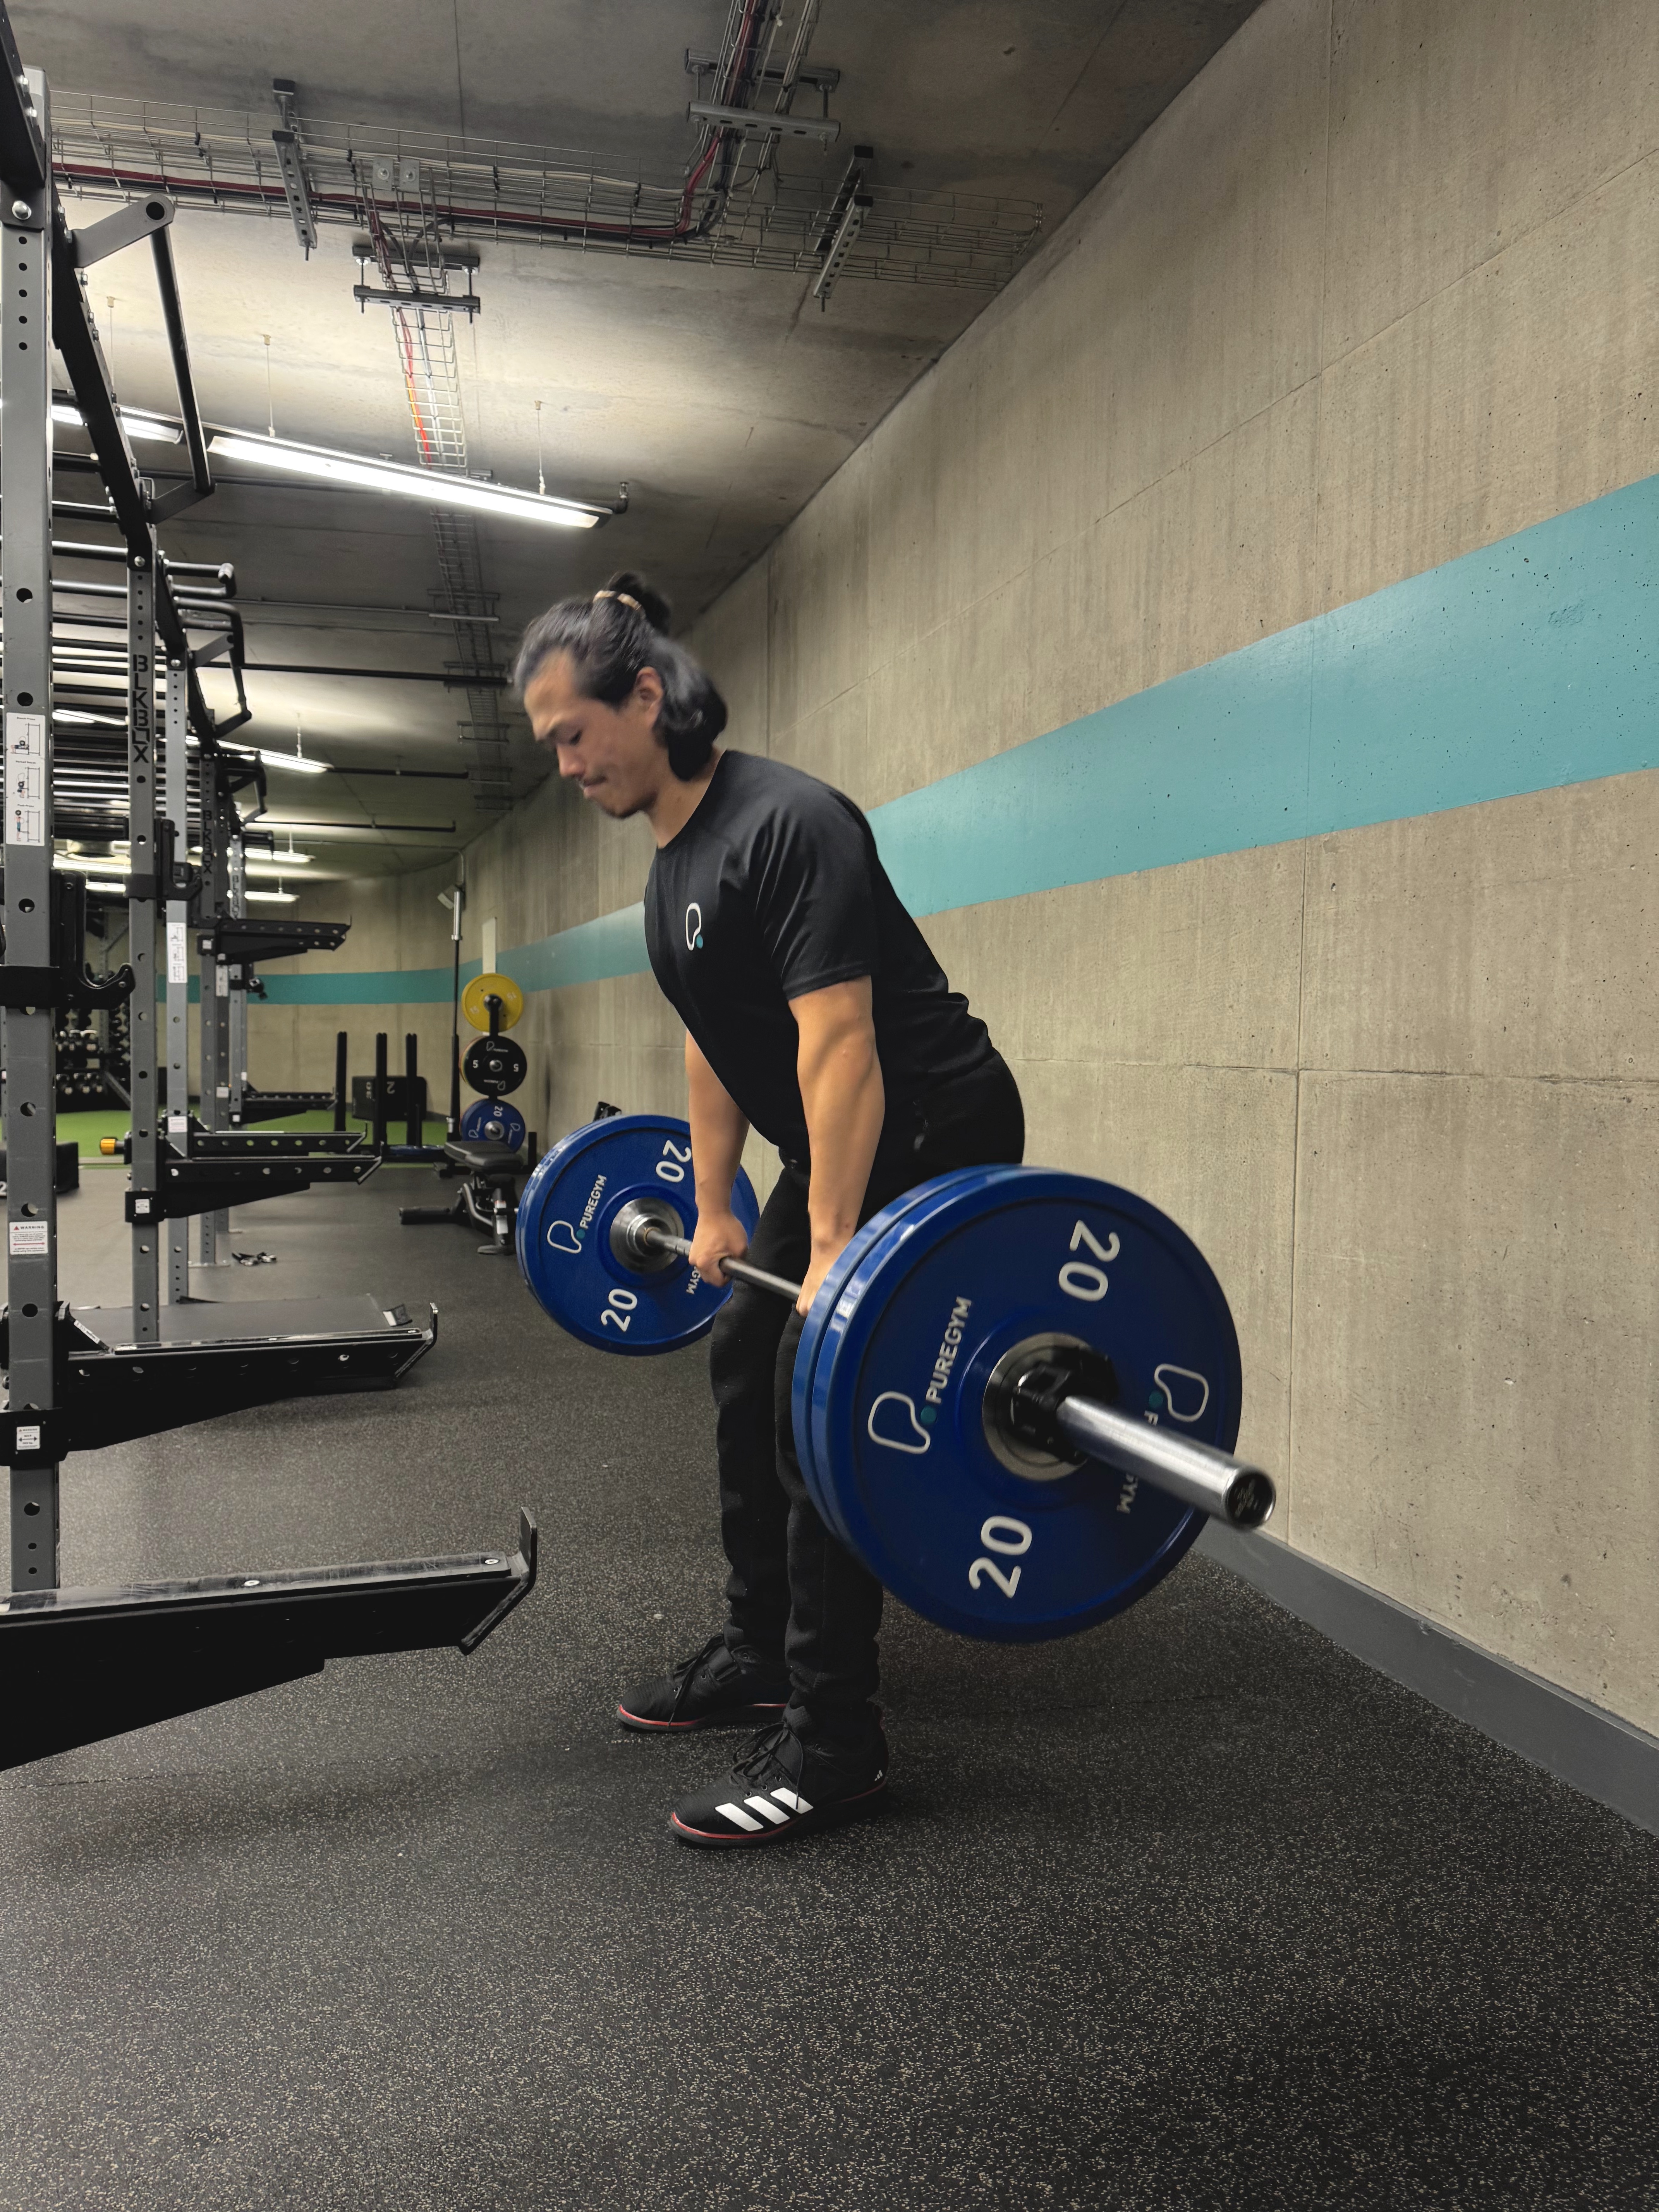
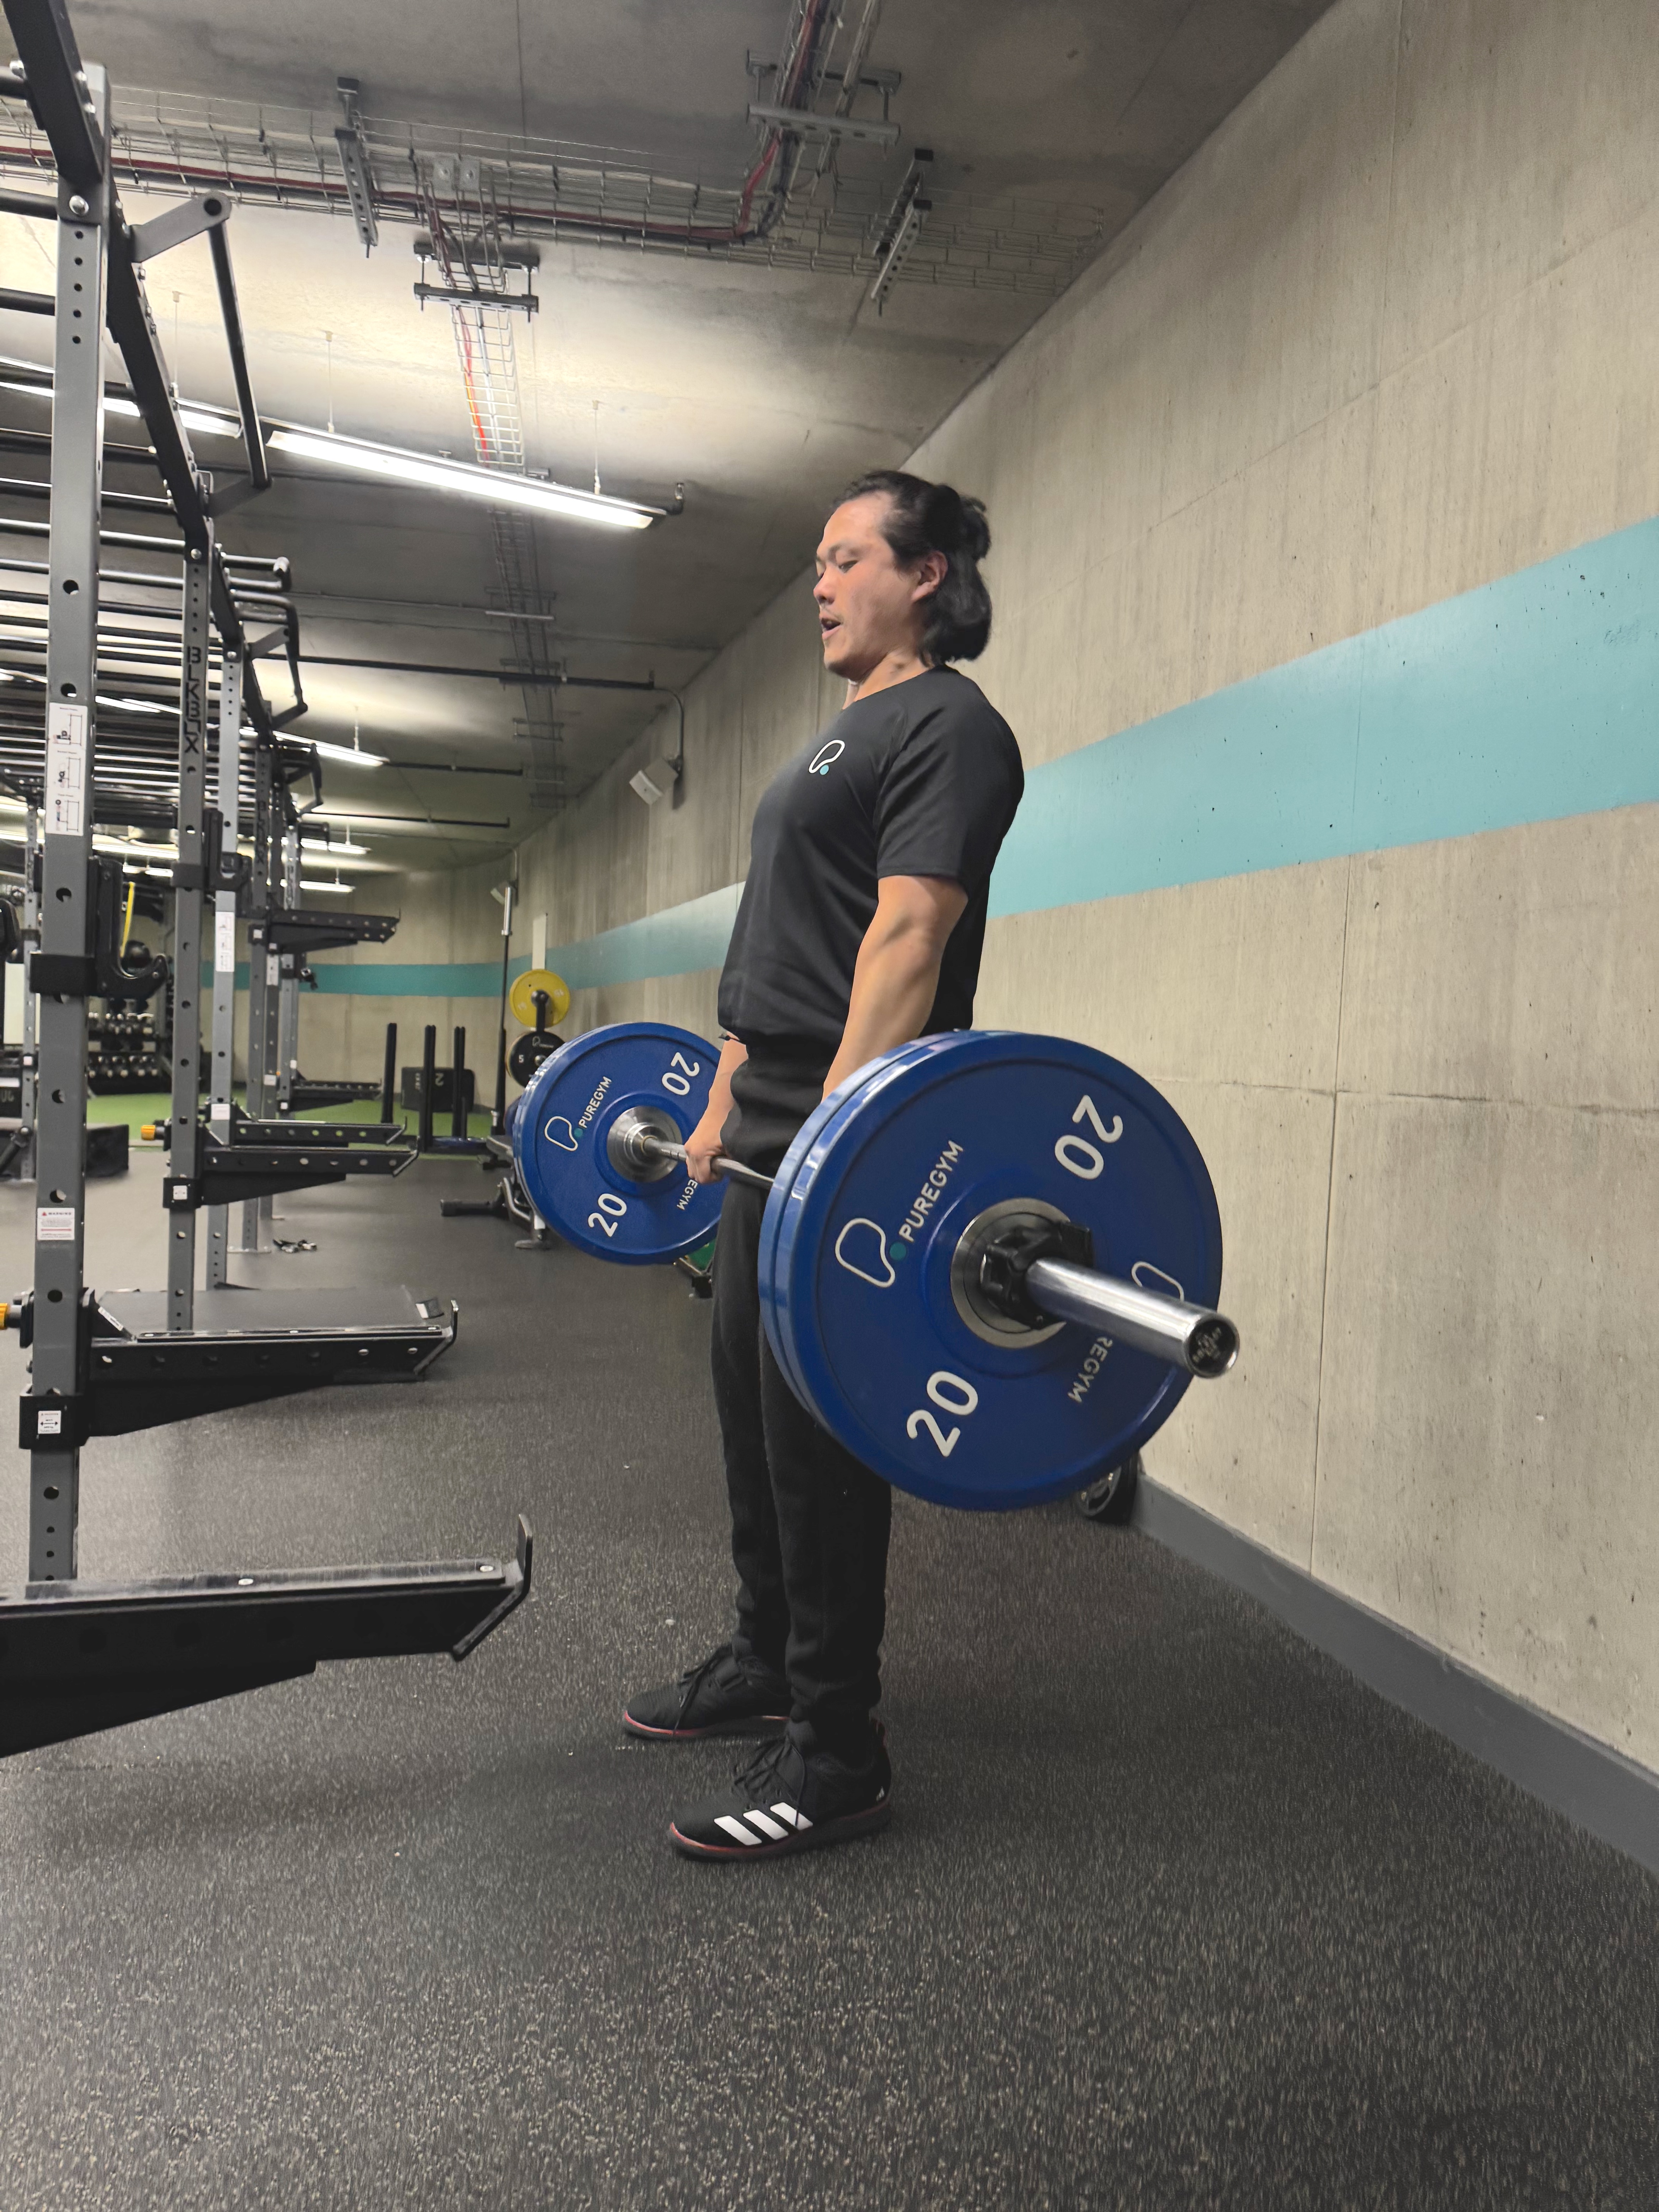
After the initial assessments you might find that you are someone who struggles to reach depth and maintain an upright position even with a wider stance. Do not fear!! You are built to low bar squat! This variation of the squat is used by many powerlifters to maximise strength gains by utilizing your posterior chain instead of your quads. Notice below how my hips sit further back and my torso leans further forward.
Instead of resting the bar on your traps, rest the bar lower on your back so it sits over your rear delts. This allows your center of gravity to still sit over your mid foot whilst allowing your hips to hinge and torso to fold further forward.

| High Bar: Sits on your traps Hips underneath bar, lift with your quads Bar is directly over the midfoot | Low bar: Sits on your rear delts Hips slightly behind, lift with your posterior Bar is directly over the midfoot |
Whilst I tried my best this is not my prefered squat technique which is why at the bottom you can see the further than my mid foot. This is because I’m more comfortable driving my knees over my toes and keeping my chest up right. When low bar squatting just like the high bar, focus on keeping the bar centered over your midfoot throughout the movement.
Depth of your squat:
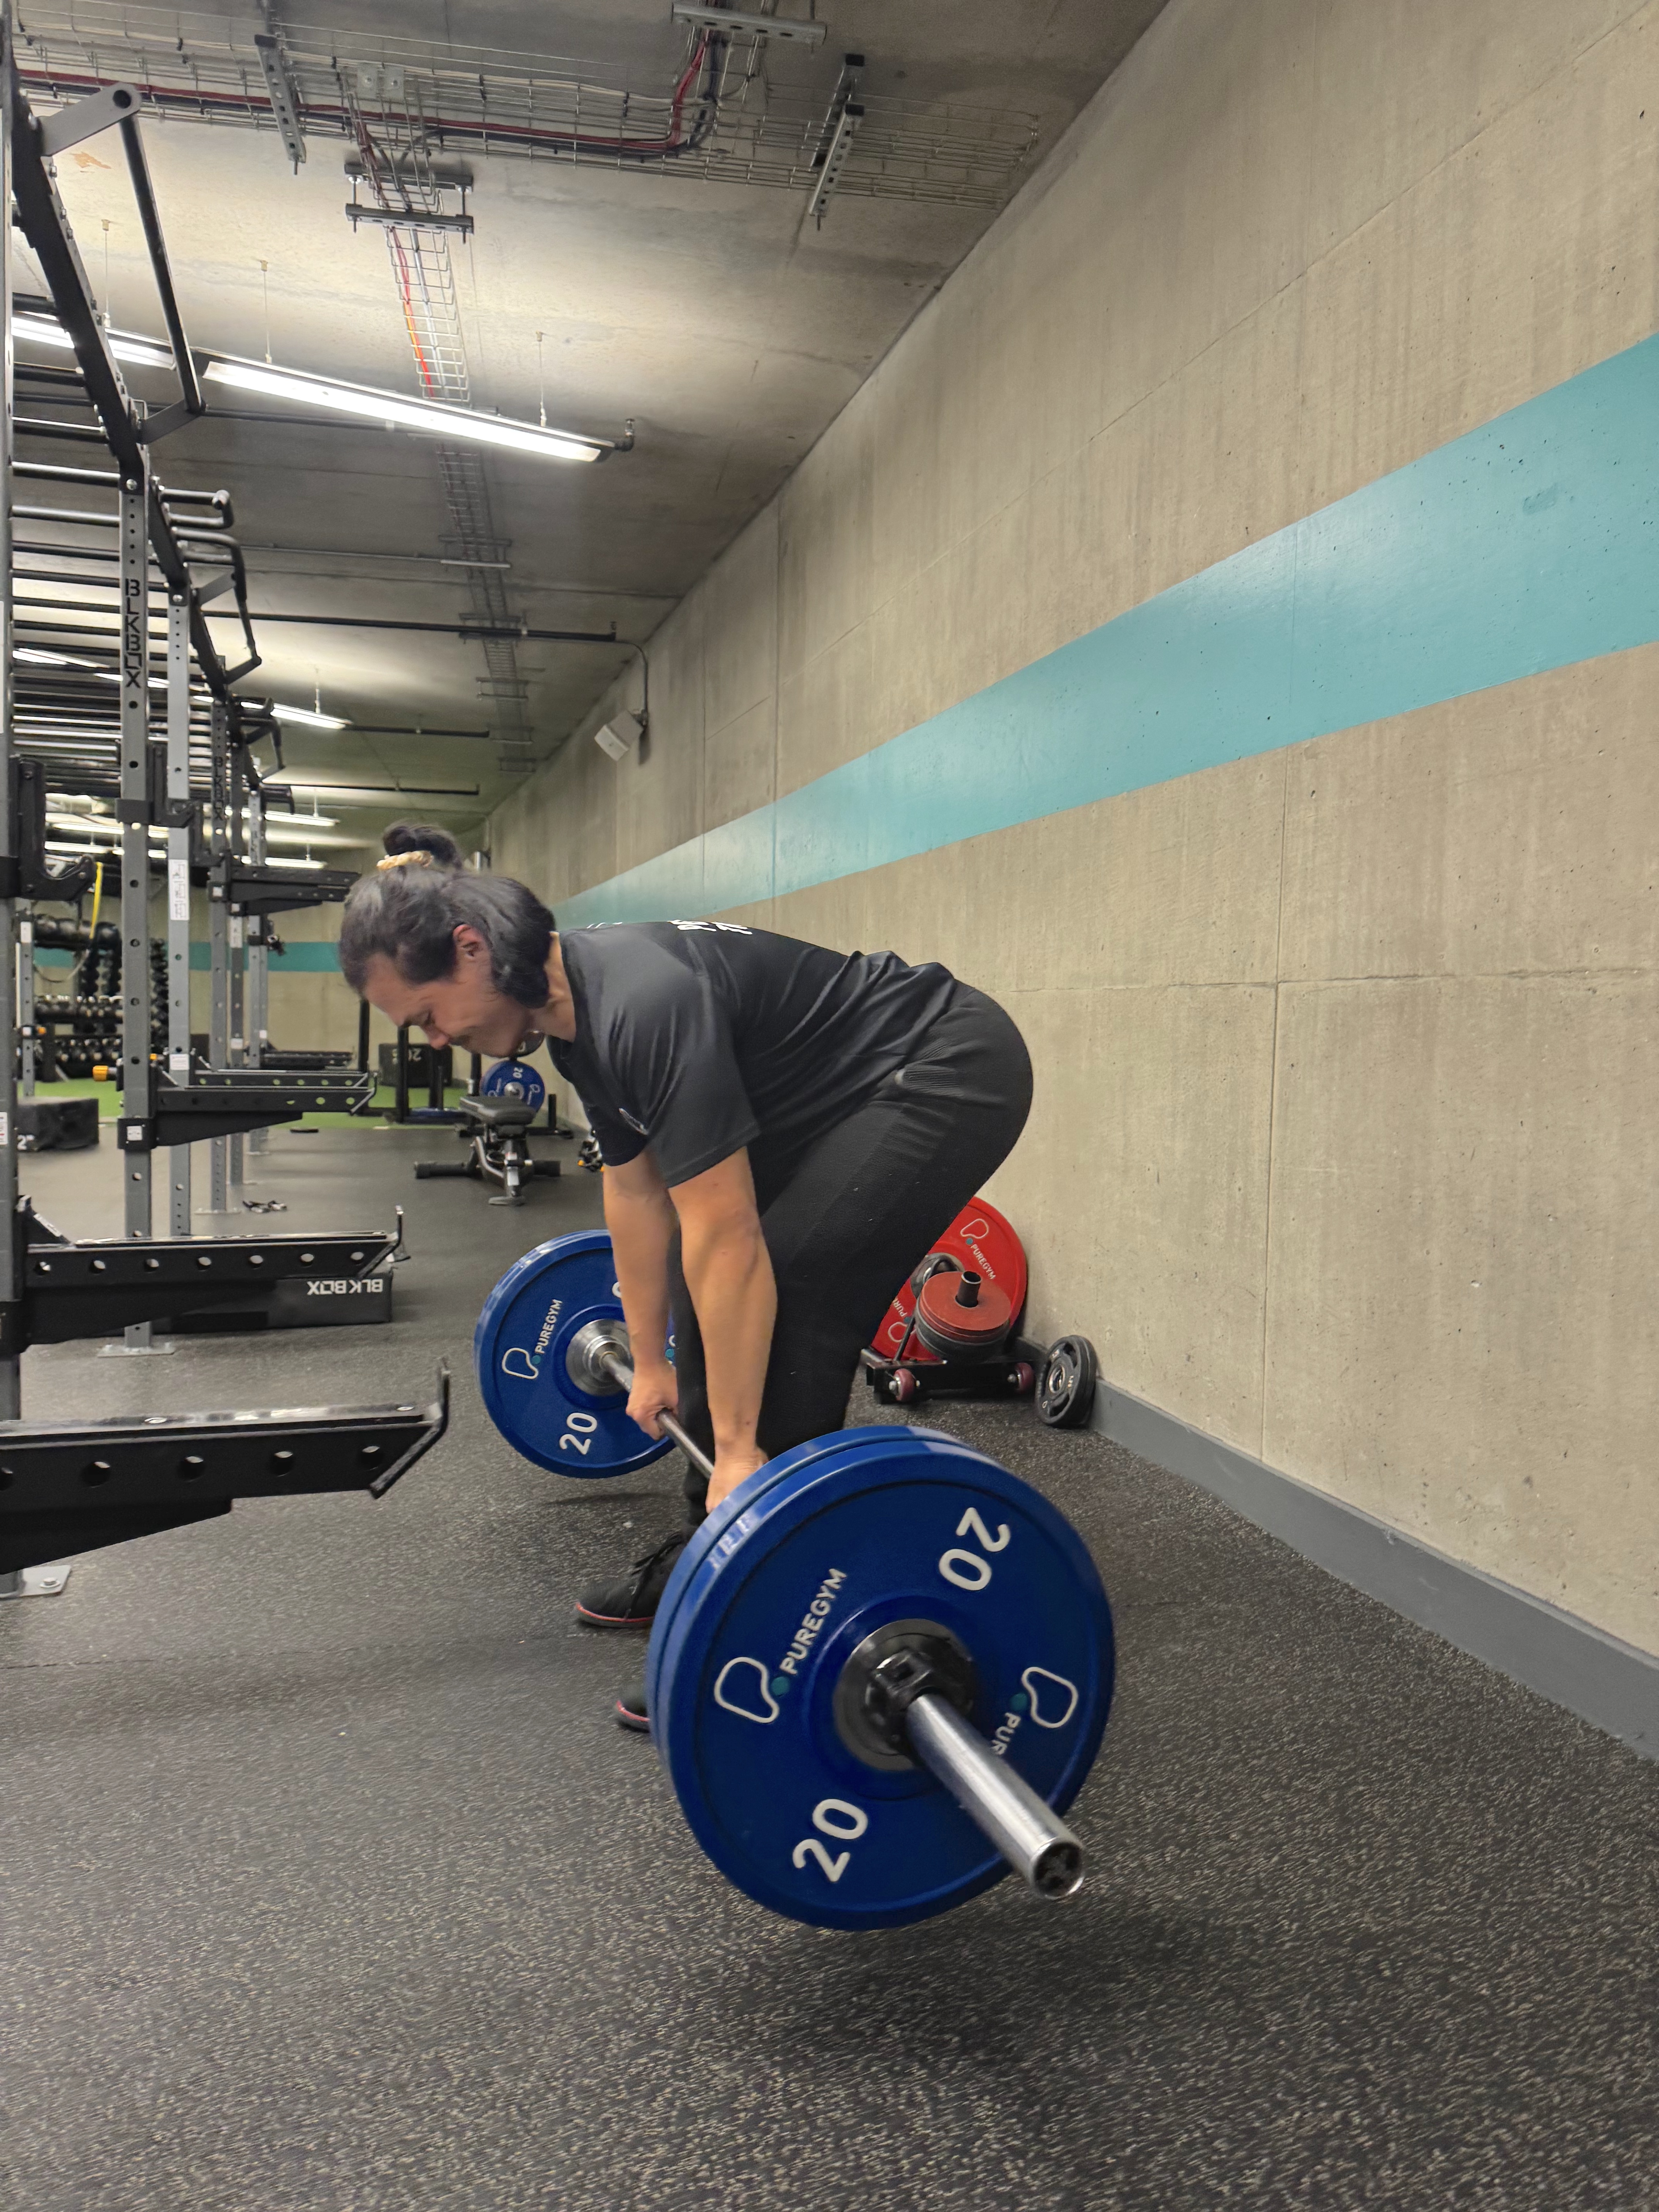
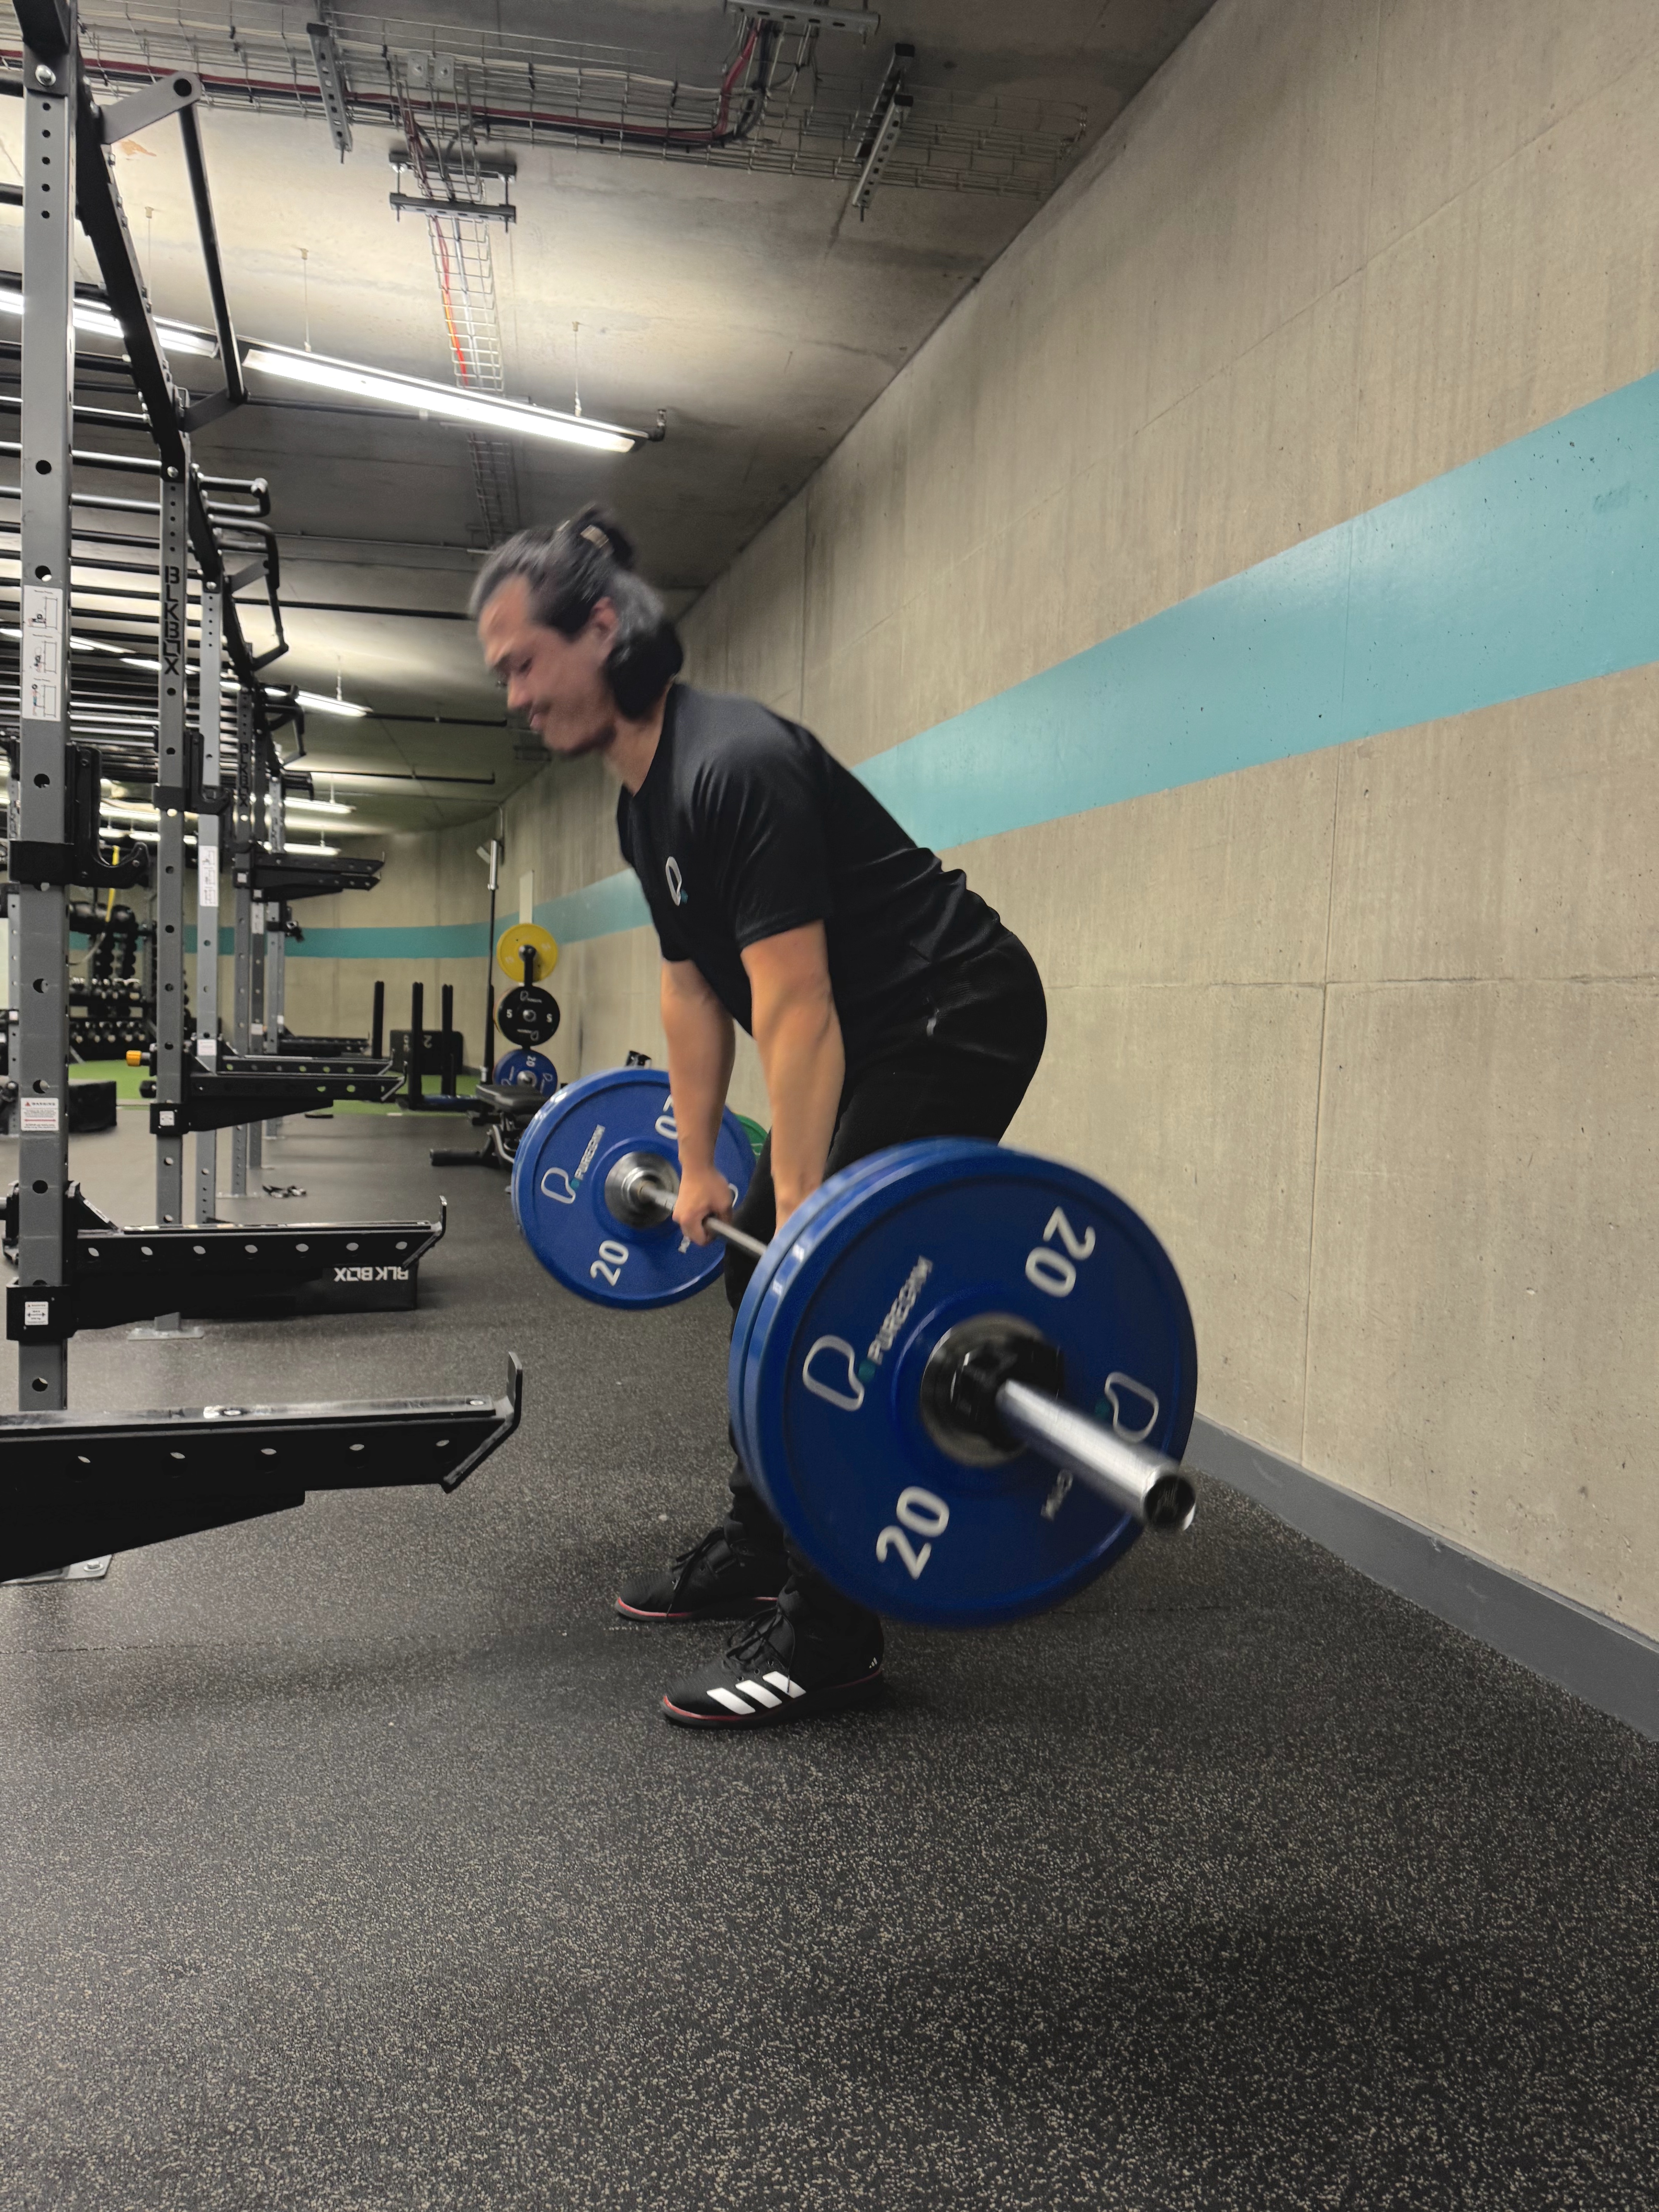
Squat depth is most often dictated by femur length relative to your body as it dictates the distance of your hips from the center of gravity. Longer femurs mean your hips will travel back further which means your knees will need to travel further forward to maintain an upright position. It’s recommended to go as deep as your biomechanics will allow as it has the most transfer to hypertrophy and sports performance.
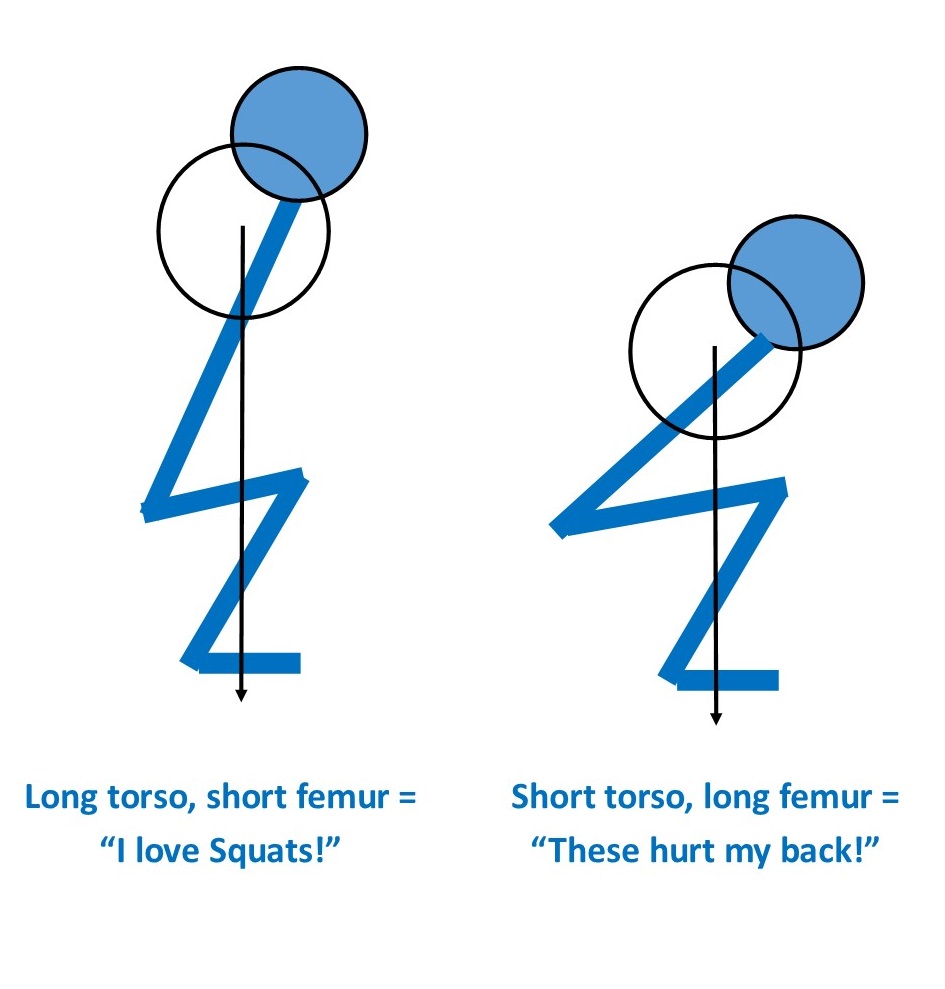
Although having long femurs can make it harder to squat past parallel (hips lower than your knees) it doesn’t mean it’s impossible. Improving ankle mobility can help the lankiest of squatters squat ass to grass with a high bar.
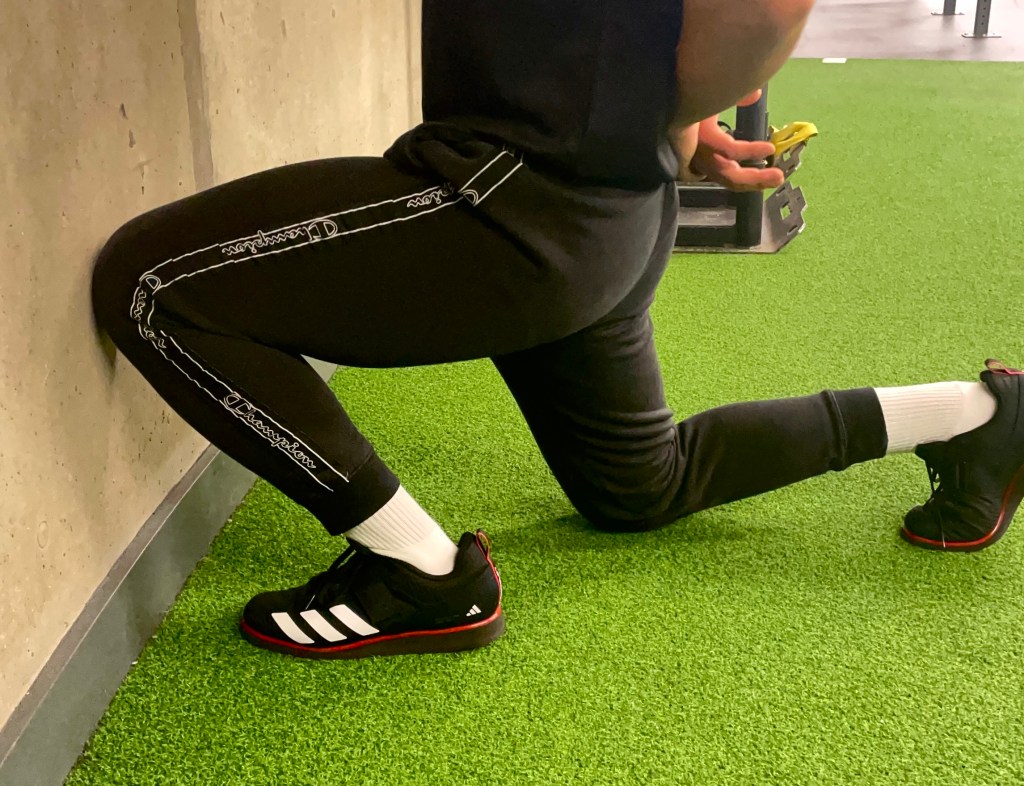
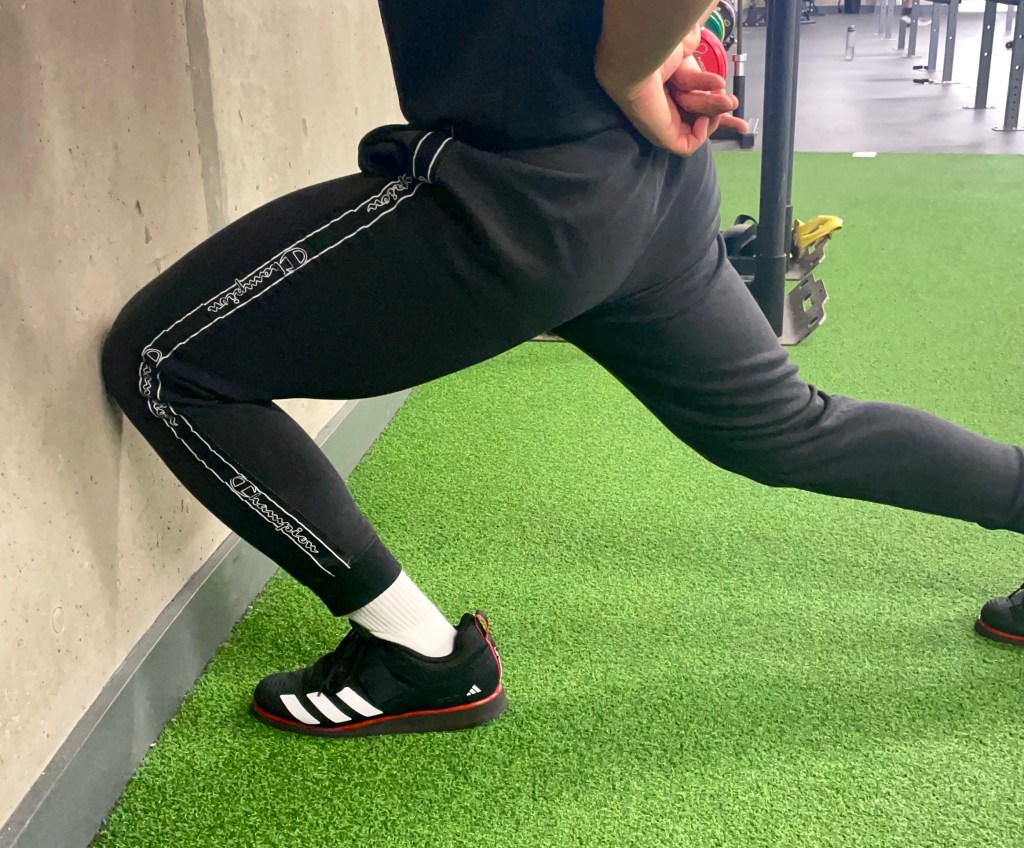
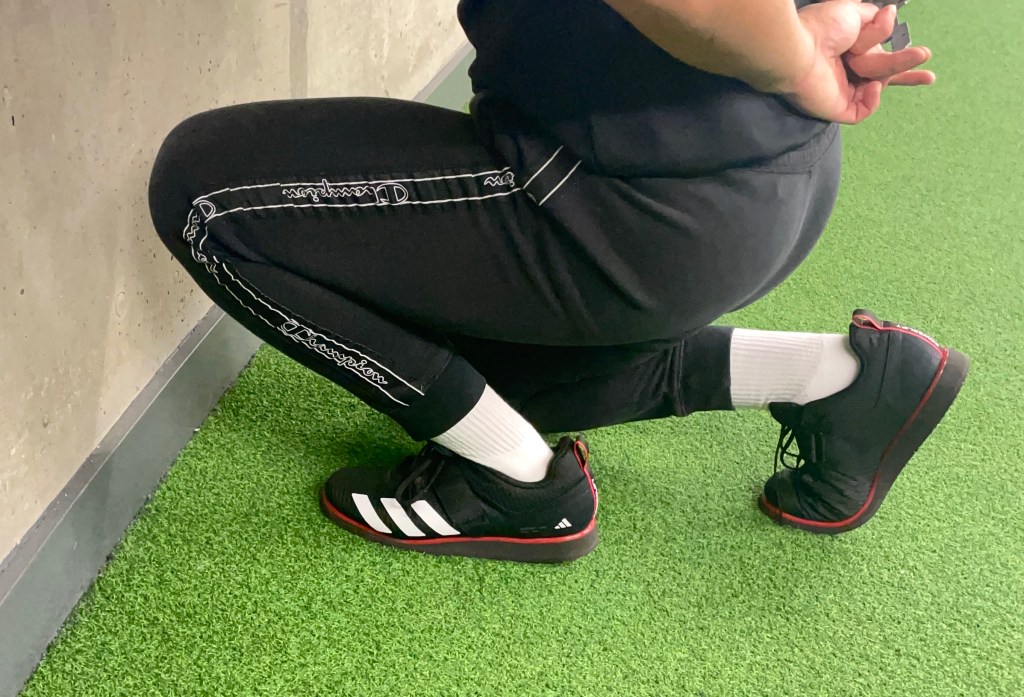
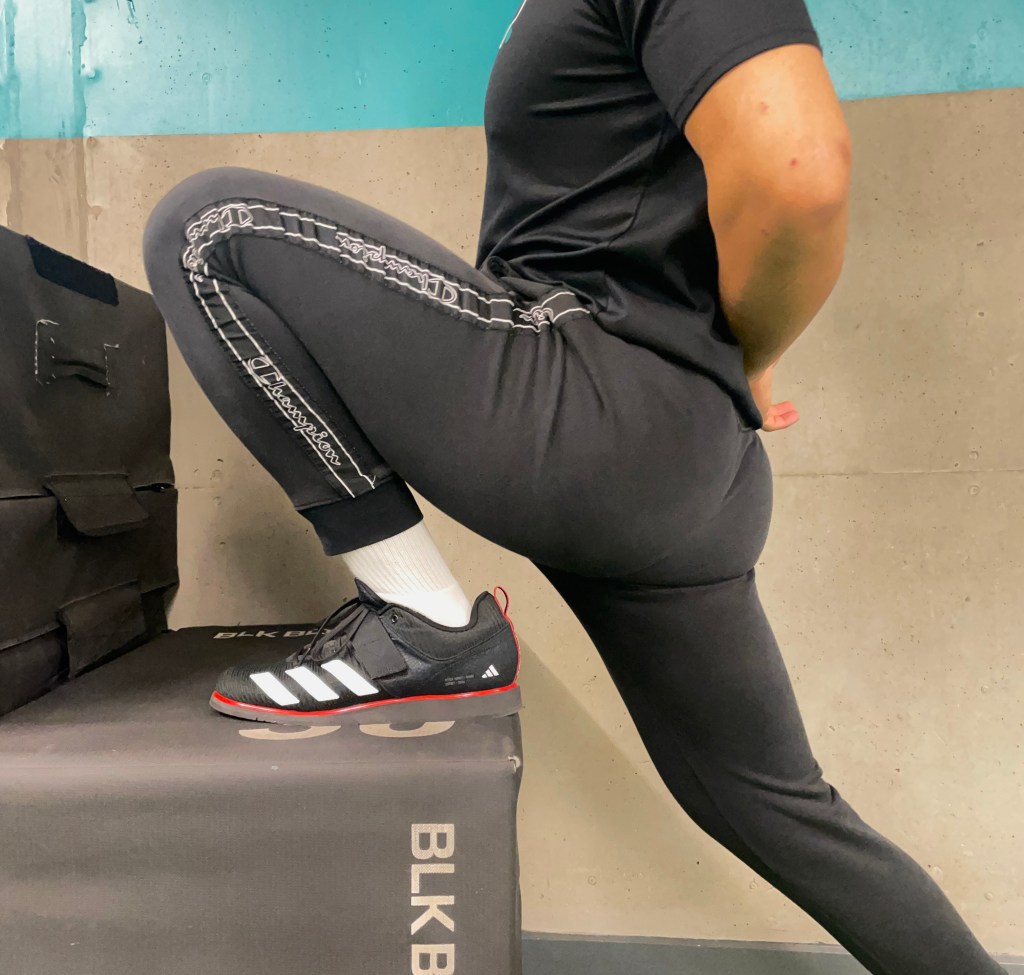
Begin by performing a single leg ankle stretches against a wall. Focus on driving the knee over the 2nd and 3rd toe. You can do this in a spit stance, kneeling, low kneeling or with your foot elevated on a box. For those of you who find discomfort or struggle to hold a deep stretch, just pulse back and forth to slowly ease into these positions. Once you get comfortable holding these positions perform 3-5 sets of 20-60 seconds. To progress this stretch bring your foot further from the wall, even place weight on your knee or elevate your toes with small plates.
For some of you it might be beneficial to add in banded dorsiflexion training. This trains the muscle which pulls your toes towards your knees. Set up a resistance band low to the ground. Sit with the band wrapped around the knuckles of your toes. Pull your toes to your knees with resistance for 3 sets of 8-12. Training the agnostic muscles will help you build stability and ROM in your ankles.
Part I – Upper Body Engagement
Tom Platzs said squats are the king of leg exercises but did you know they’re a tremendous builder of back muscles too. Muscular irradiation is the principle that isometric tension created in one part of the body will allow for a greater recruitment of muscle groups in another part. Form a fist and flex your forearms, notice how in doing so your biceps and triceps want to engage? Flex your forearm even harder, notice how your shoulder, chest and back want to start contracting as well. The main muscle group we want to recruit during the squat in the upper body are your back muscles. That’s your traps, lats and spinal erectors. Imagine a table with titanium legs and a cardboard tabletop, any object placed on the table would easily fall through and collapse the whole table. It does not matter how strong the legs are, a weak platform will always lead to strength leakage when transferring force from our legs to the bar. Our back is that platform which is why it’s important to focus on back activation and strength in the back muscles when adding load to our squats.
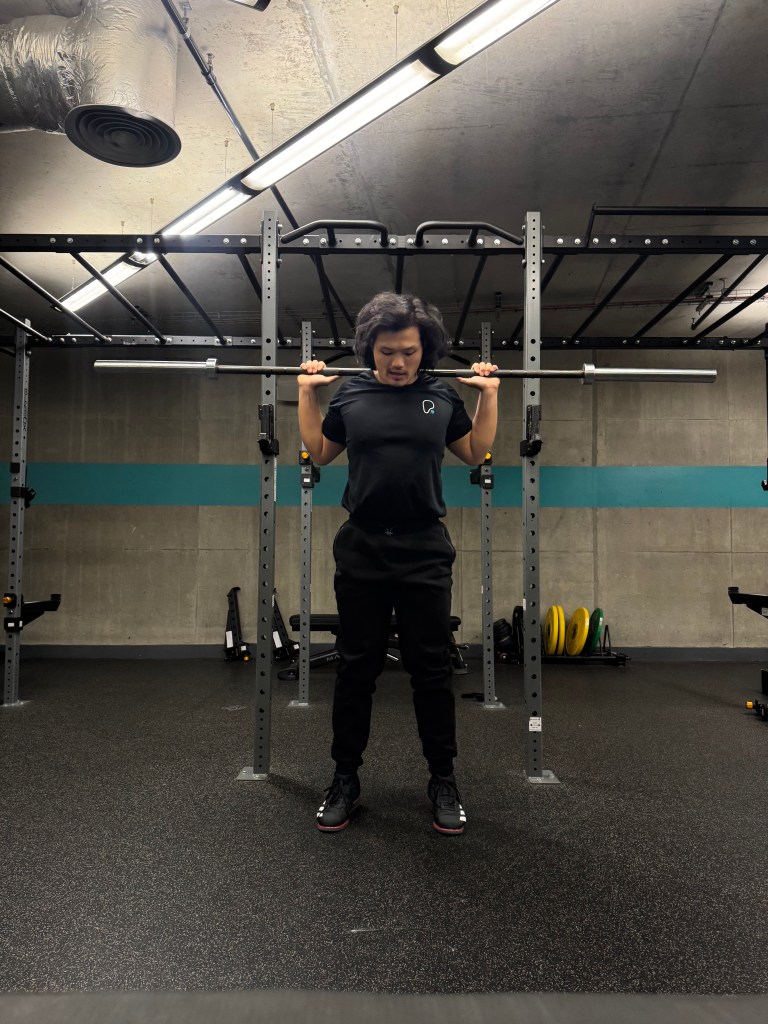
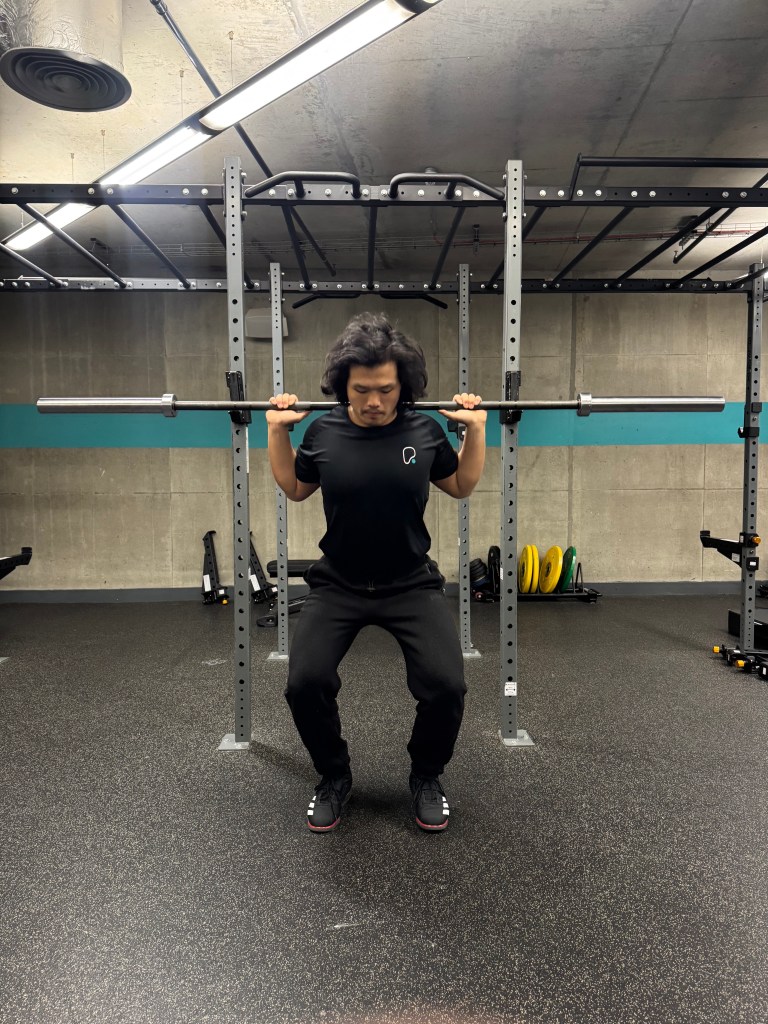
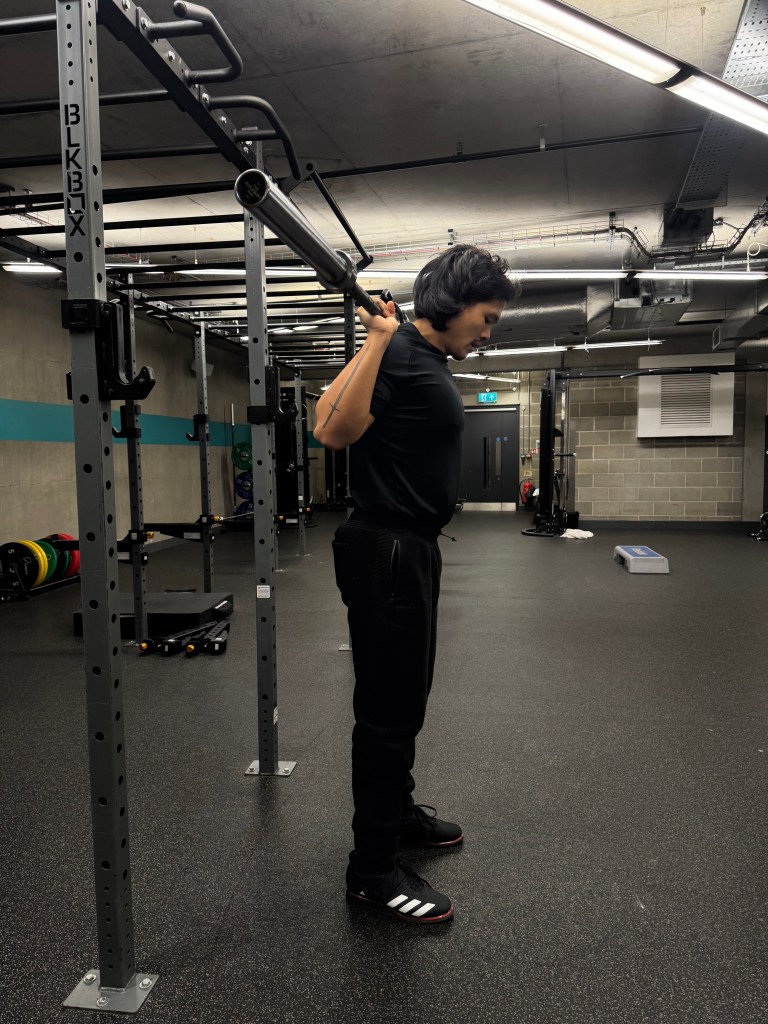
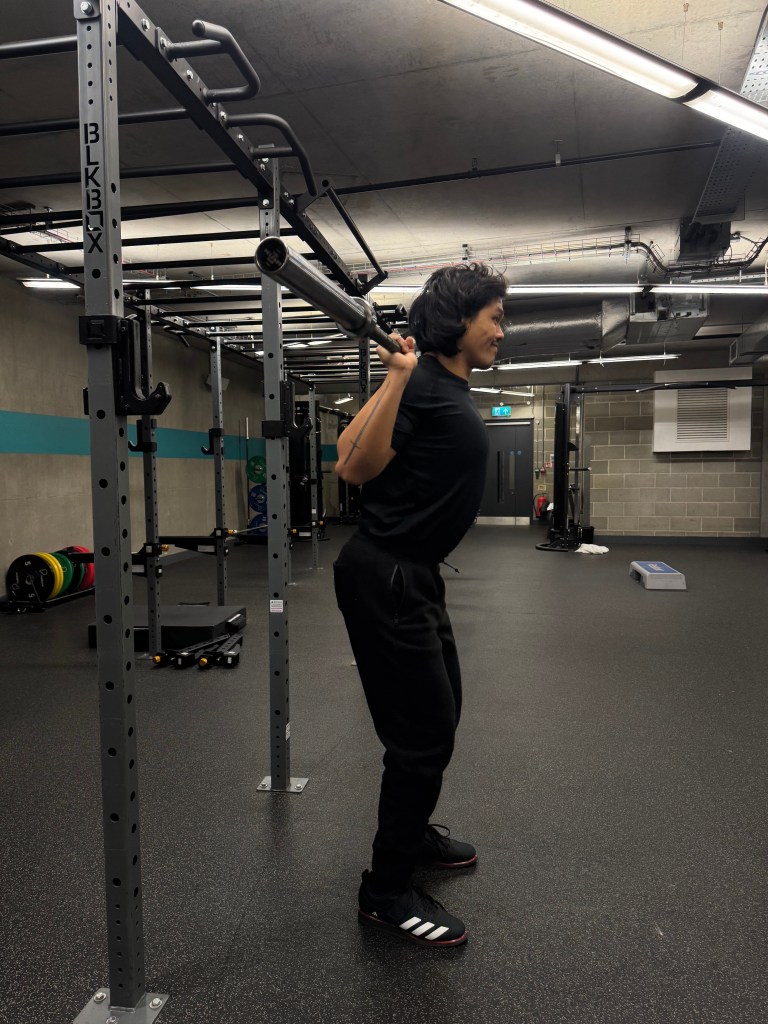
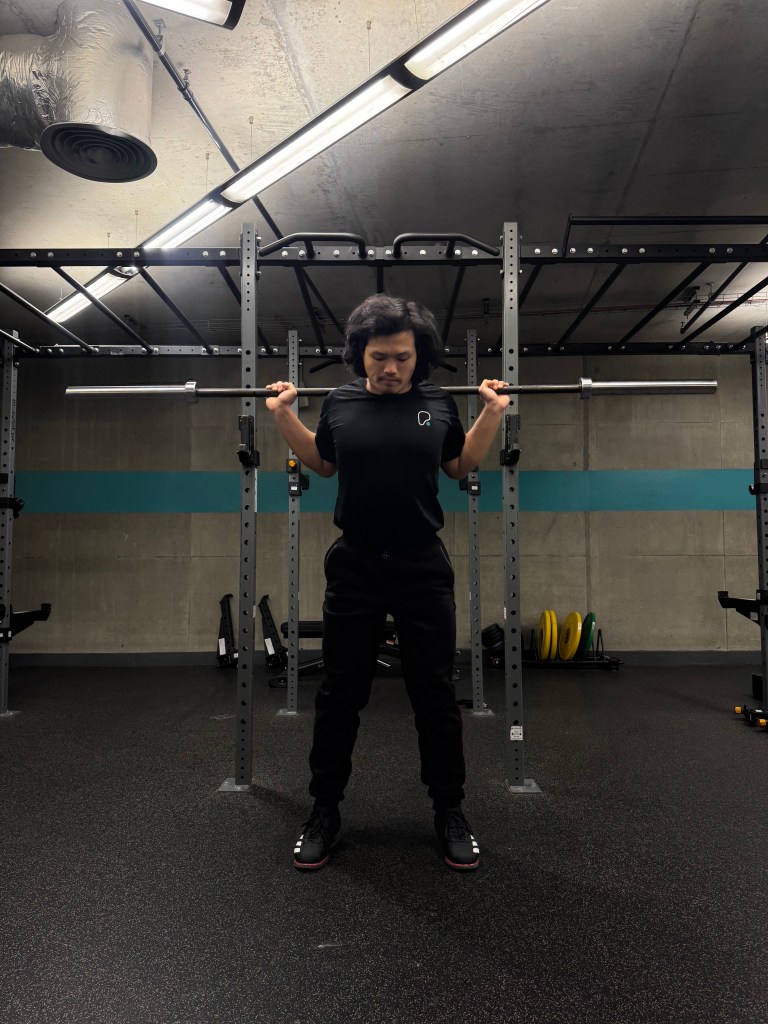
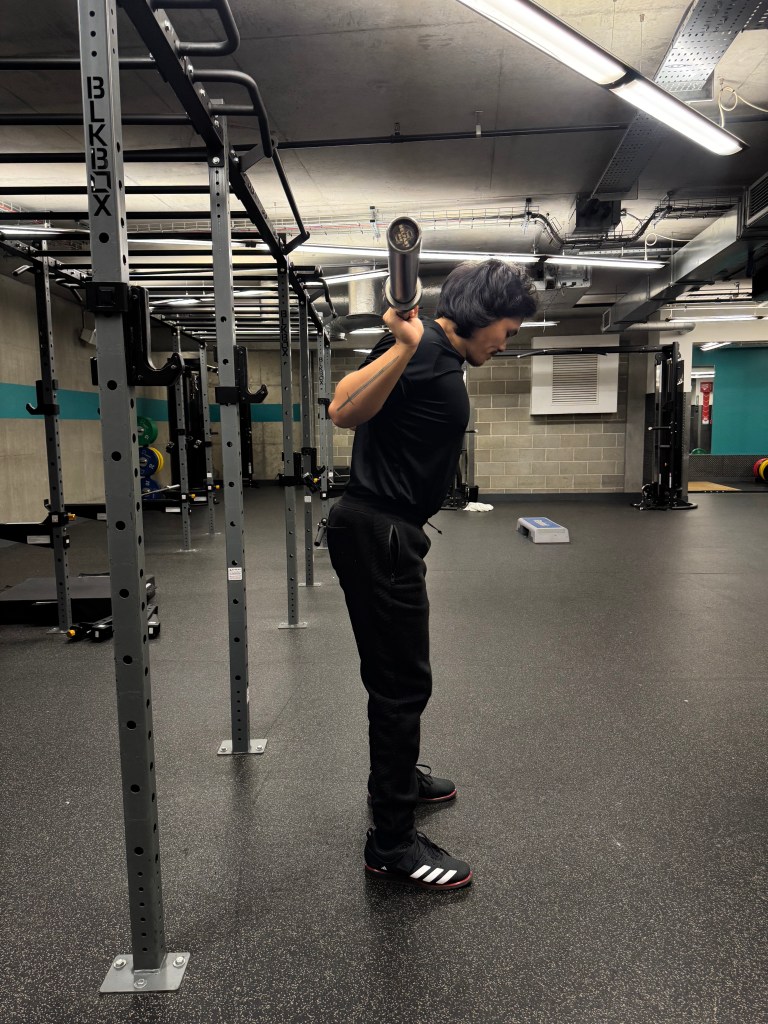
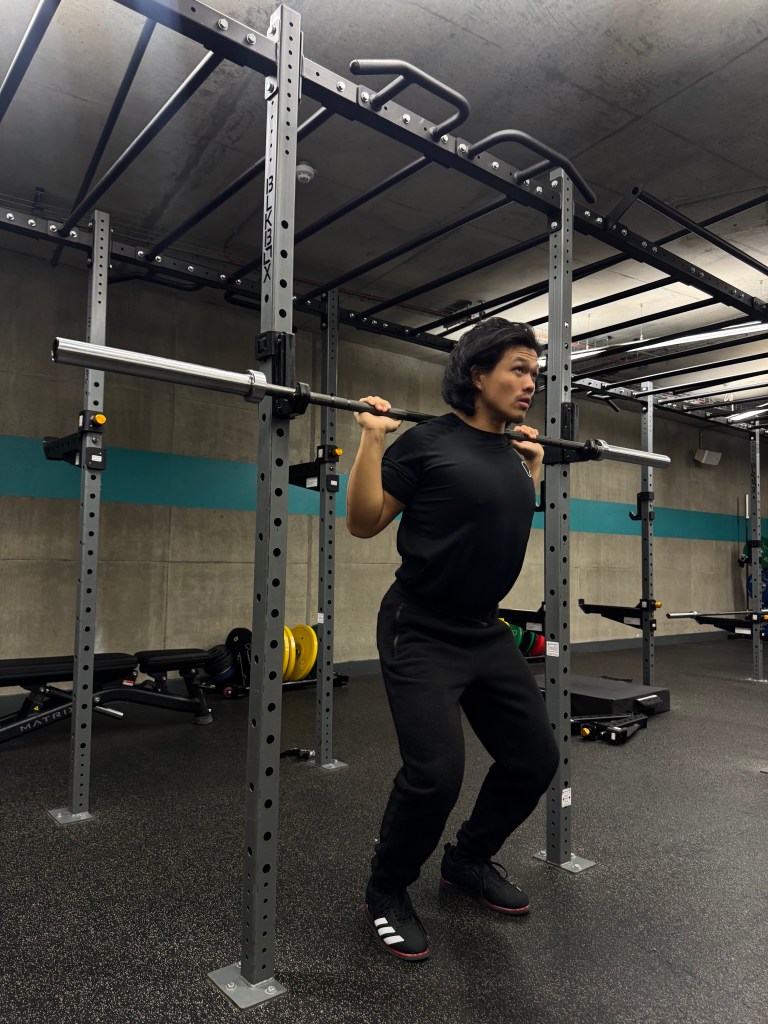
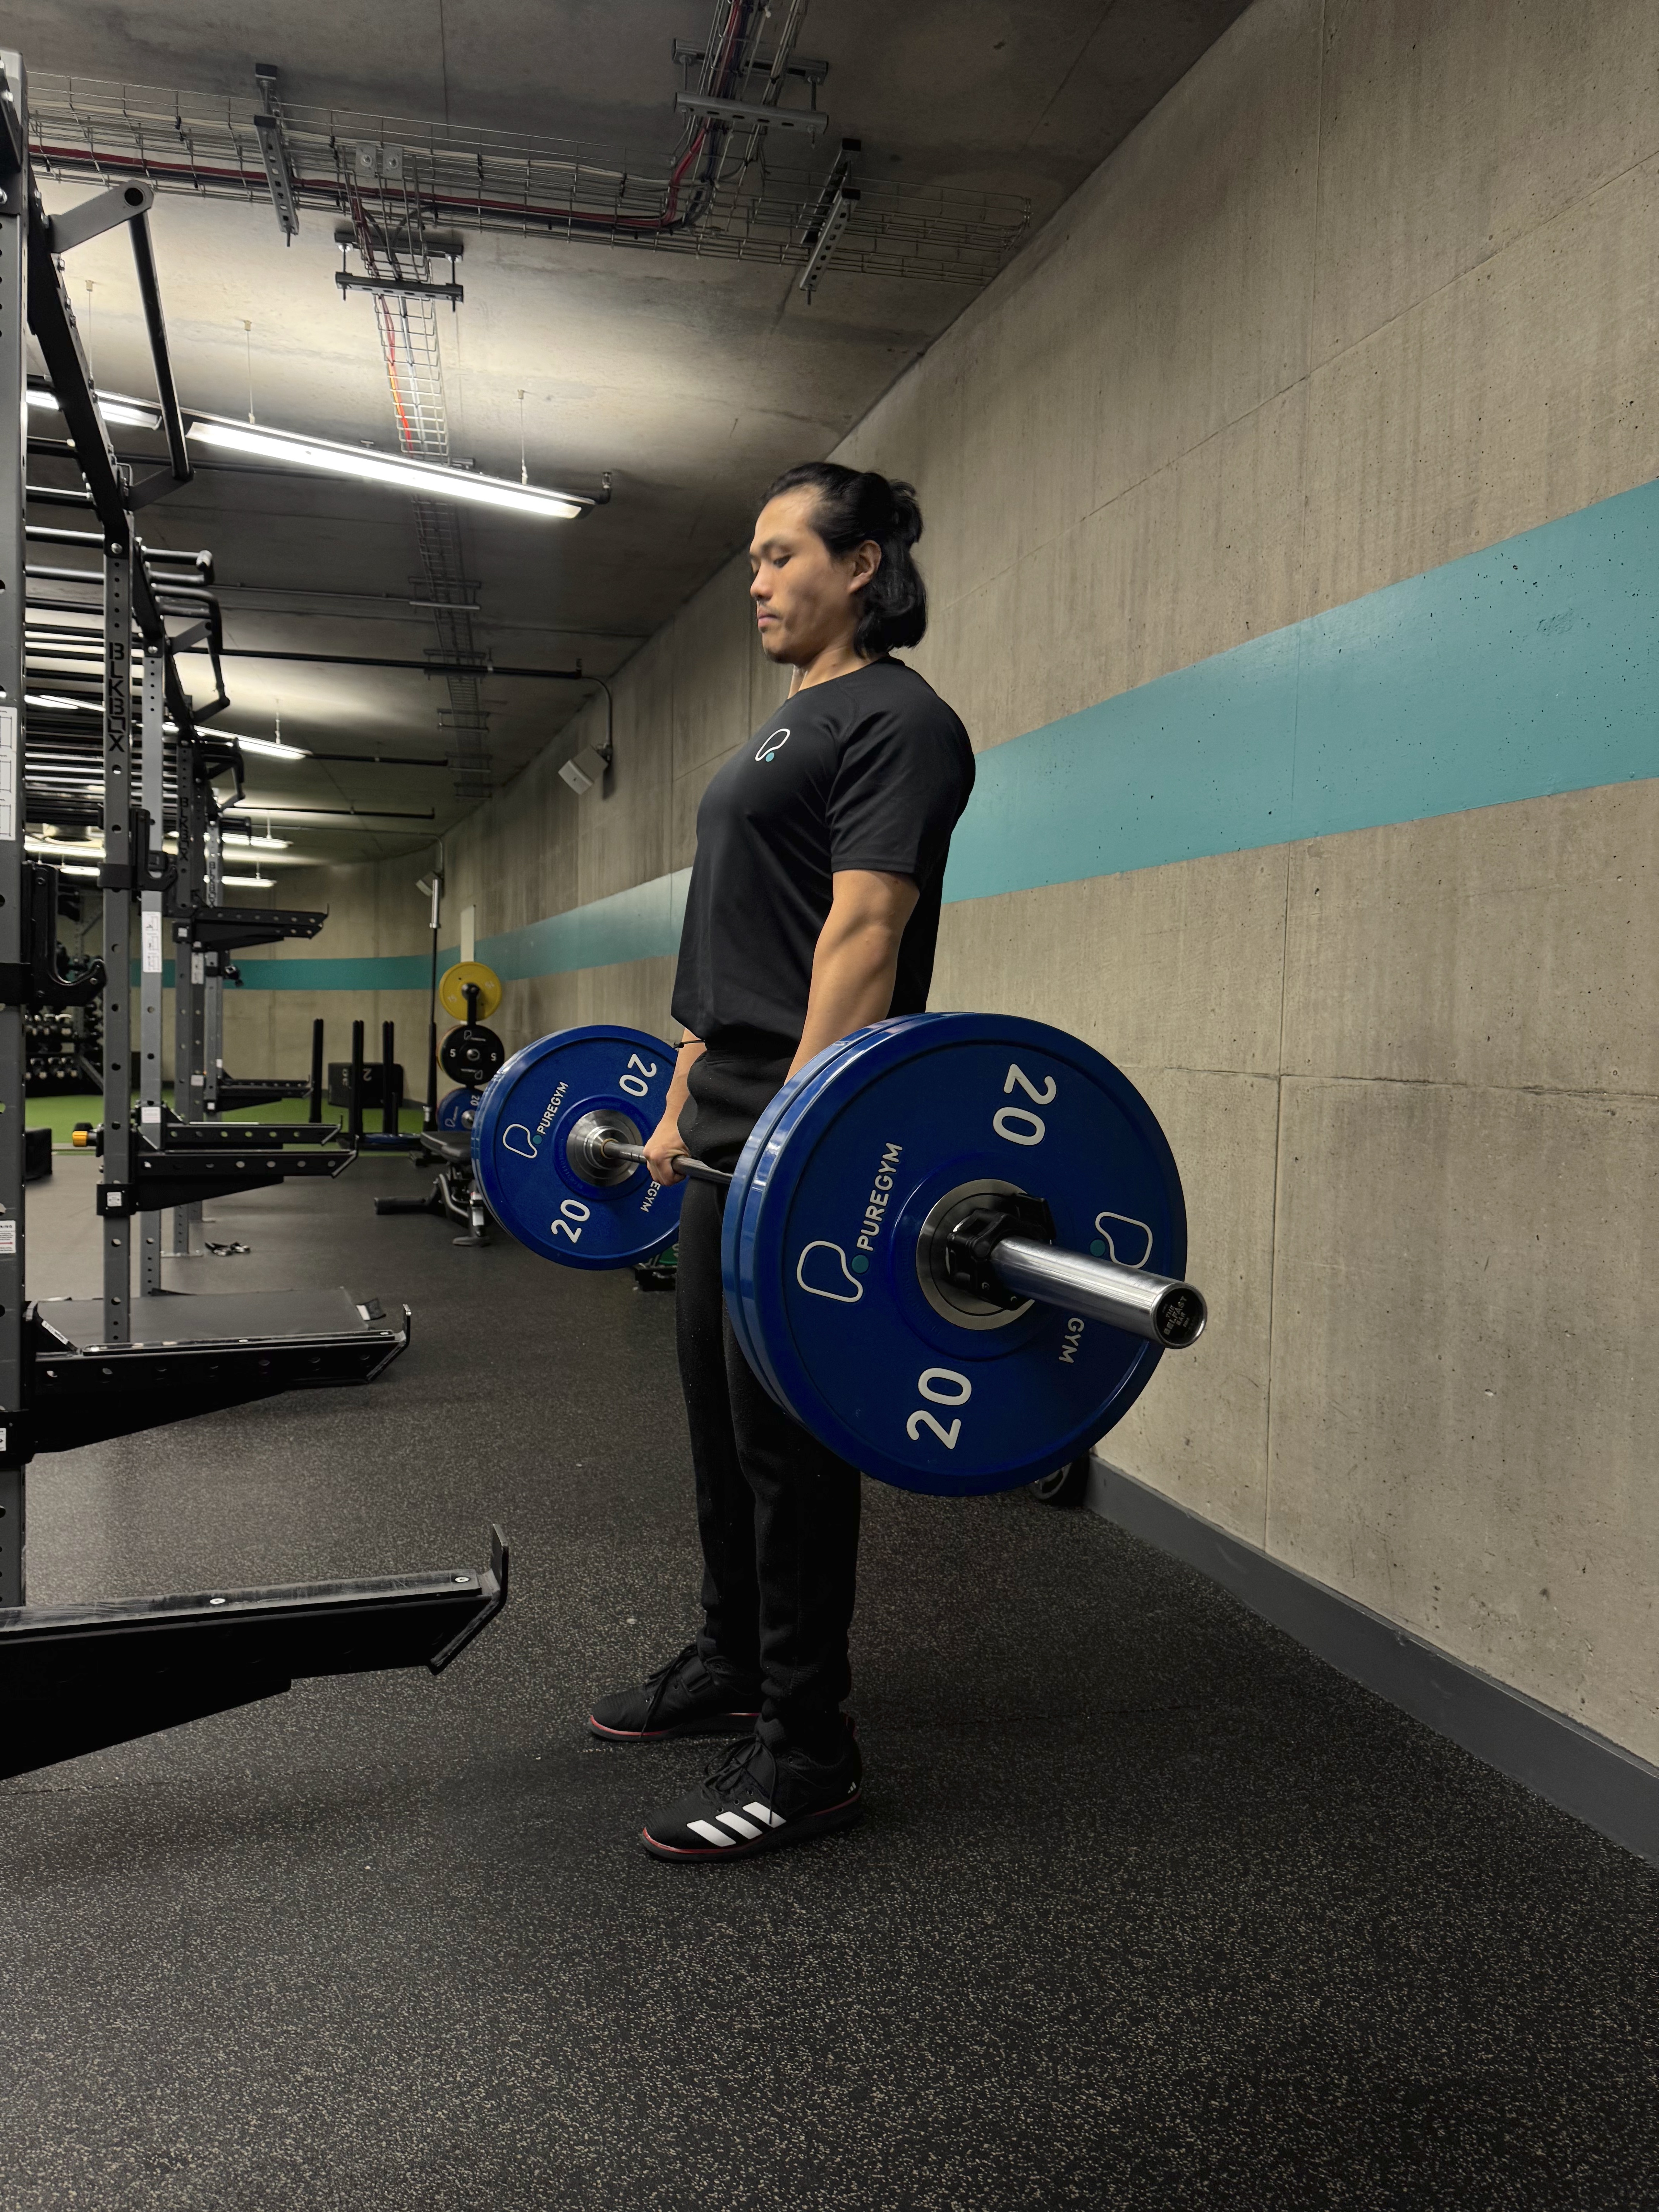
Always start your squats by driving your hands into the bar and gripping tightly. Once you’ve established a strong grip, slightly wider than your shoulder, practise pulling yourself into the bar, this helps activate your back muscles by mimicking the a pull up. It can be done by:
- Squatting directly underneath the bar with your feet and hips underneath
or
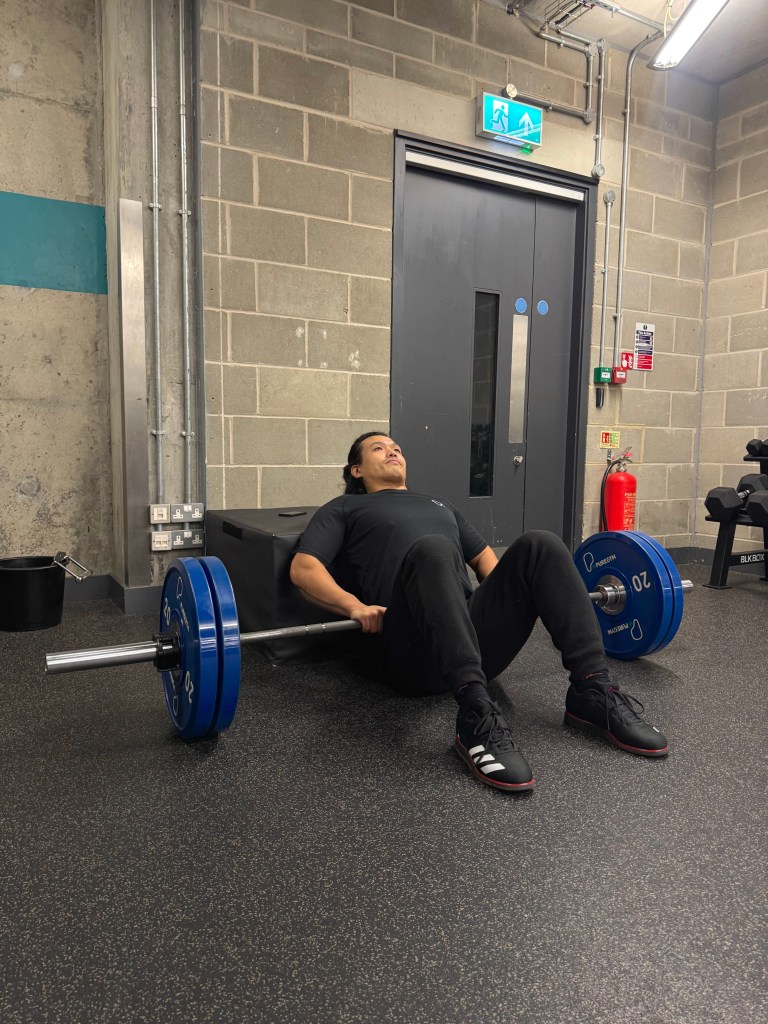
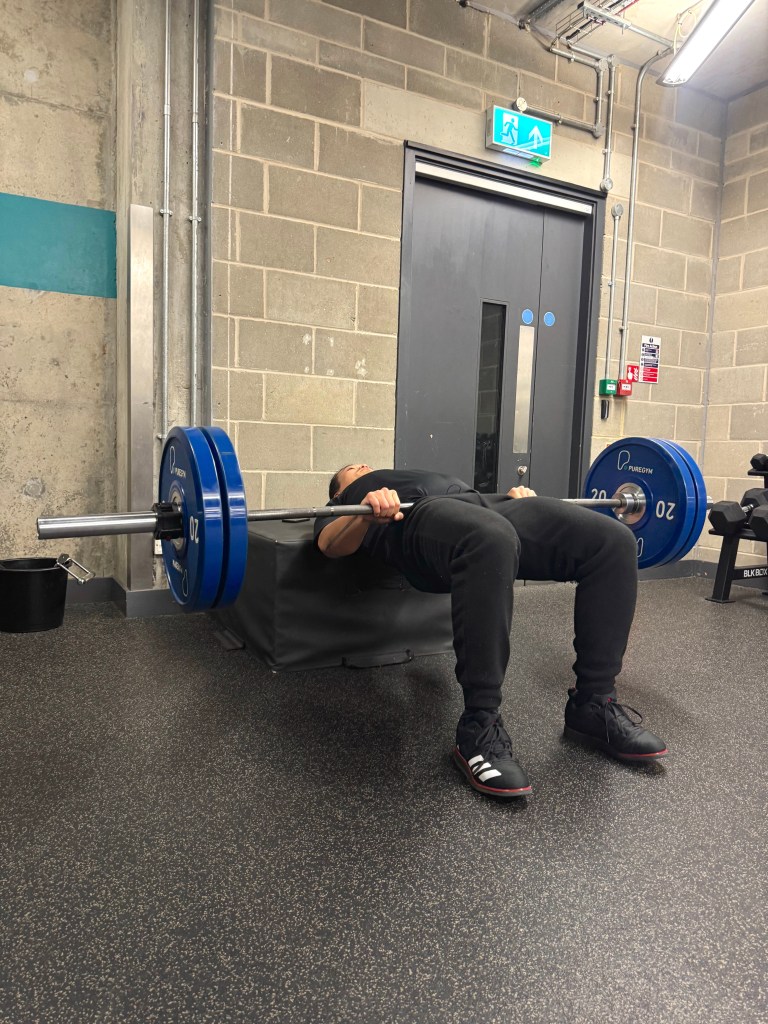
- by pulling yourself in horizontally and stepping your hips underneath. (In the pictures below I placed my feet in position first, this is due to the way I arrange the hooks which allowed me to hang my weight back, normally you would drive your weight into the bar and step your feet and hips underneath the bar.)
The bar should sit comfortably on your traps (or rear delts).
While any back exercise that works shoulder extension will help build a stronger back, here’s my favorite exercise that helps build strength through a full ROM whilst allowing you to absolutely mog everyone at the gym because absolutely no one does it or is too scared to try.
Behind the Neck Lat Pulldown
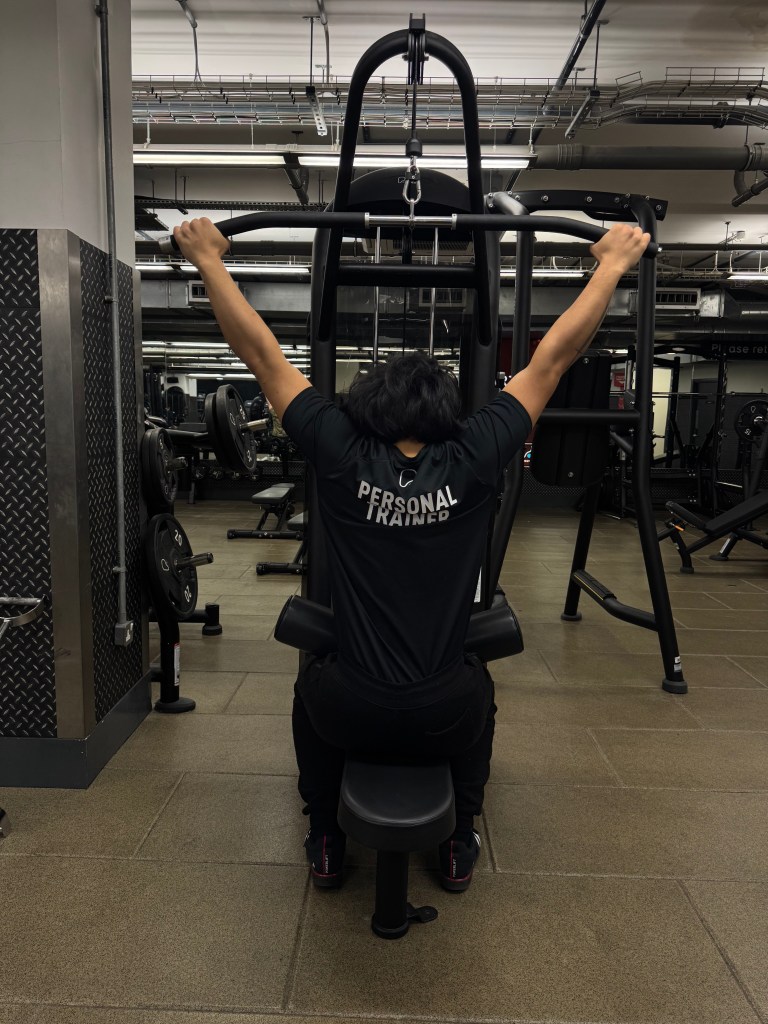
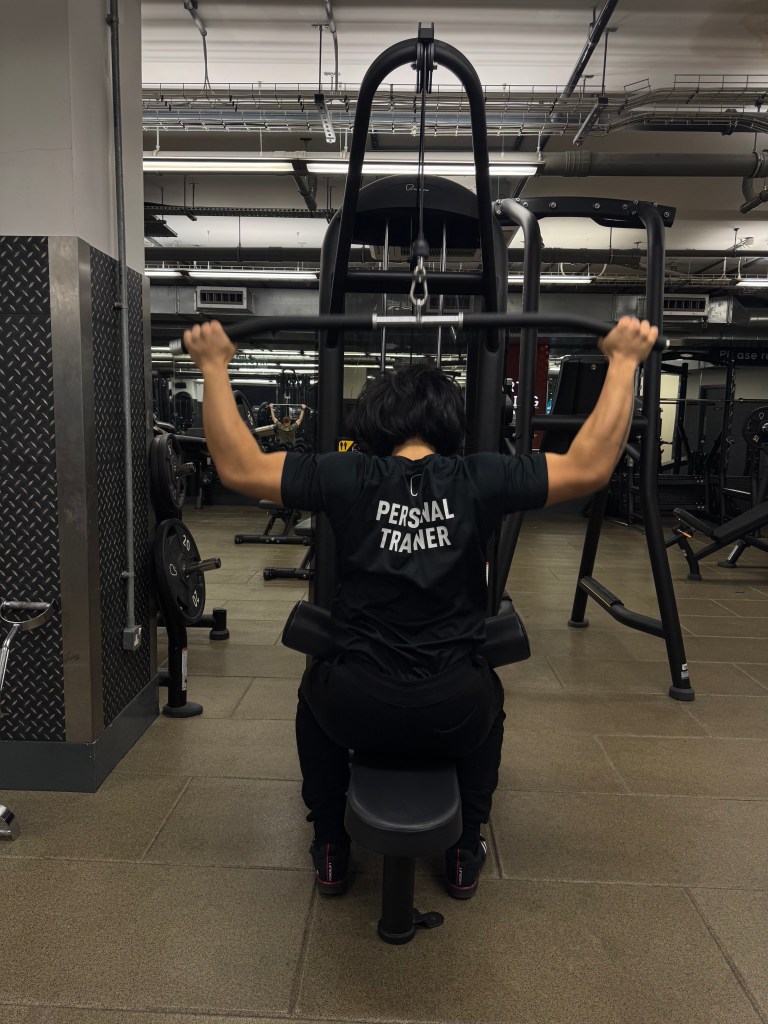
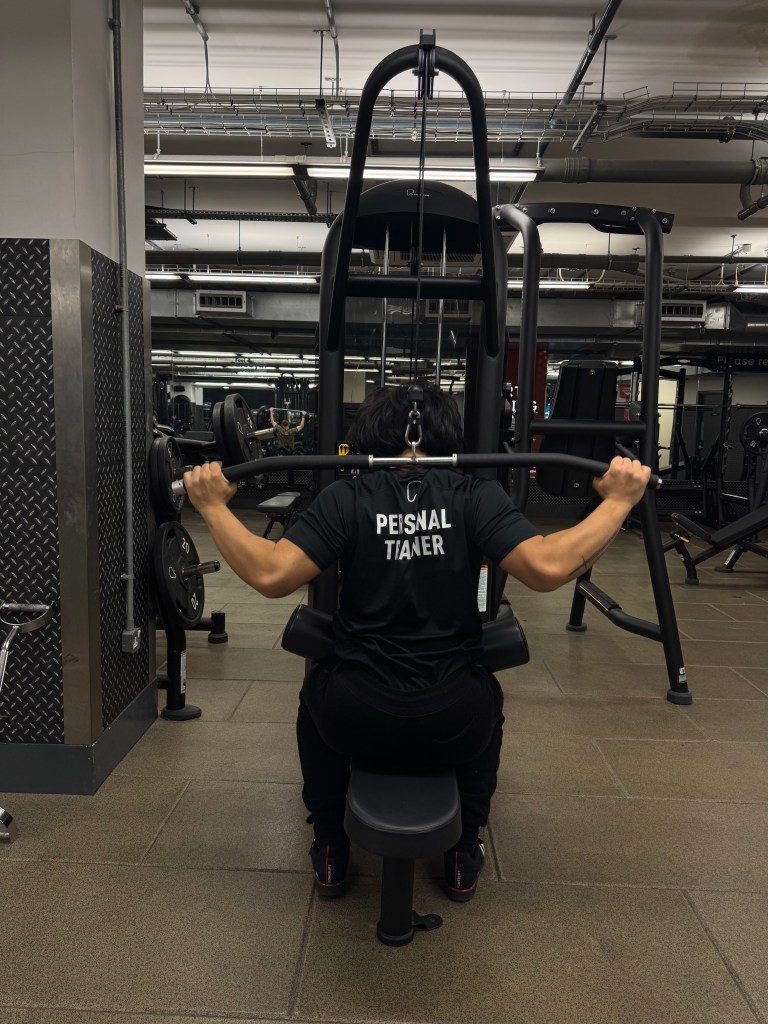
Step 1: Squeeze the handle with a wide pronated grip (double overhand)
Step 2: Picture a pencil pinched between your shoulder blades. This will help engage your lats through shoulder retraction.
Step 3: Tuck your chin forward and down. Pull the handle behind your neck until it touches your traps. Slowly lower the bar back to the starting position. Pulling your elbows to your ribs is a good mental que.
Part II – Mcgill Big Three
Squats require immense core stability and coordination. Your obliques, abdominals and lower back must work together to build a bridge that protects your spine and transfer force from your legs directly into the barbell efficiently. A full, unopened can of coke can bear the weight of a grown man but an open, empty can gets crushed instantly. Why? Because the internal pressure pushing against its walls increases the cans ability to bear weight. Your abs should work the same way if you learn the correct bracing and breathing techniques needed to perform heavy squats.
Side Note: Many of you will try to use belts to assist in your brace but please understand beginners should learn to do this without the belt first. Don’t use belts until you can squat at least your own body weight belt free.
The McGill Big Three are three exercises created by Dr Stuart Mcgill, a biomechanist from Waterloo University, Canada, designed to build a strong, stable core and are considered the standards for core strength development. This includes:
The Curl Up:
Train your ability to breath whilst bracing your core in a neutral spine position, this will protect the spine during squats and allow for more efficient transfer of force from the legs to the bar. Aim for 3-5 sets, working up from 10 seconds to 1 min.
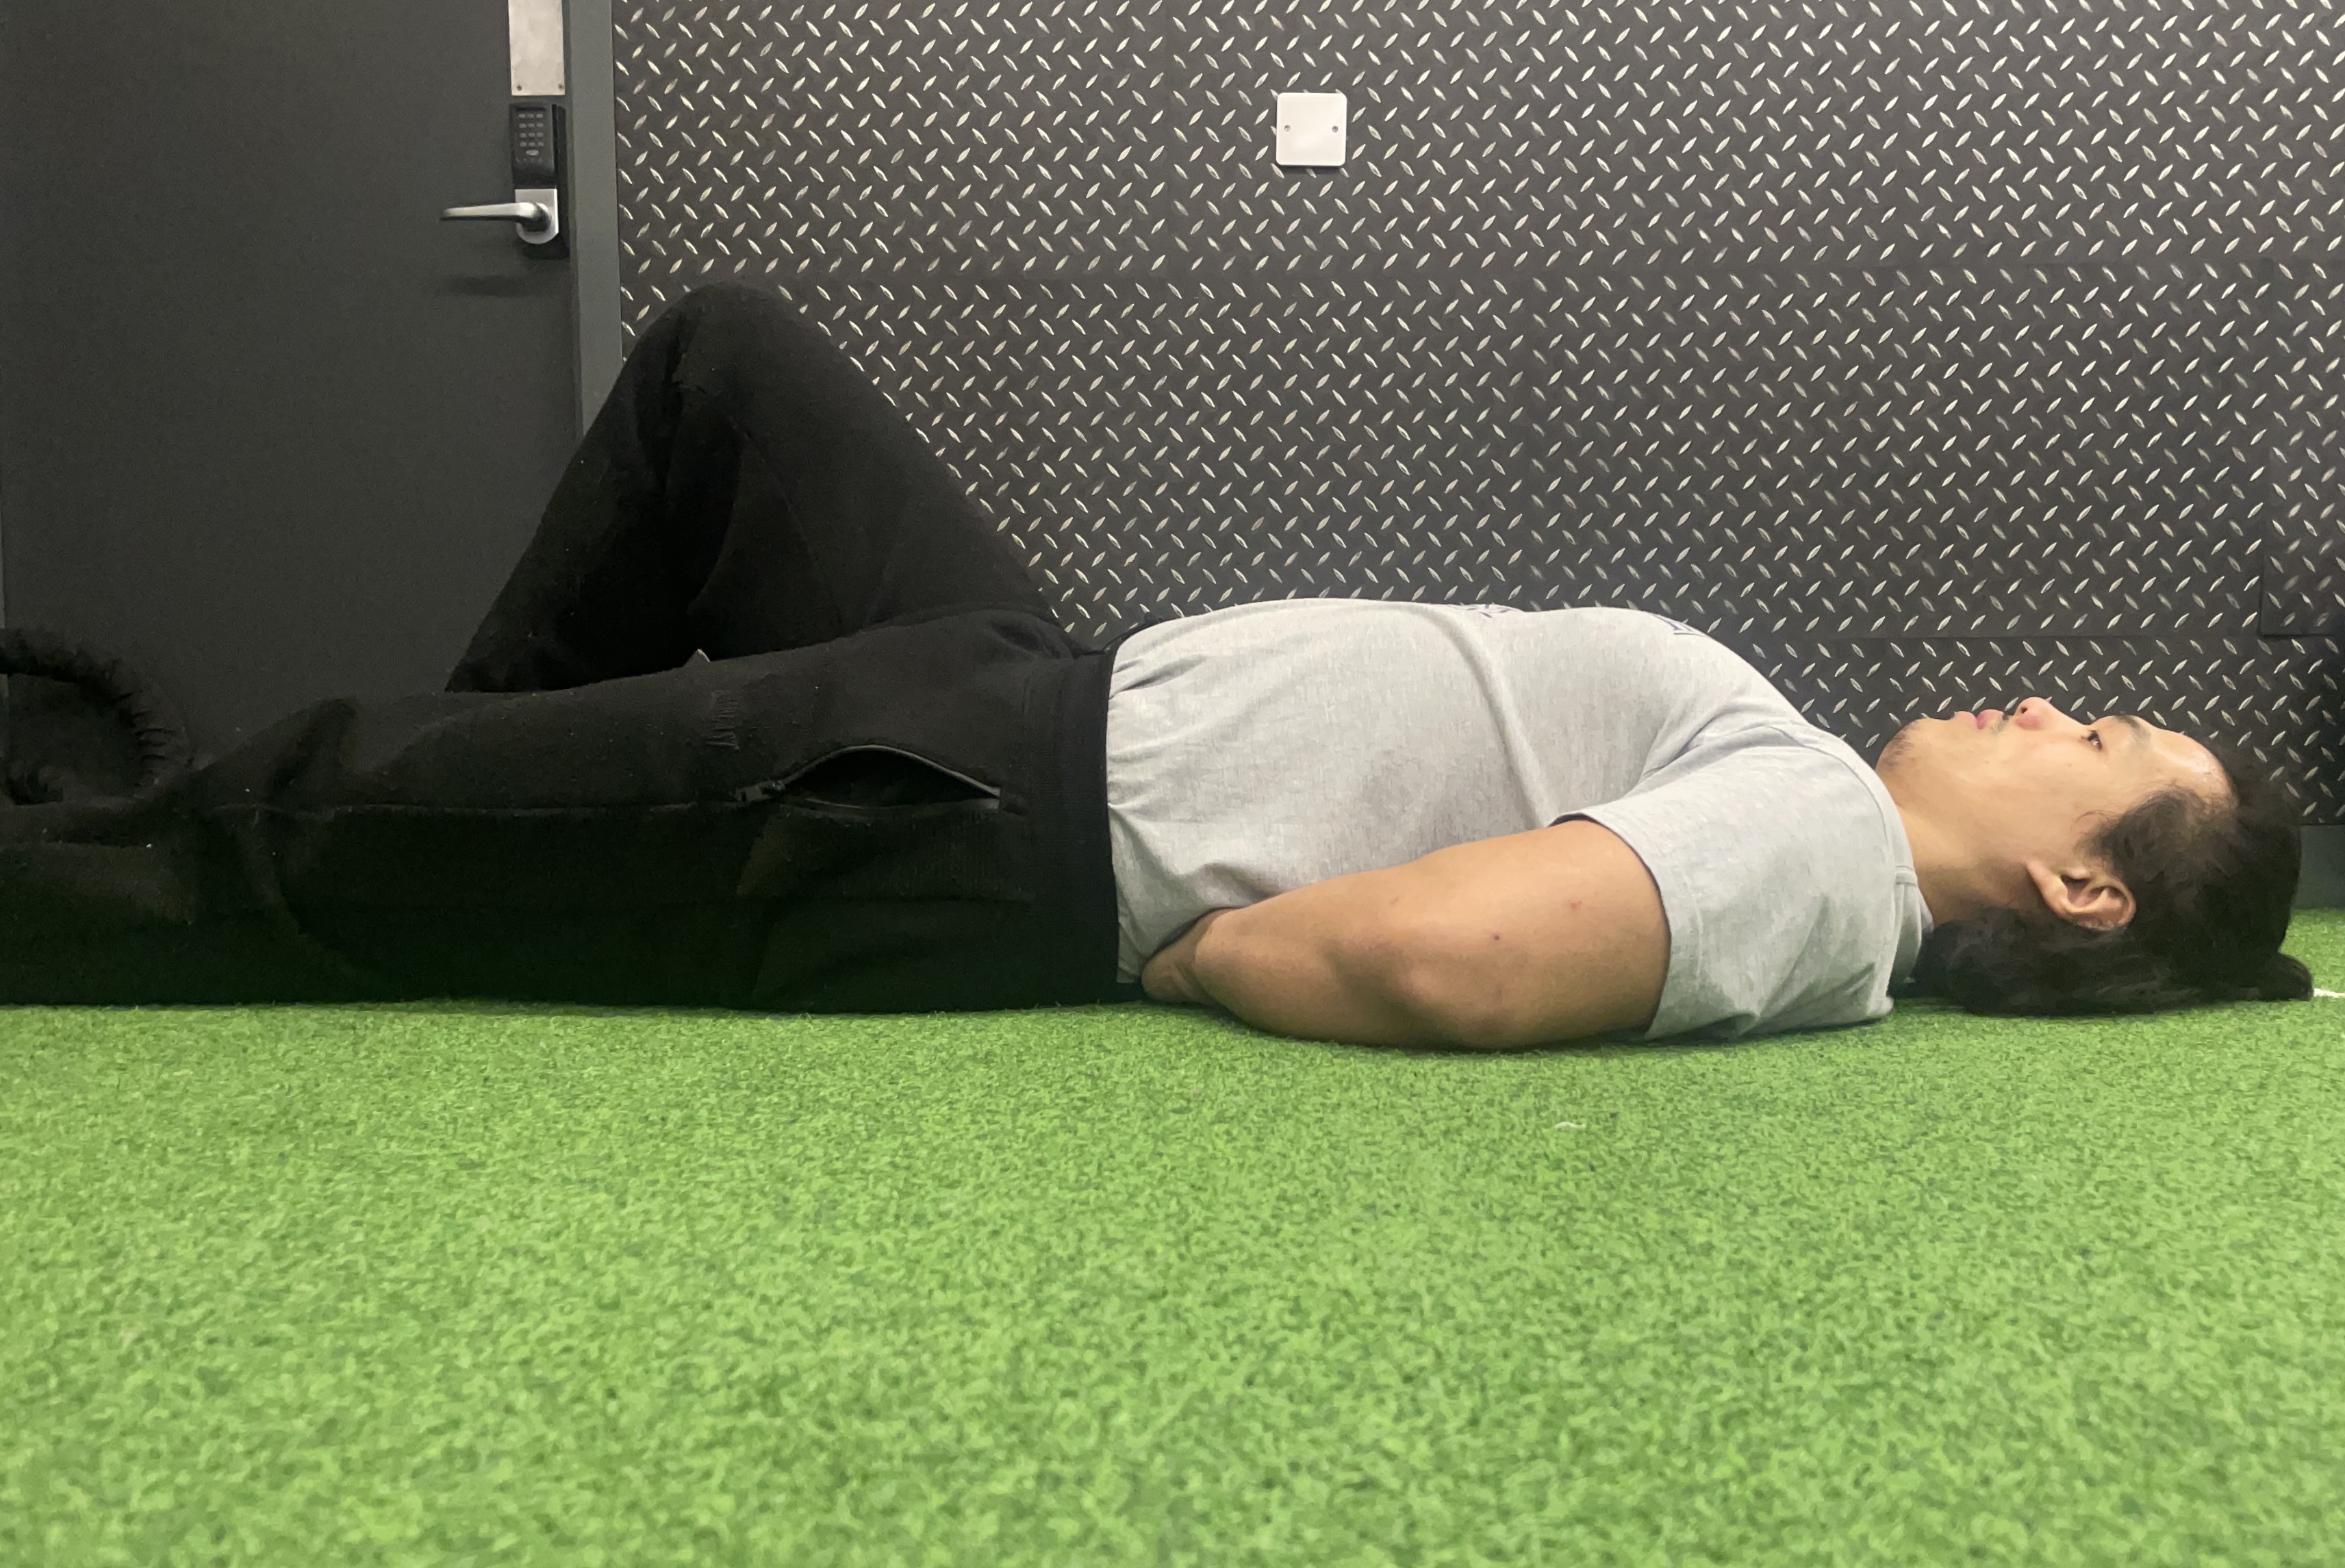
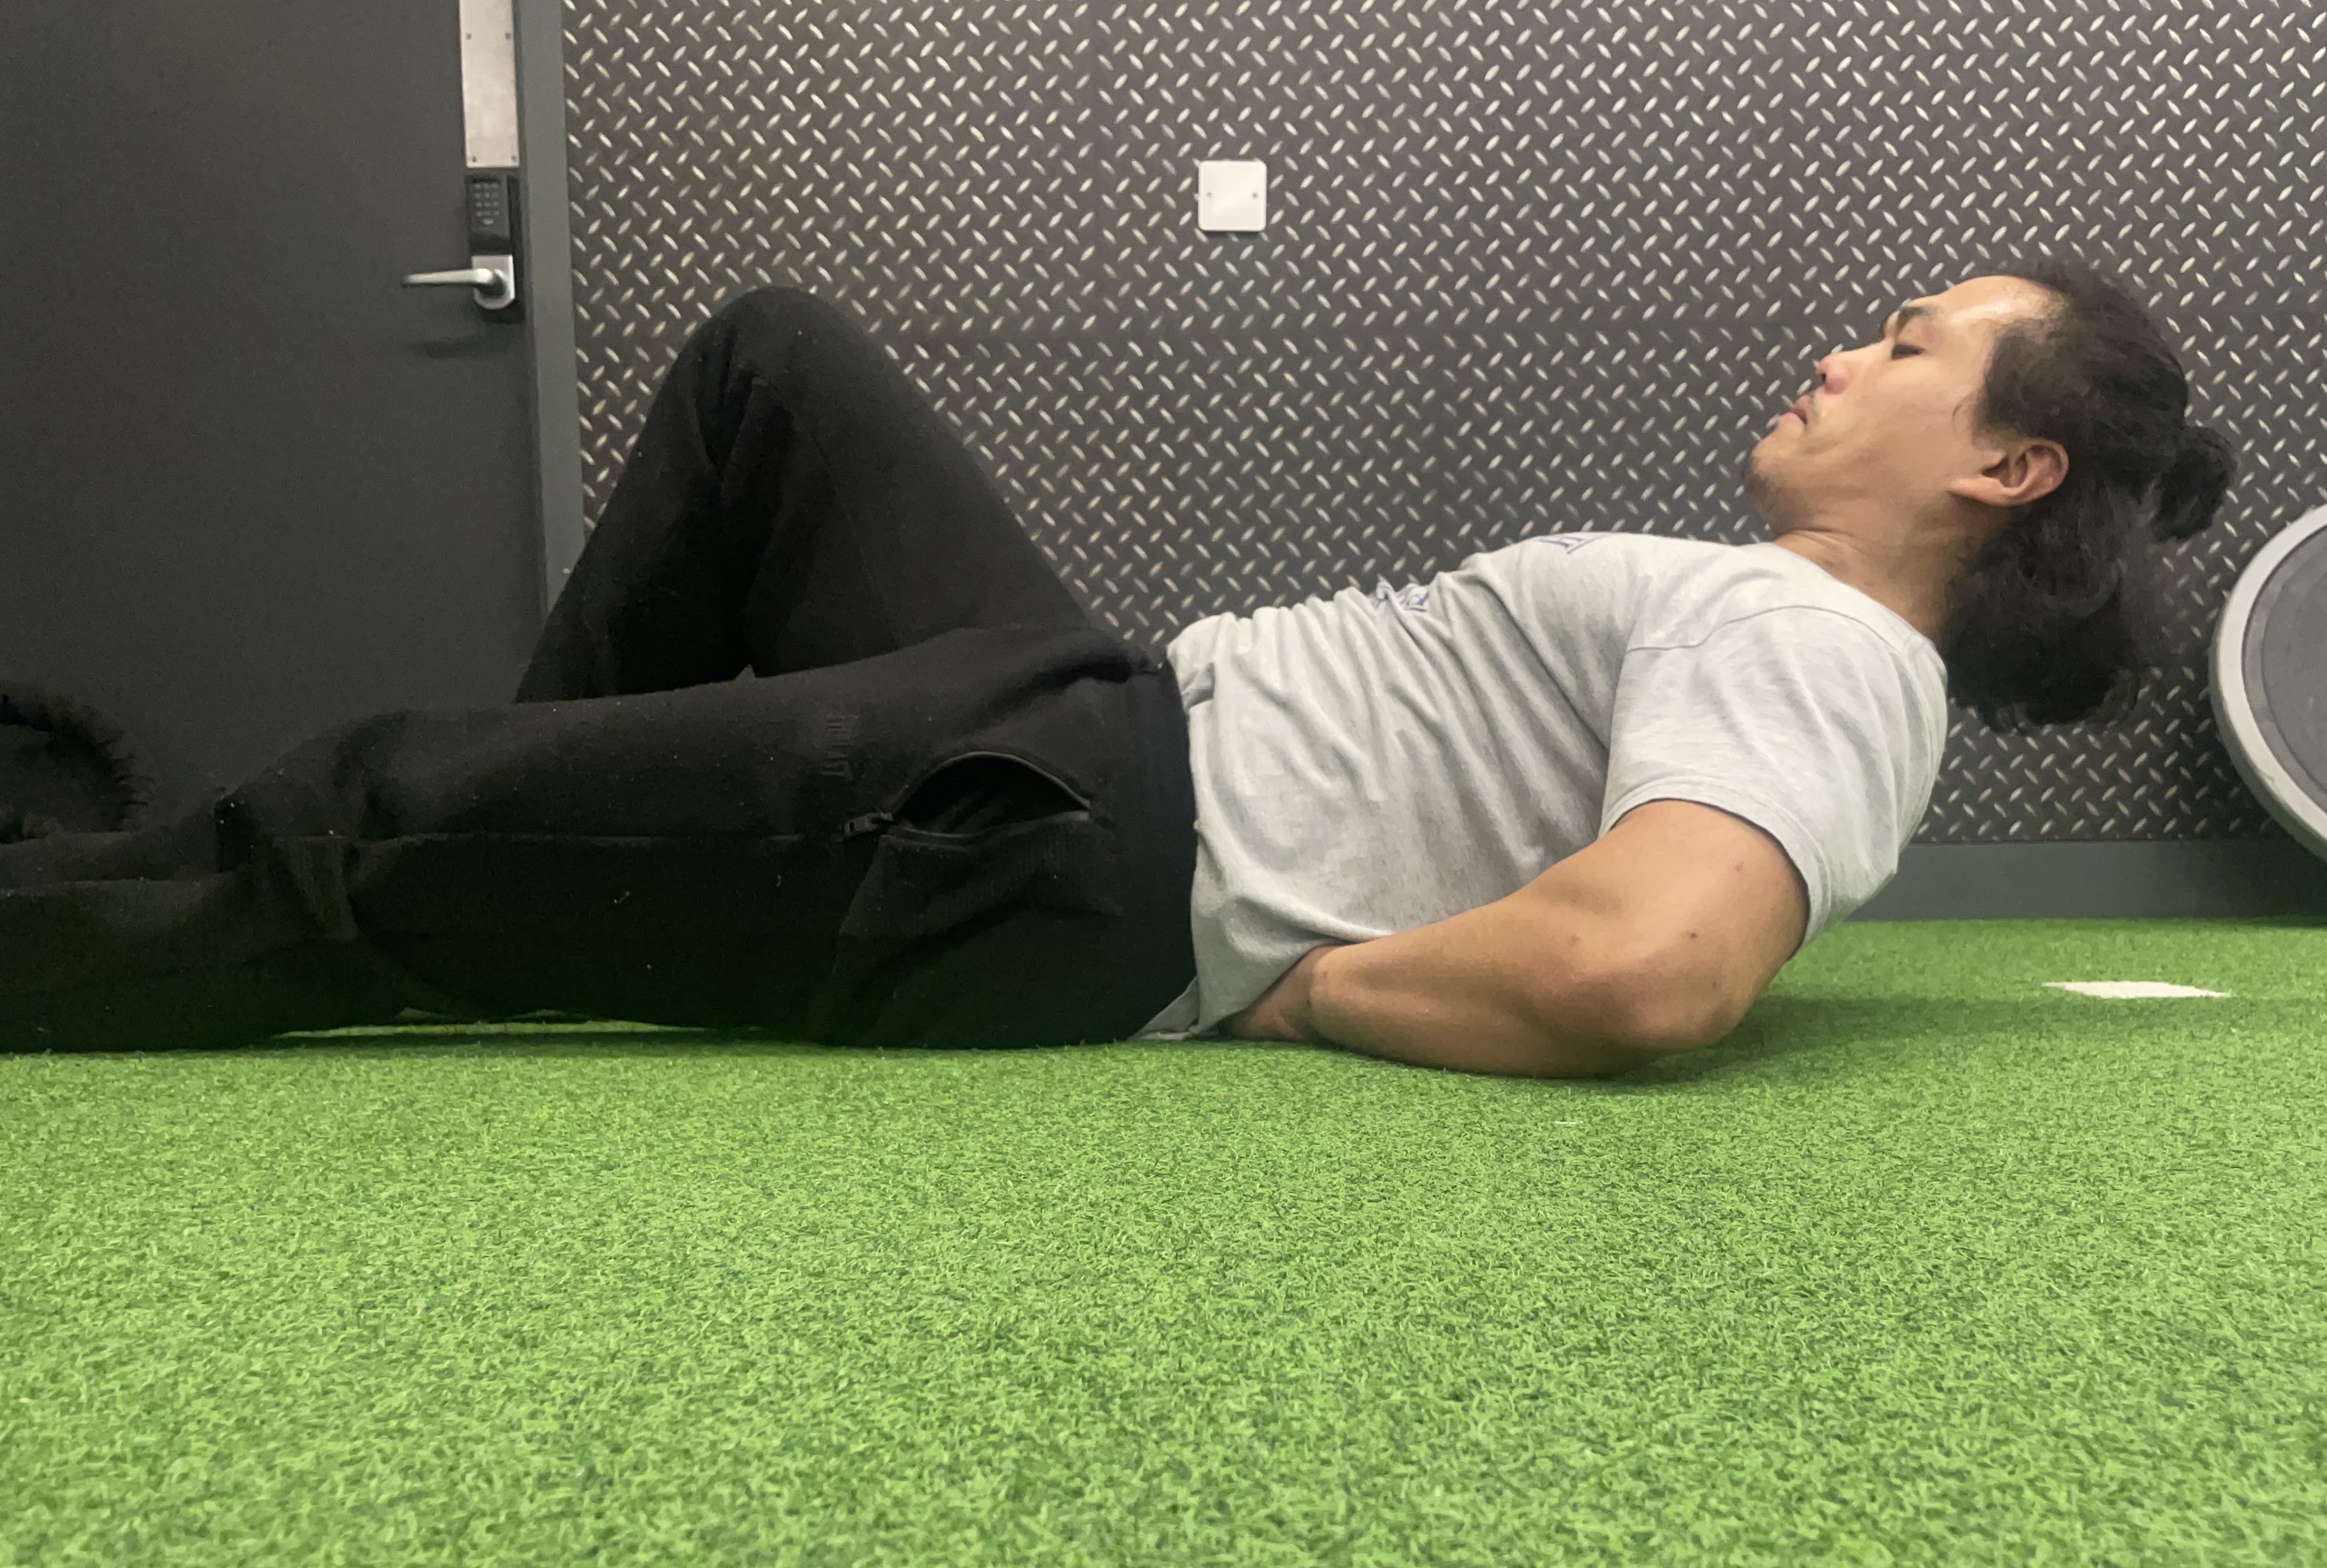
Step 1: Lie on your back with one leg bent and the other leg straight. Place your hands palm down, beneath your lower back to support the spine’s lower arch.
Step 2: Take a deep breath into your stomach, the side of your abs, obliques, should expand outward. Hold this breath
Step 3: Pick your head and shoulders off the ground and hold that position. The goal is to perform this curl-up without your spine breaking its natural curve. Take short shallow, rapid breaths to maintain pressure in your abdominals.
The Side Plank:
Build strong, durable obliques, which help stabilize your core and help transfer leg drive into the bar more efficiently. Like curl ups, aim for sets of 3-5 working from 10 seconds up to 1min.
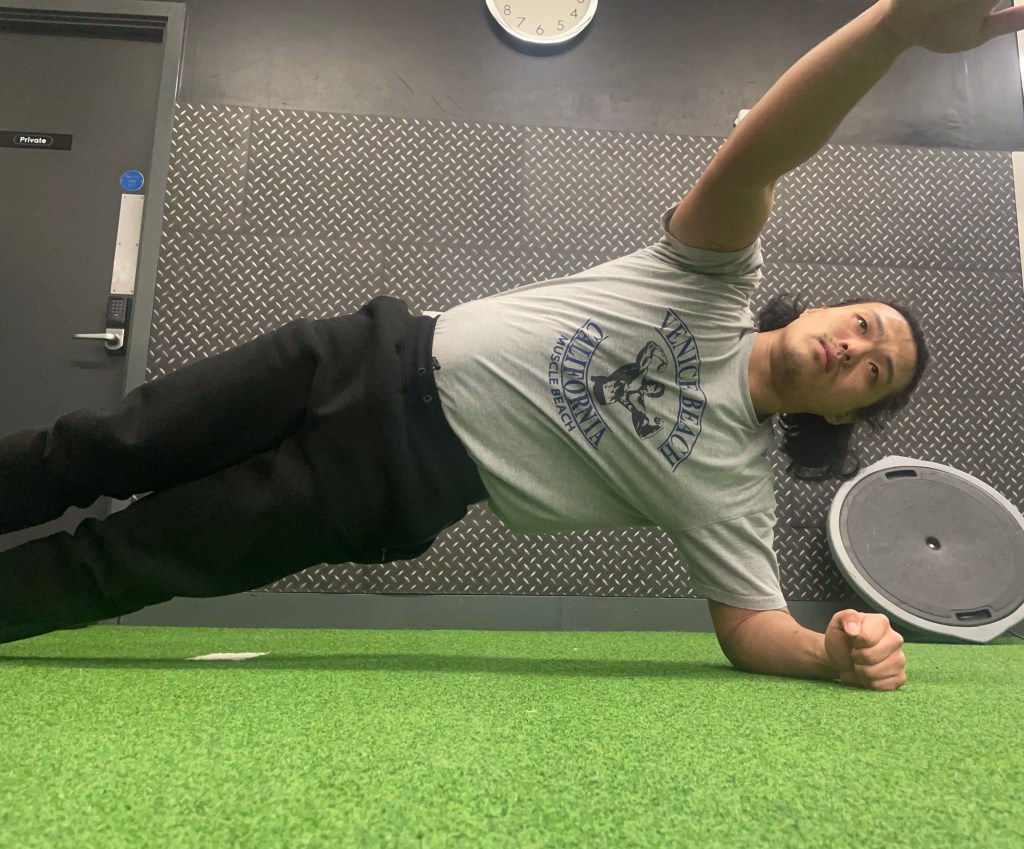
Step 1: Lie on your side with your legs straight and upper body supported through your elbow.
Step 2: Raise your hips so that only your feet and elbow support your body weight. Practise the same breathing as done in the curl up.
Bird Dog:
Trains you to engage your lower back as well as coordination between the arms and legs during the brace. Perform these as an isometric hold. 3–5 sets for 10 seconds to 1 min.
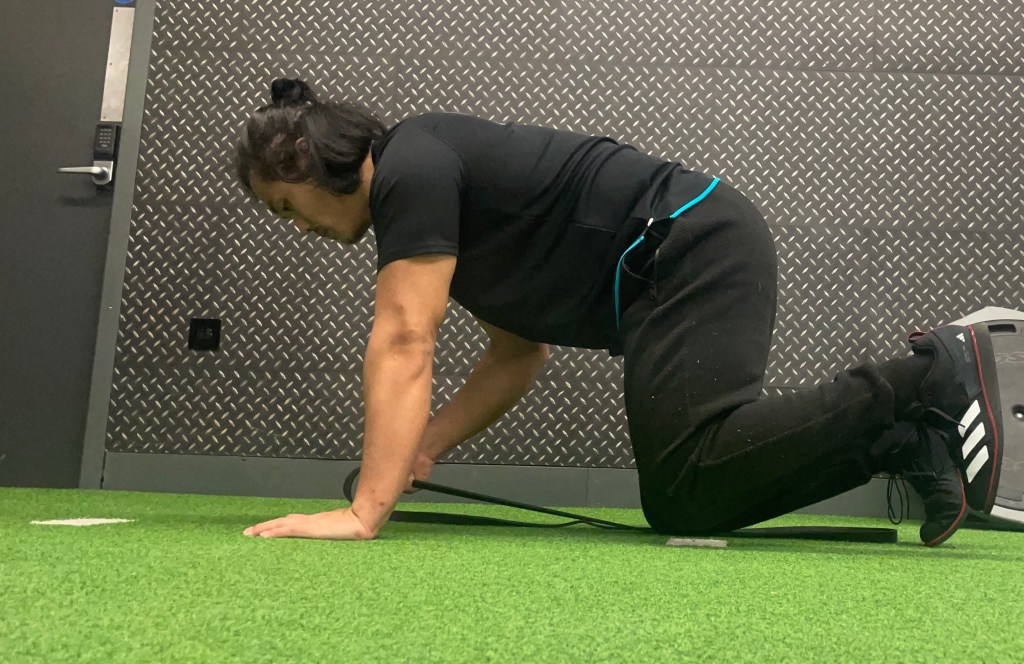
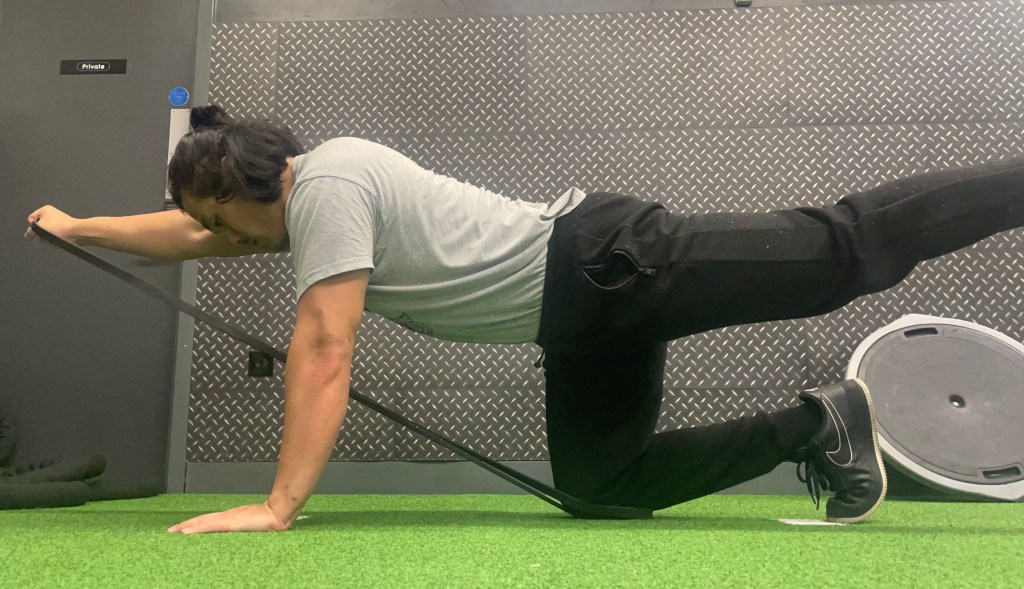
Step 1: Start on all fours, hands and knees, and hold a neutral spine position (upper back slightly curved, lower back slightly arched). Take a deep breath into the stomach.
Step 2: Without allowing any movement to occur in the spine, kick one of your legs straight back while simultaneously raising the opposite side arm in a fist until both are fully straightened. Again practise the same breathing as done before. To make it more difficult place a resistance band under one knee and hold it in the same side hand. Perform these as an isometric hold for 10 seconds to 1 min.
Part III – Building Horse Power: Glutes, Hamstrings and Quads
Glutes and Hamstrings strength is crucial for heavy squats, they work as antagonists to your quads with the glutes stabilizing the hips and the hamstrings stabilizing the knees. When performing any leg exercise there are two key factors I want you to pay close attention to.
- Are your feet making three points of contact (Big Toe knuckle, Pinky Toe knuckle, Heel) at all times with equal pressure in all three points?
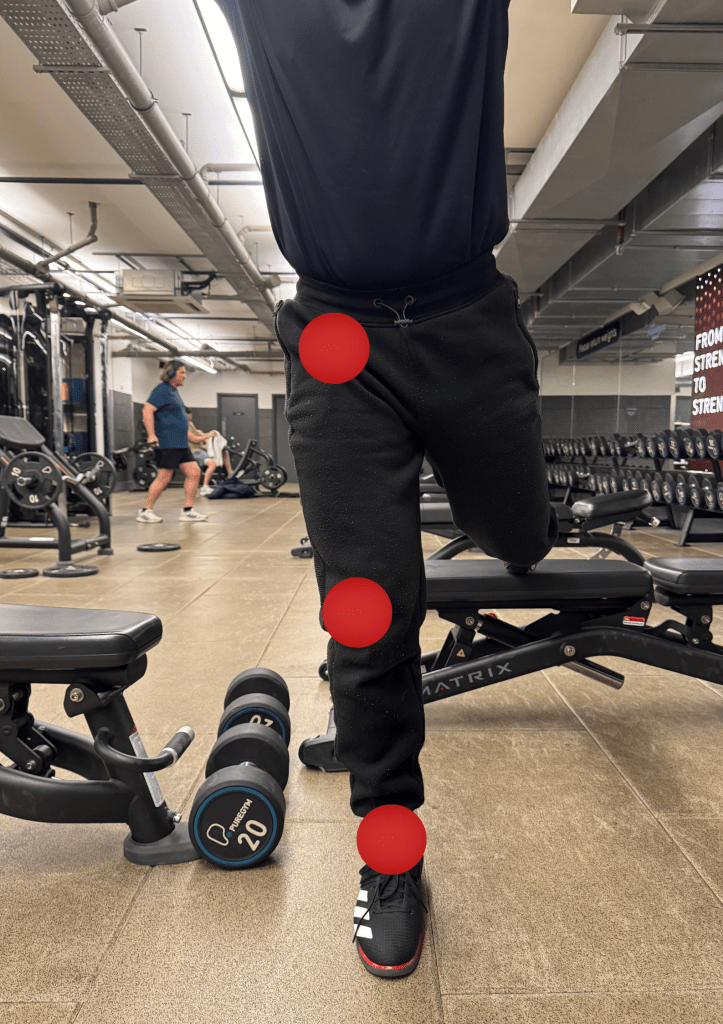
- Are your toes, ankles, knees and hips inline with one another? If you drew train tracks coming from your hips would your toes, ankles, knees and hips follow these tracks?
If you notice your foot and lower body positioning shift or they seem to sit naturally out of line, you must consciously correct these before progressing with weight as these misalignments can come back as injuries or power leakage later down the line. There are hundreds of different ways to train the glutes and hammies but here are a few of my favorites. I recommend doing these as an accessory after your squats or on a separate day.
Best Glute Exercise
Glute bridge – For Strong glutes which stabilize your hips at the bottom position and extend your hips at the top.
Single leg variations are also great for working out muscle imbalances
Step 1: Find a platform which is the same height/length as your femur. Rest your shoulder blades on the edge.
Step 2: Place your feet hip width apart, with your knees at 90 degrees
Step 3: Deep breath, brace your core, Drive your hips up till your spine and femurs reach parallel. If they aren’t find a platform which allows you to be parallel with the ground
Best Posterior Chain Exercise
Romanian DeadLift – For hamstrings, glutes and low back, strong antagonist muscles stabilize the knee and hip joints, allowing your quads to contract efficiently.
Step 1: Bar should start and end over your midfoot
Step 2: Brace your core
Step 3: Hip move back not down, shoulders come forward, knees stay stacked over the ankles
Step 4: Pause just before the weight touches the ground. As you come up think “push the ground away from you”,
Best Single Leg Isolation Exercise
Bulgarian split – prevents muscle imbalances, good for overall hypertrophy. Aim for 3 sets of 8-12 gradually adding weight.
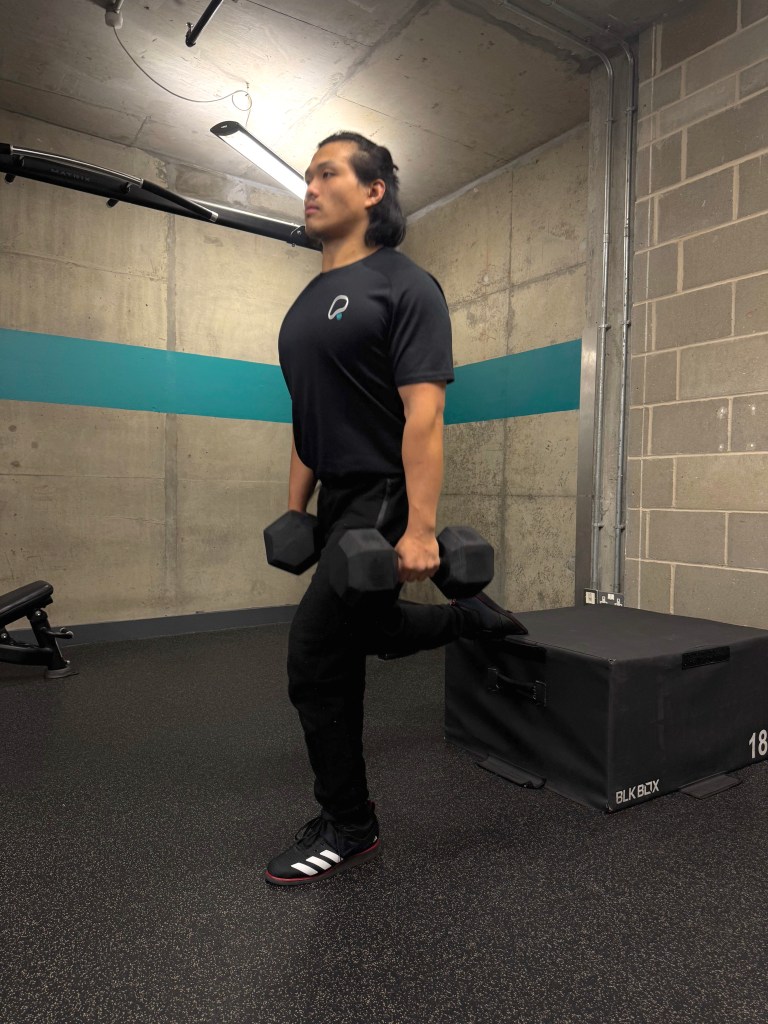
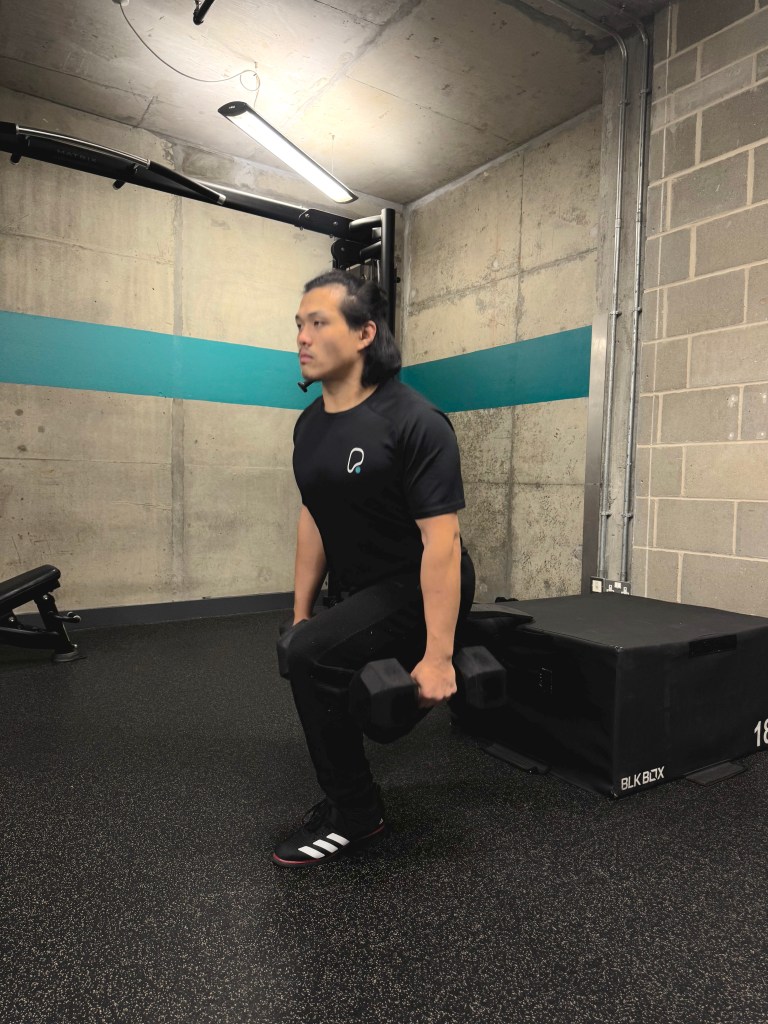
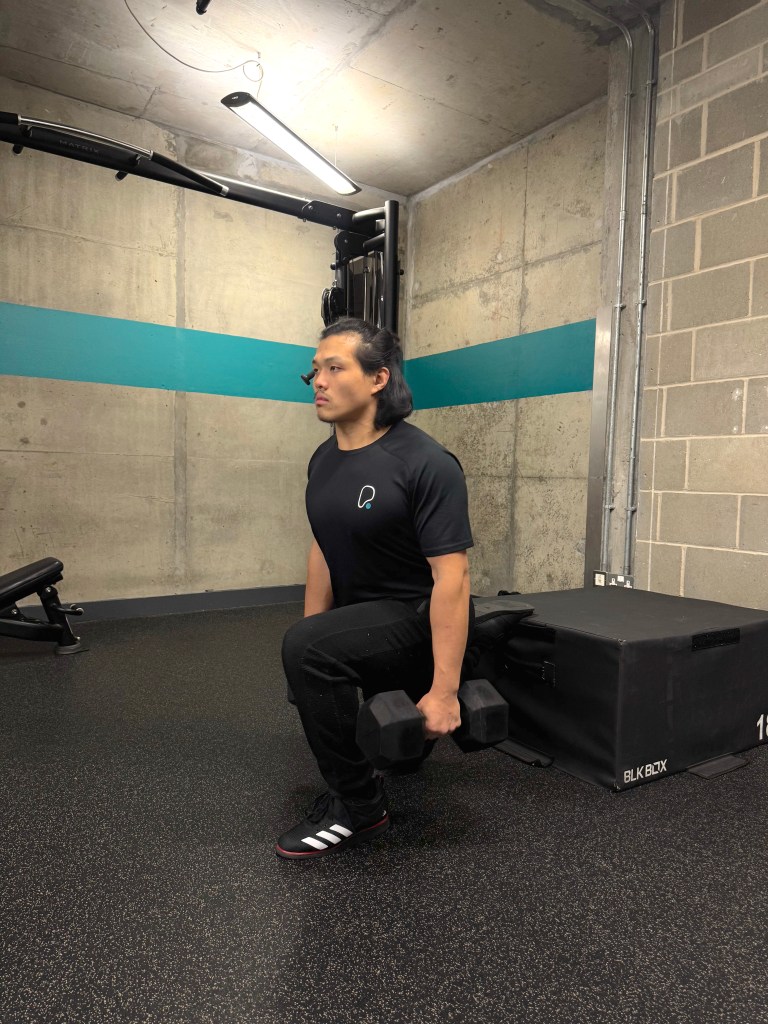
Step 1: Find a platform no higher than the length of your femur, this will ensure you can get a full range of motion without unnecessary stress on your hip flexor or ankle.
Step 2: Sit on the edge of the platform and extend your legs. This will help you find your ideal foot positioning. Too far forward and you’ll be using more of your rear leg. Too close and you’re just using your quads and not your glutes for hamstrings.
Step 3: Brace your core and drop your rear knee to the ground. Drive back up, think about pushing the ground away from you.
Best Hamstring exercise
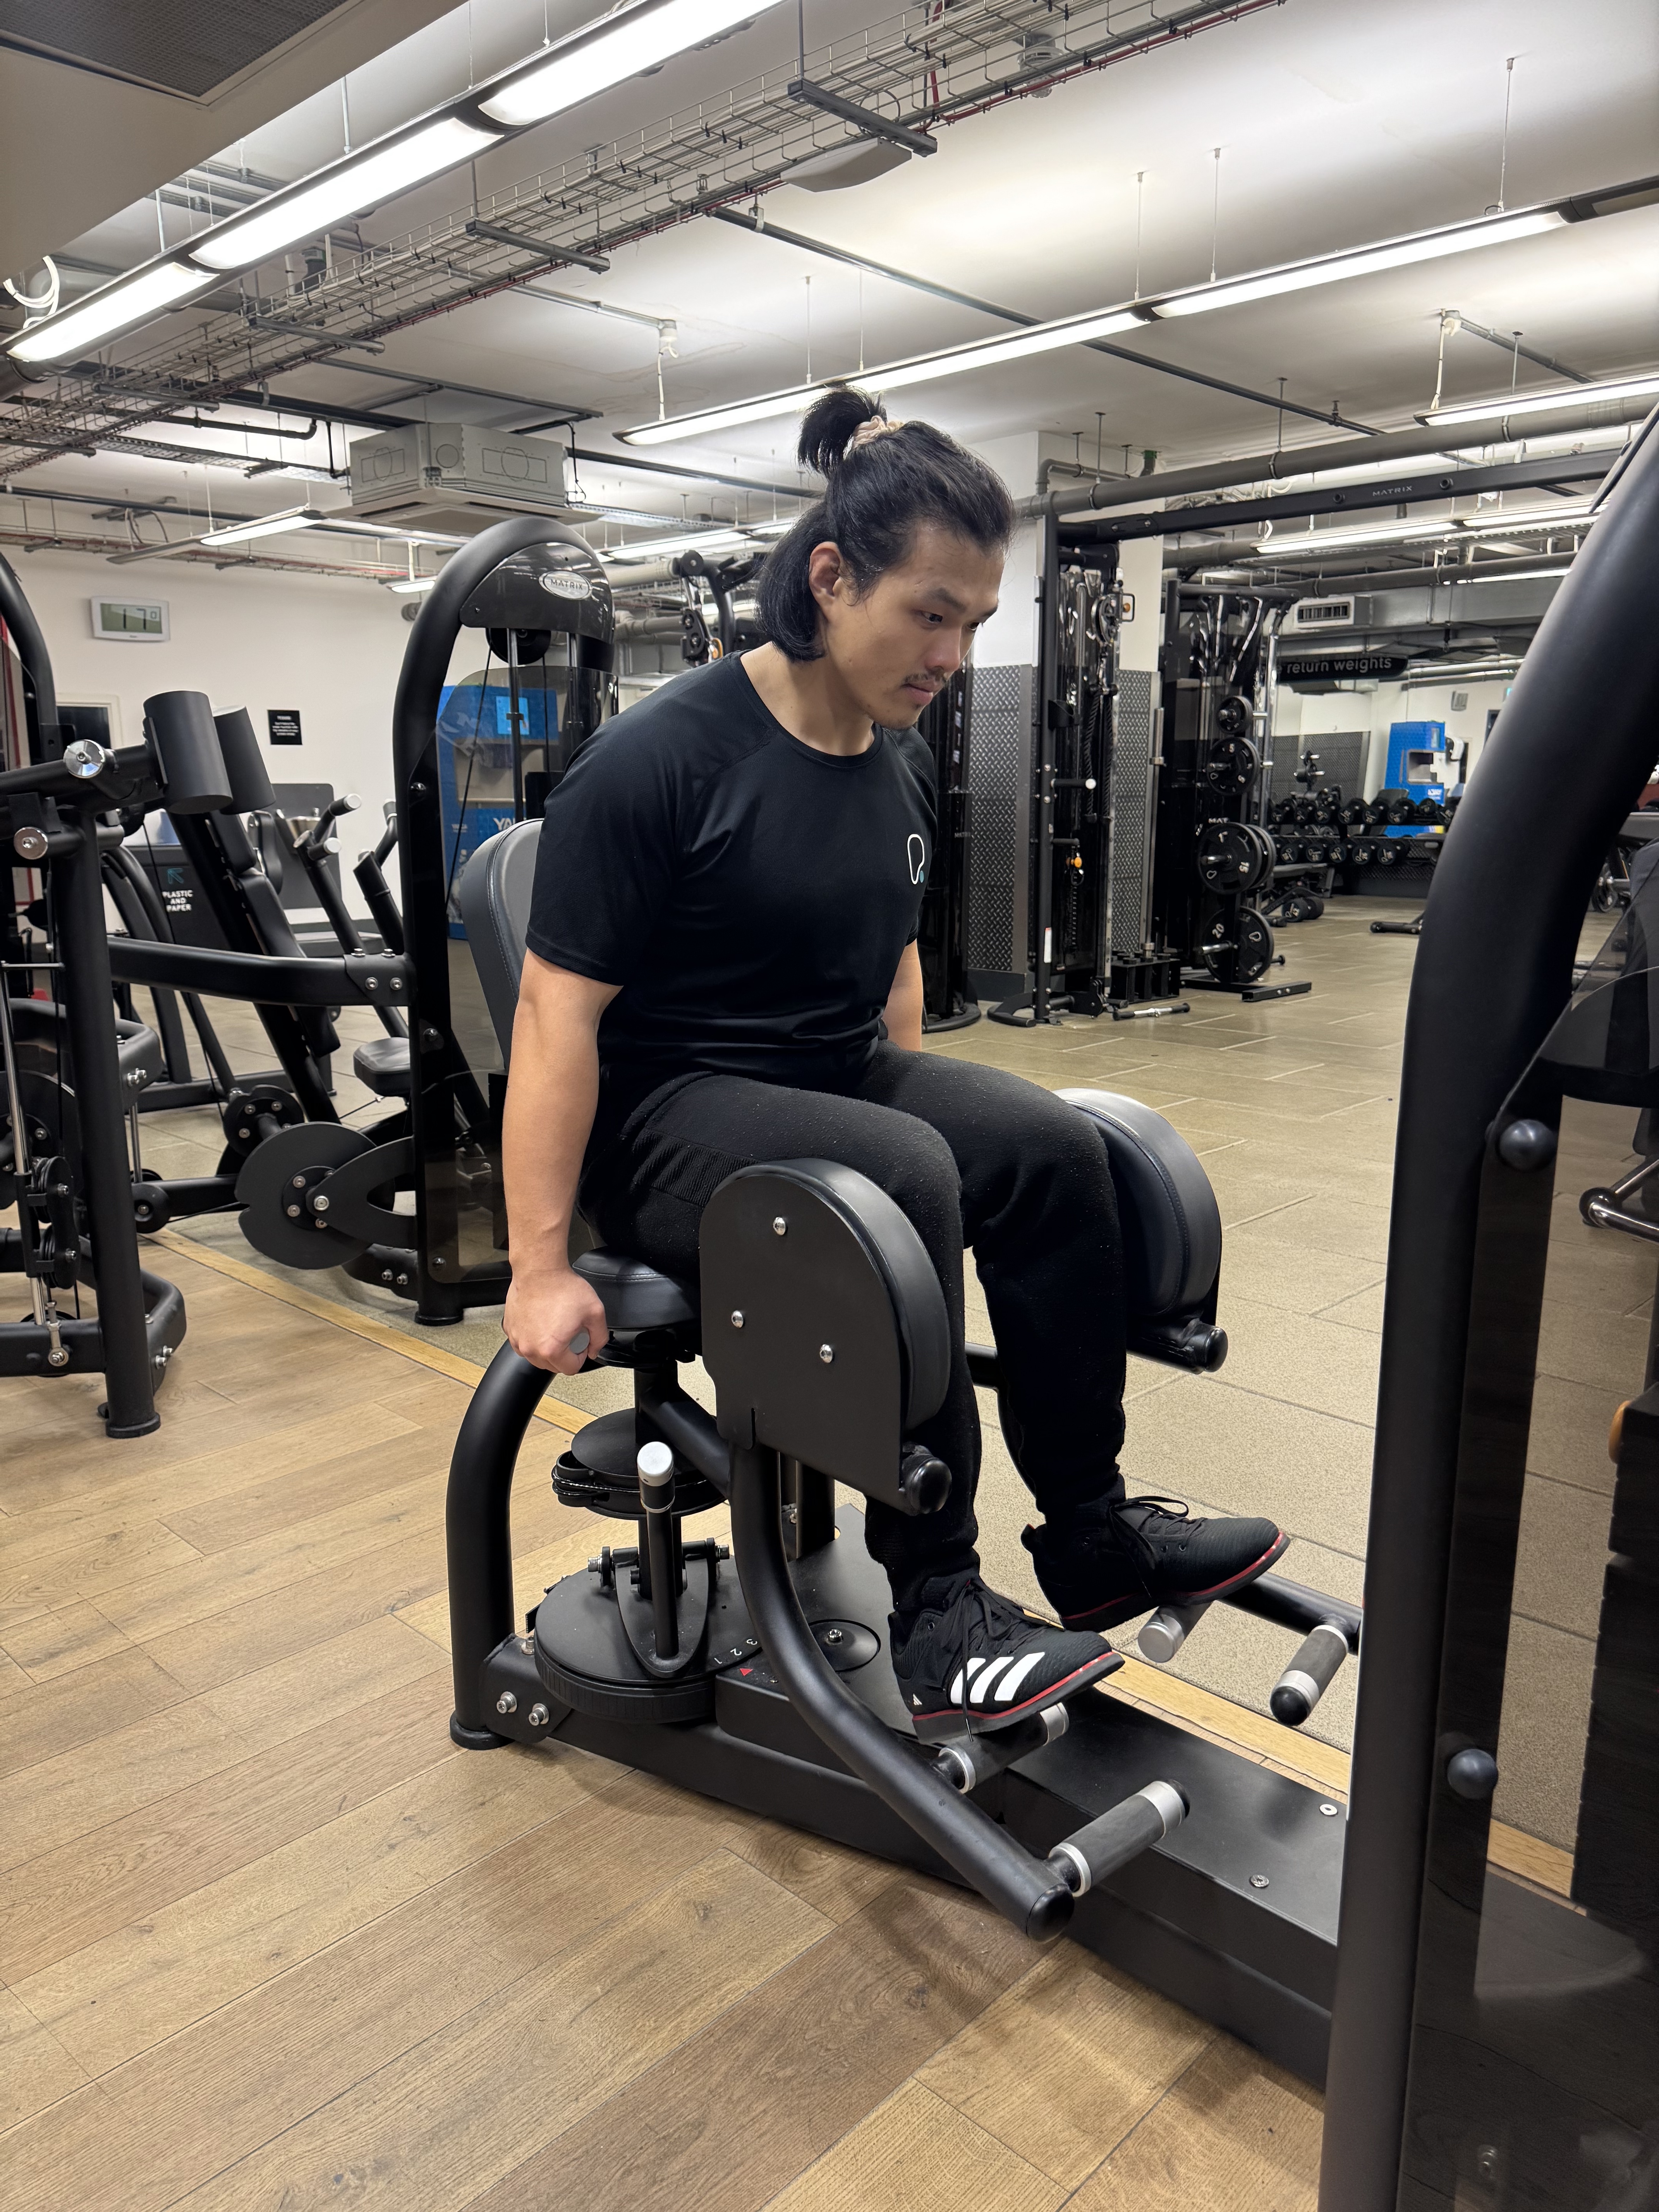
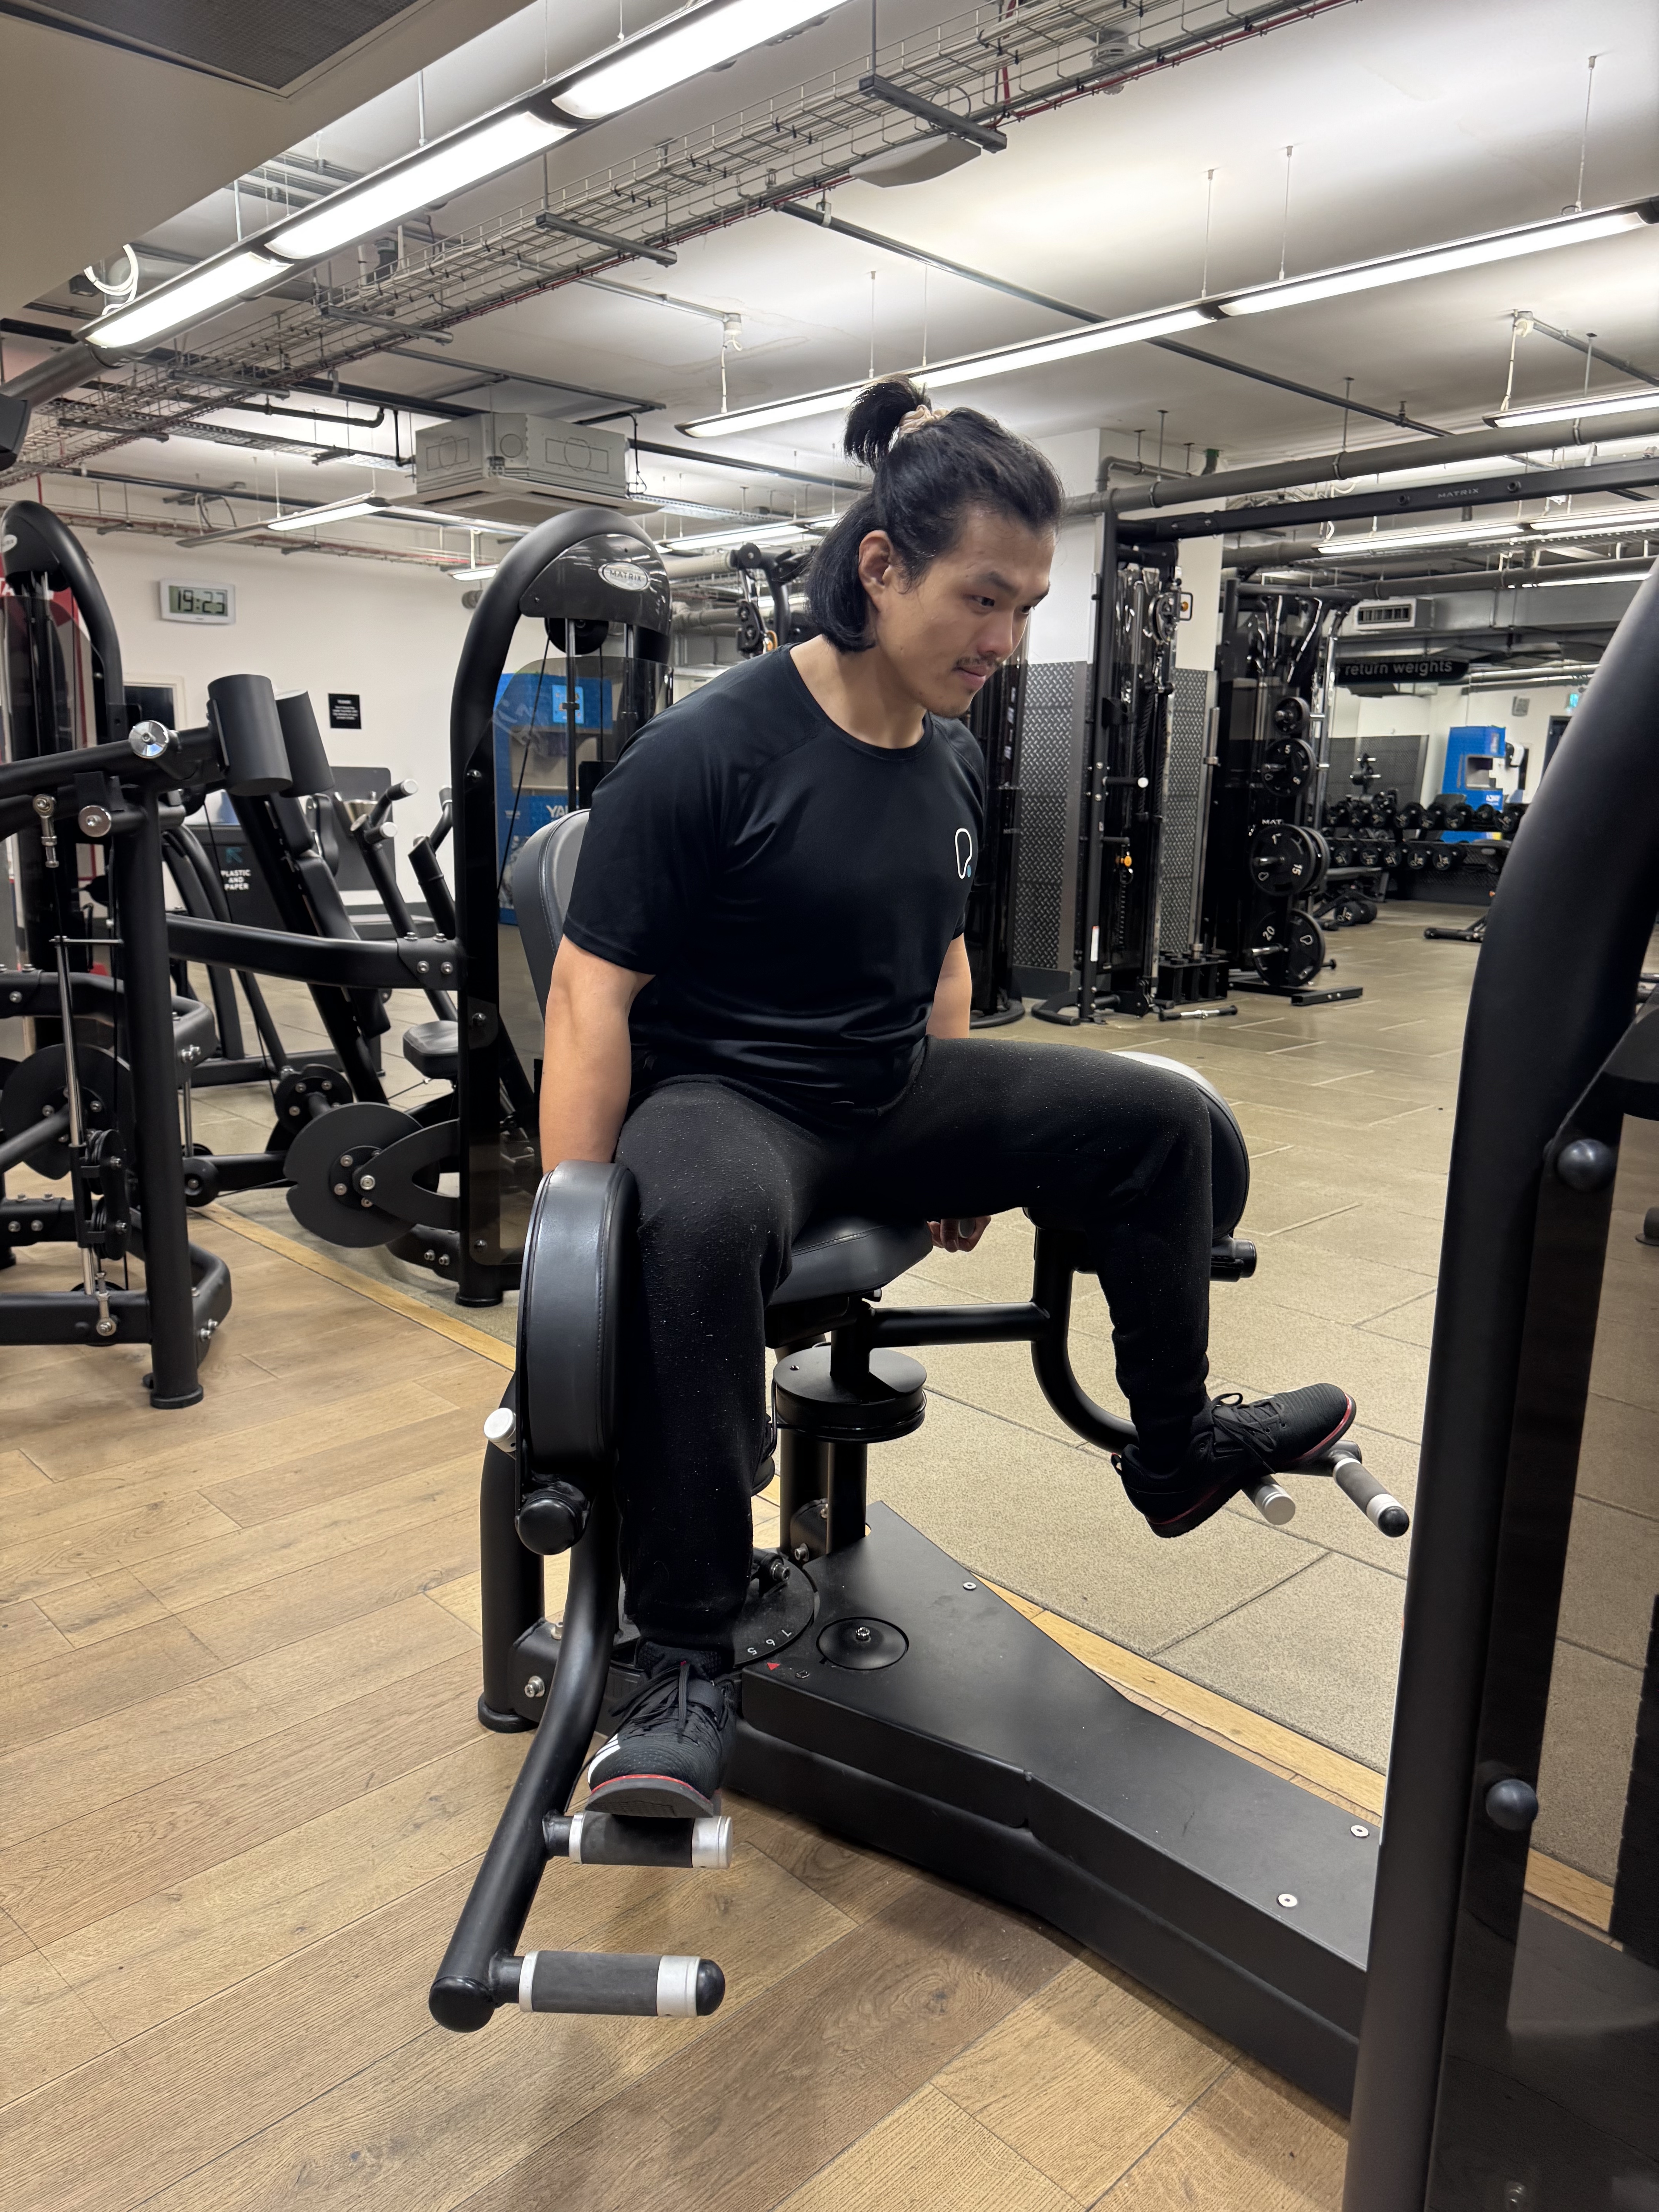
Hamstring Curls – Build Bigger hamstrings, stronger antagonist muscle create more controlled decent
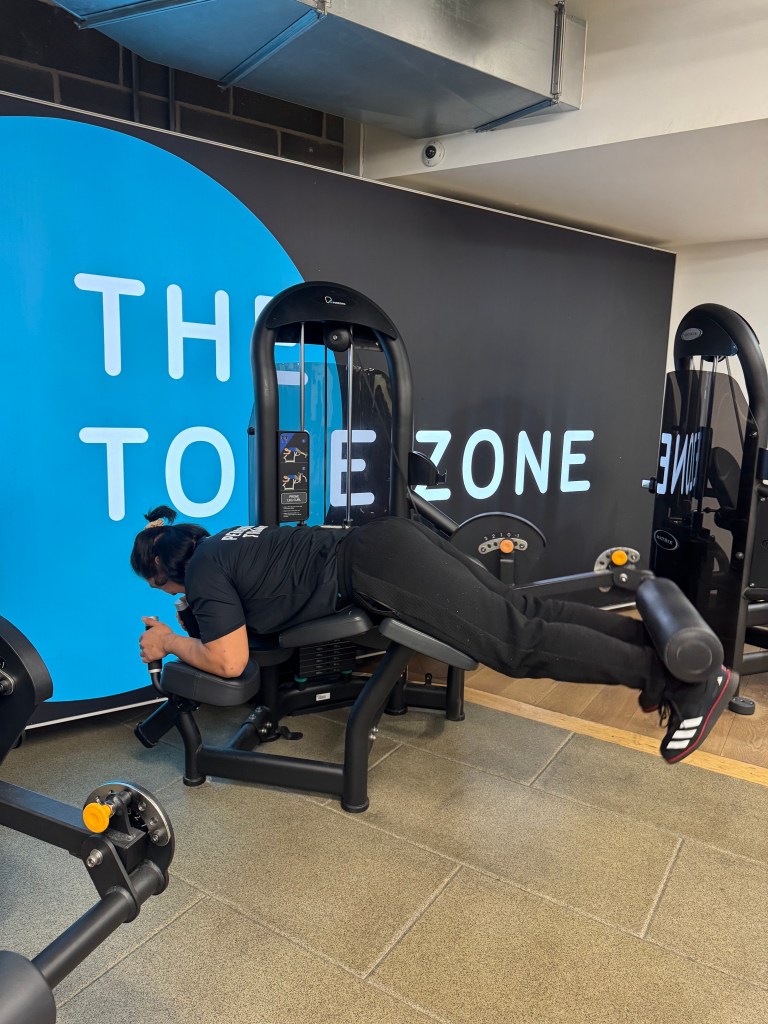
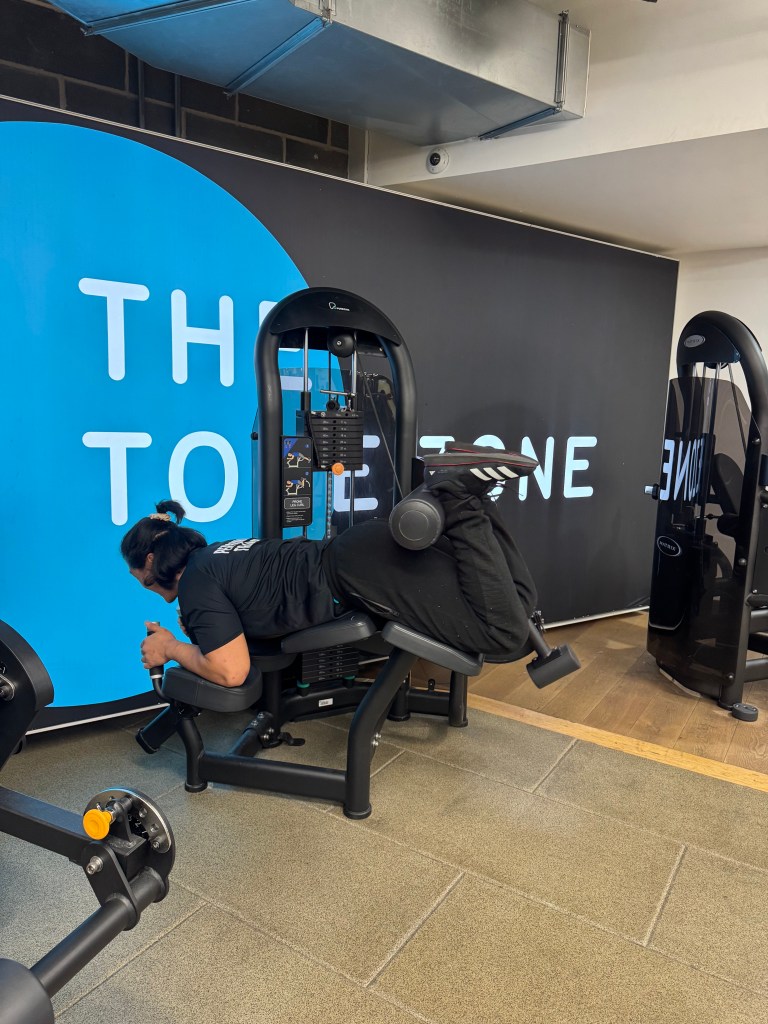
I recommend using machines, 3 sets of 8-12 reps or 2 sets of AMRAPs as an accessory
Best Hip Stabiliser exercises
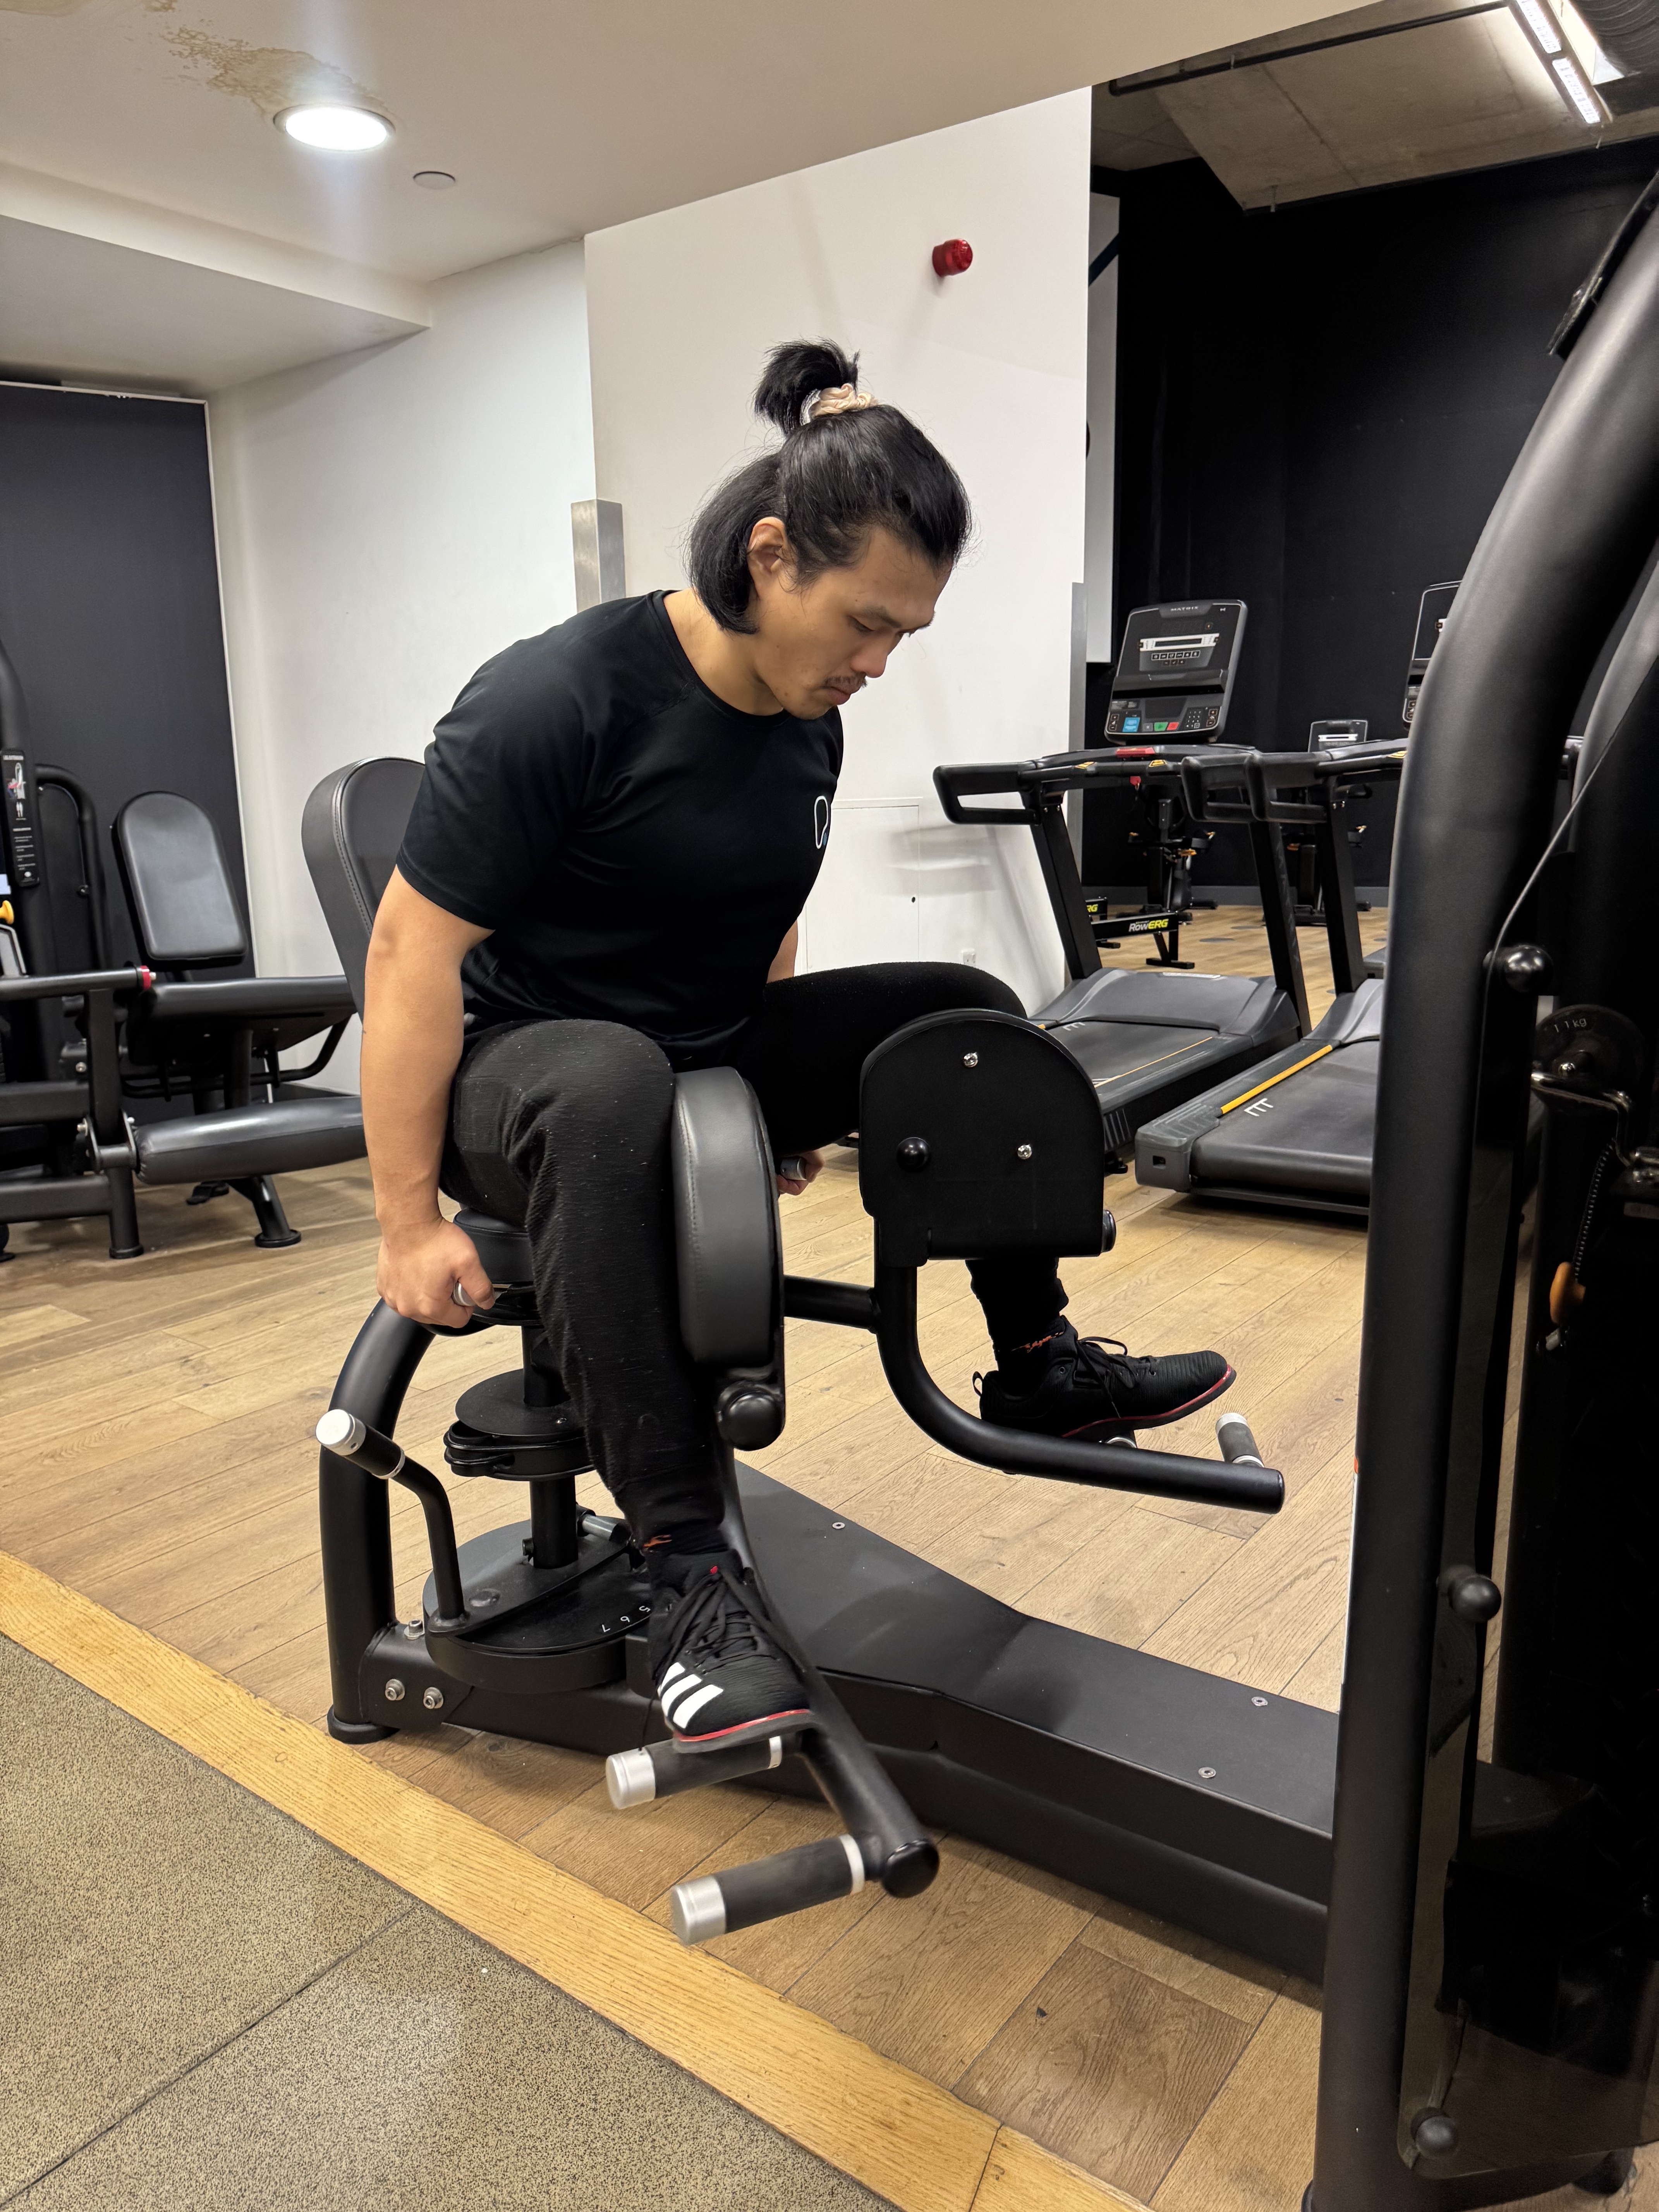
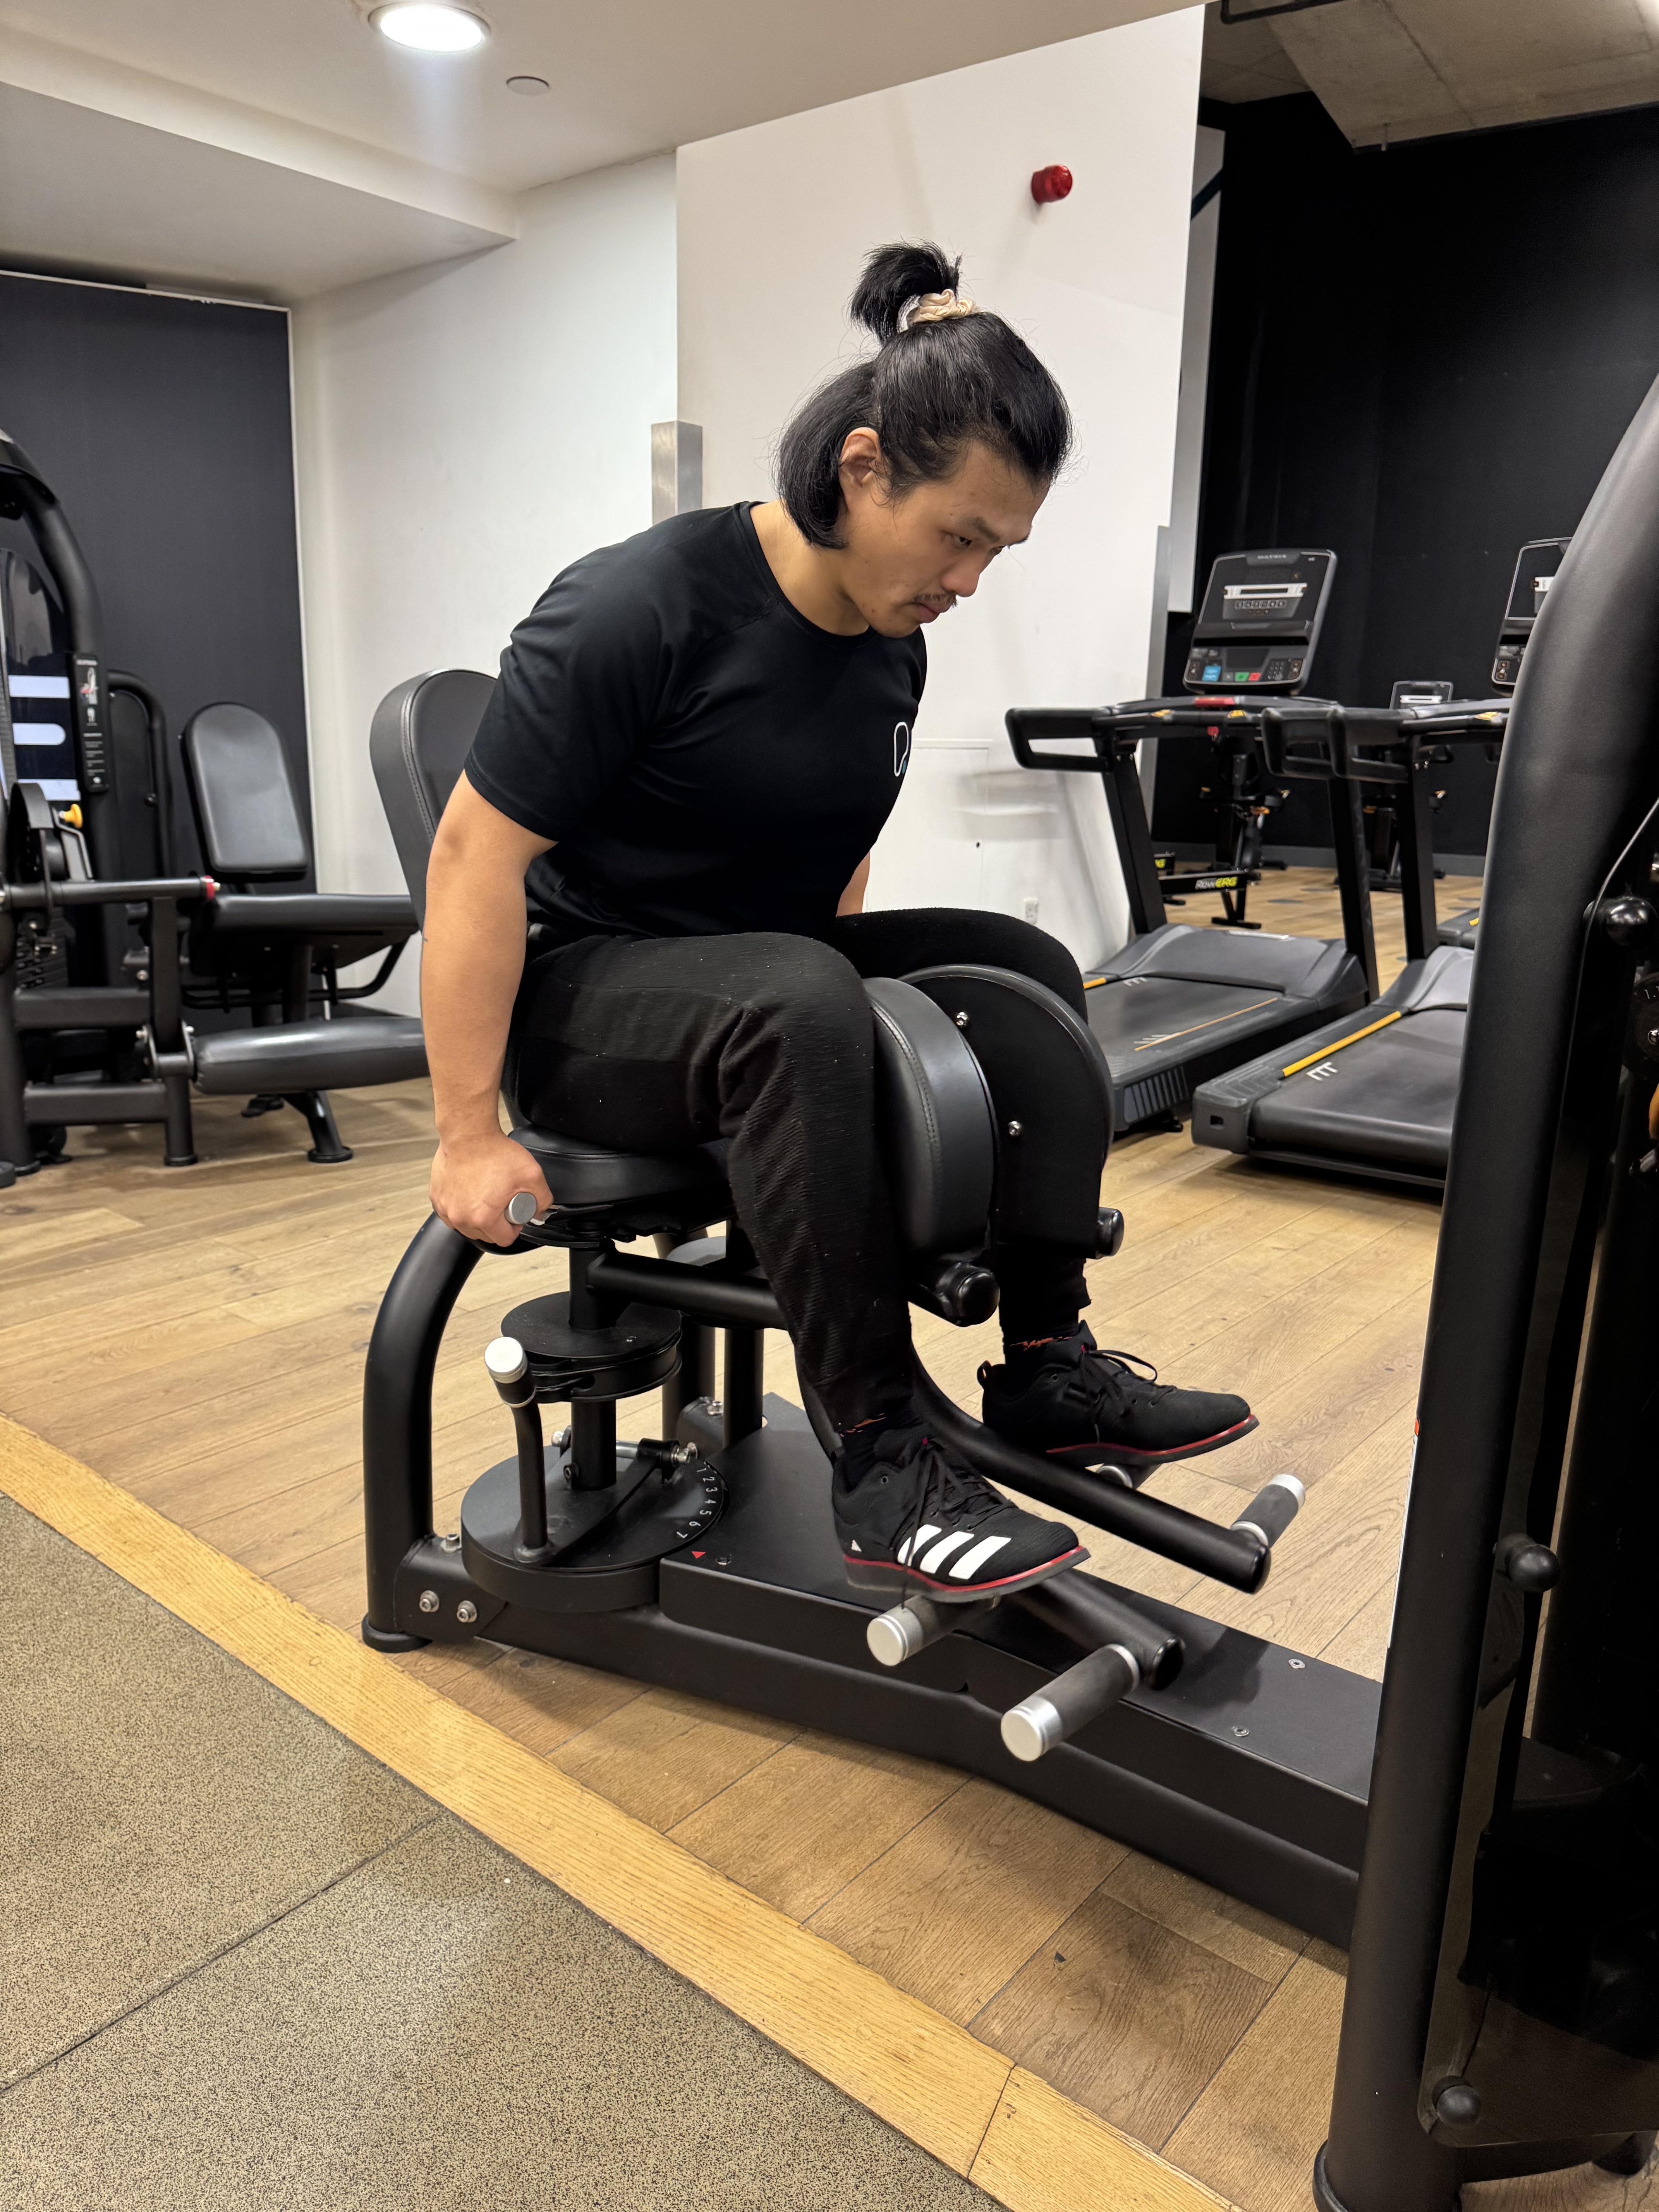
Hip adduction abduction – Strengthen hip flexors to prevent knee buckling or flaring during heavy sets, preventing knee injuries and unnecessary stress on the low back, 3 sets of 8-12 reps or 2 sets of AMRAP. I recommend holding the contraction for an isometric as well as leading forward on the machine with a braced core to simulate the position your torso would be in a squat.
Best Quad Hypertrophy Exercise
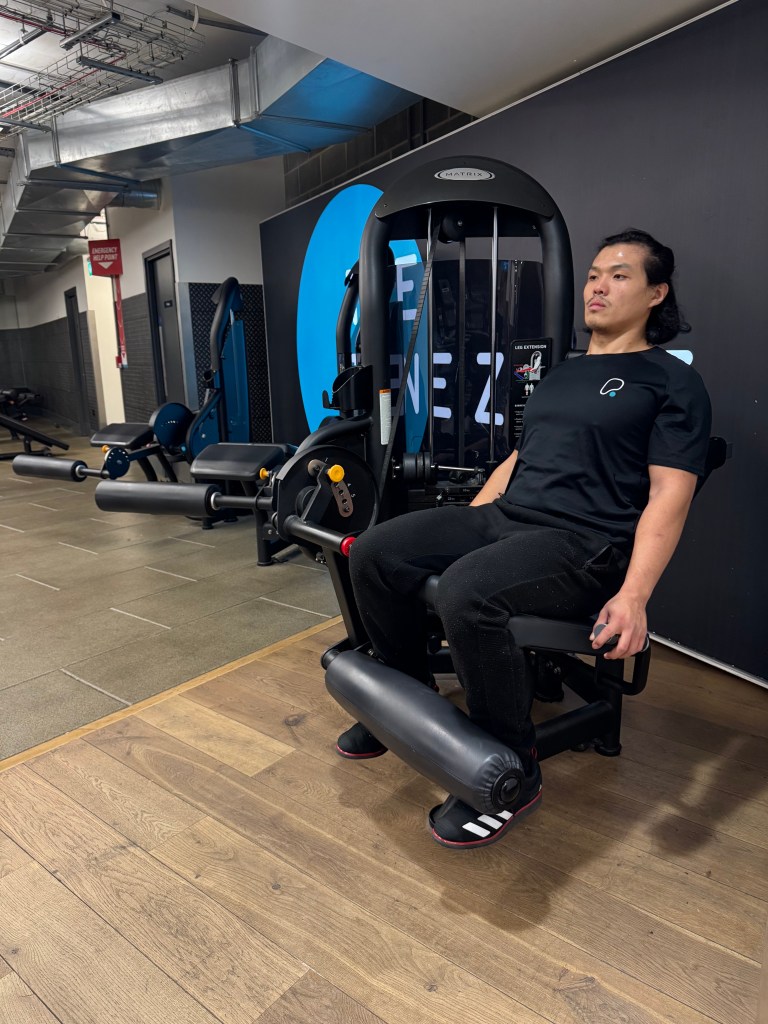
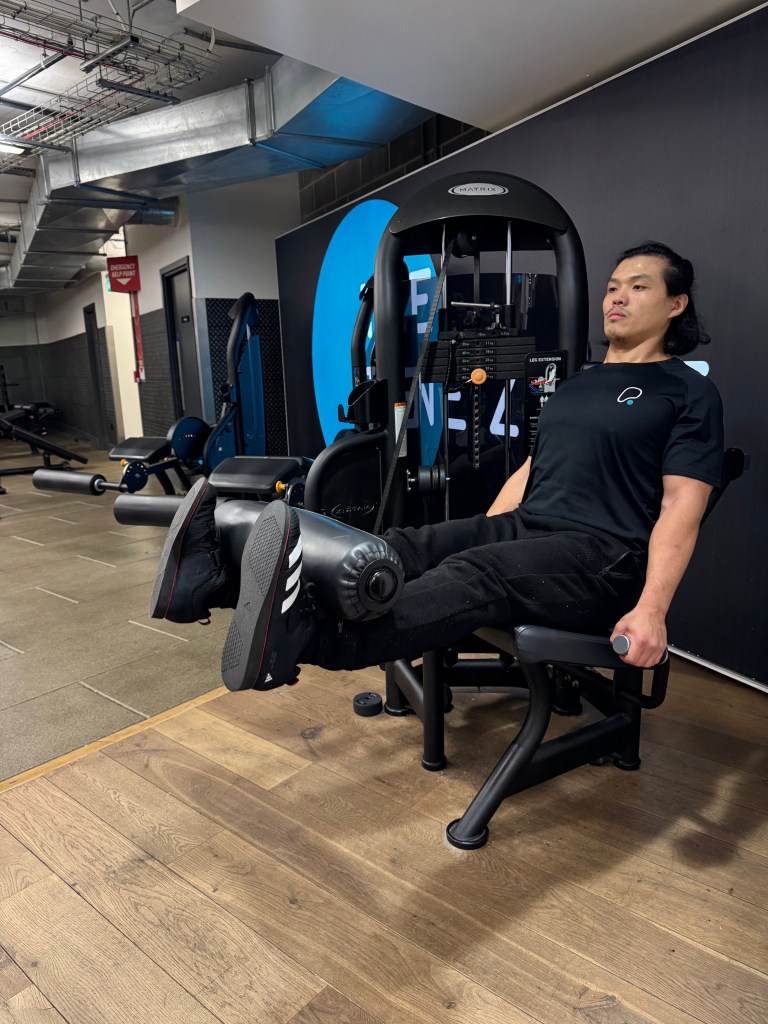
Leg extensions – More volume = more muscle, more muscle = more strength potential. For beginners I recommend high sets and high reps, 3-6 sets of 12 – 20 reps. Use drop sets, forced reps, partials. Anything that will help build quad muscle will cross over to strength gains later down the line as well as improve tendon strength and knee health.
Best Squat ROM Exercise
Goblet squats – By having the weight in front of you it will be easier for you to sit your hips further back without losing balance. This is a great way for you to get used to and get comfortable in the upright position you will find yourself squatting with a high bar.
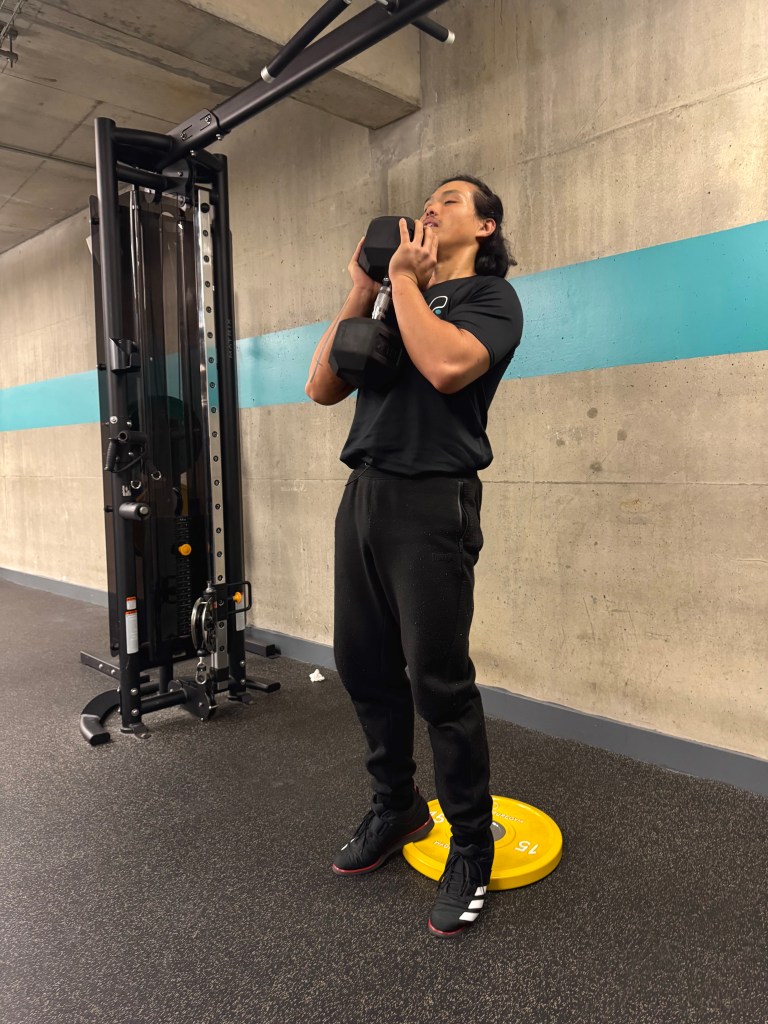
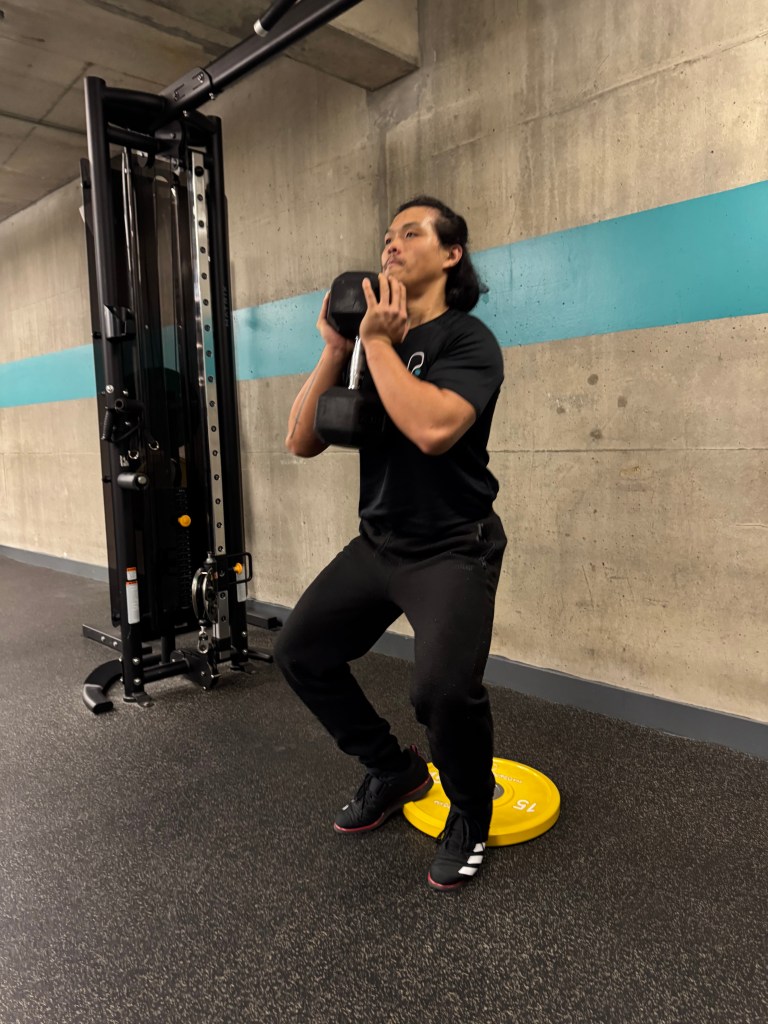
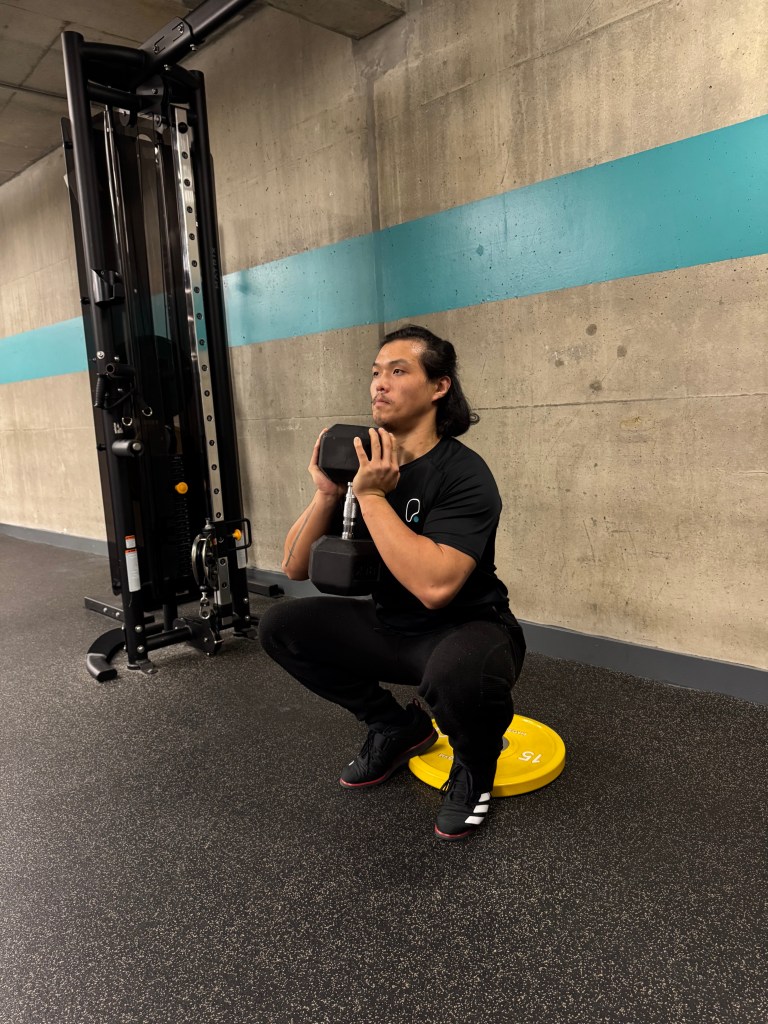
Step 1: Feet hip width apart, hold the dumbbell or kettlebell in both hands.
Step 2: With your chest upright, lower your hips whilst driving your knees over your toes. Use the weight as a counter balance by holding it out in front of you as needed
Step 3: pause at the bottom and get comfortable, drive up with all three points of your foot with equal contact with the ground
Putting it all together
- Place your hands on the bar slightly wider than shoulder width. Drive your palms into the bar and squeeze.
- Pull yourself into the bar with the bar sitting on your traps (or rear delts). Tuck your elbow into your ribs
- Lift the bar of the hooks by brings your feet and hips underneath the bar and extending your knees.
- Take two steps back, one for distance, one to meet the other foot, adjust your feet until comfortable.
- Deep breath into your stomach, brace your core.
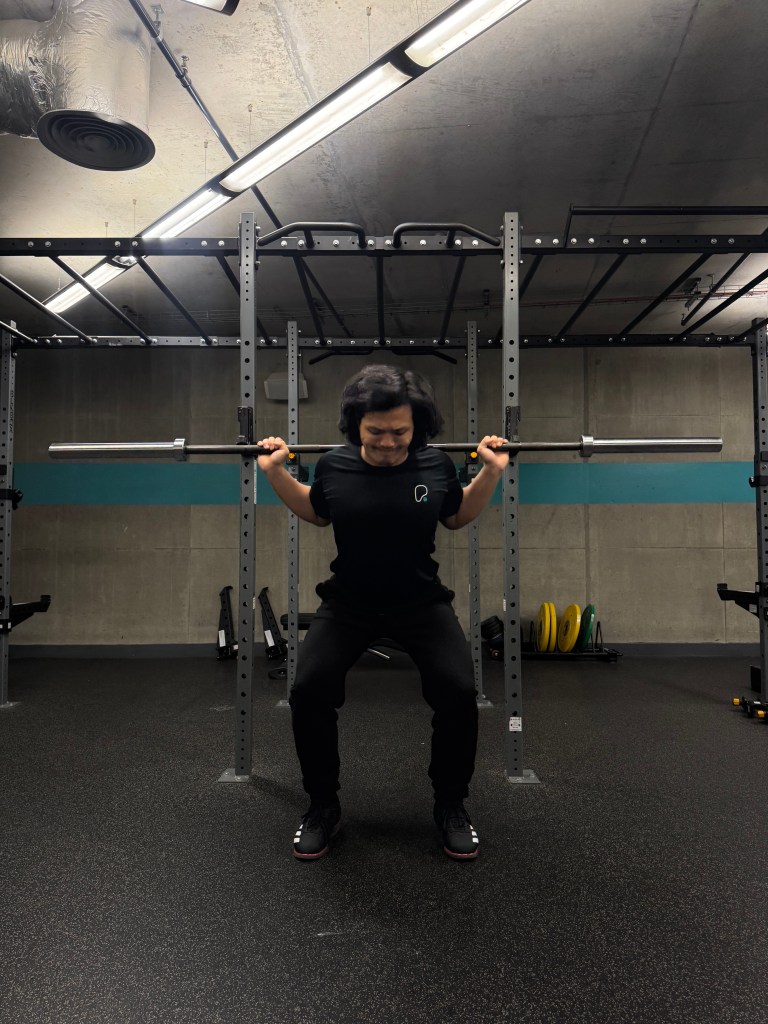
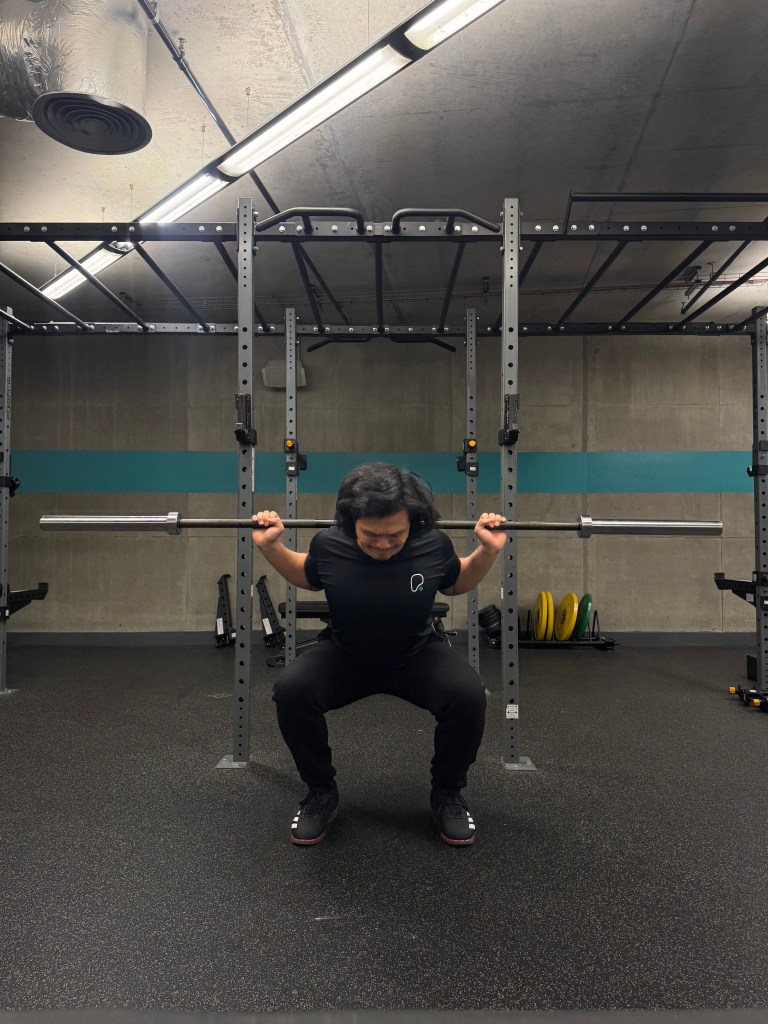
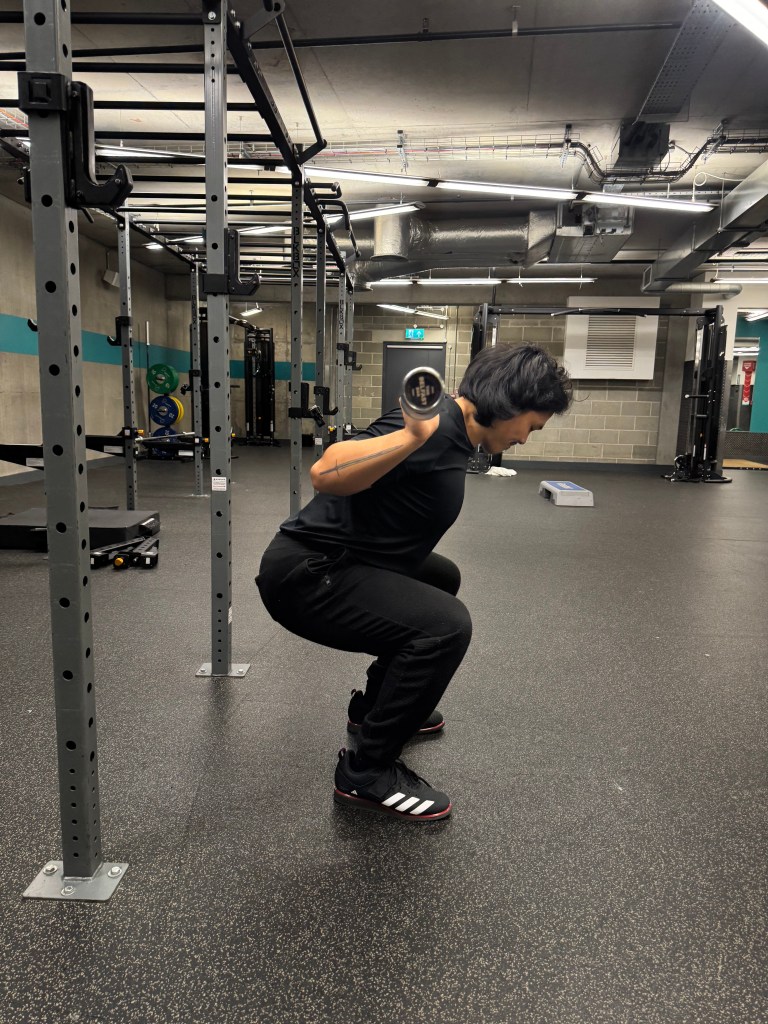
- Lower your hips, drive your knees over your toes, keep your chest upright, three points of contact in your feet at all times.
- As you drive up think about press the ground away from you.
- The bar shoulder travel in a straight line, a side on view should reveal the bar stays over your midfoot throughout the whole movement.
